Have you ever faced the frustration of trying to connect your device to a projector, only to get stuck with confusing cables and unclear instructions? You’re not alone.
Whether it’s for a work presentation, movie night, or classroom lesson, knowing how to connect to a projector quickly and easily can save you time and stress. In this guide, you’ll discover simple steps and insider tips that make the whole process smooth and hassle-free.
Keep reading, and you’ll be ready to impress your audience without the technical headaches.
Choose The Right Cable
Choosing the right cable for connecting your device to a projector is crucial for a smooth presentation. The cable you select affects video quality, ease of setup, and compatibility with your devices. Before you connect, consider what ports your device and projector have and what kind of connection suits your needs best.
Hdmi Vs Vga Vs Usb-c
HDMI cables are the most common choice today. They carry both high-definition video and audio in one cable, making your setup cleaner and simpler. If your projector and laptop both have HDMI ports, this is usually the best option.
VGA cables are older and only transmit video signals. You’ll need a separate audio cable if you want sound. VGA might still be useful if you’re dealing with older projectors or computers, but expect lower video quality compared to HDMI.
USB-C is becoming popular, especially with newer laptops and tablets. It can carry video, audio, and power all through one cable. If your projector supports USB-C input, this can greatly reduce cable clutter and improve convenience.
| Cable Type | Video Quality | Audio Support | Compatibility |
|---|---|---|---|
| HDMI | High-definition (up to 4K) | Yes | Modern devices and projectors |
| VGA | Standard definition | No | Older devices and projectors |
| USB-C | High-definition | Yes | Newer laptops, tablets, and some projectors |
Wireless Connection Options
Cutting the cord can be tempting. Wireless connections like Wi-Fi or Bluetooth let you project without cables, which is perfect for flexible setups or quick presentations.
Devices like Chromecast or Apple TV can stream your screen to a projector if it has an HDMI port. Some projectors also have built-in wireless capabilities, allowing direct connection from your phone or laptop.
Think about your environment: Is the Wi-Fi stable? Will you move around a lot during your presentation? These factors can affect how well a wireless connection works for you.
Credit: www.tataneu.com
Prepare Your Devices
Before you connect your devices to a projector, preparing them properly saves you from last-minute surprises. Ensuring compatibility and having the right cables ready can make your setup smooth and stress-free. Let’s take a closer look at what you need to check on both your projector and your laptop or device.
Check Projector Ports
Projectors come with different ports, so identifying the ones available is crucial. Look for common ports like HDMI, VGA, USB-C, or DisplayPort. Some projectors even have wireless options, but wired connections usually offer more stability.
Open the projector’s port panel and note down the types and number of ports. This step helps you figure out which cables or adapters you will need. Have you ever brought the wrong cable and had to scramble for an adapter? Avoid that hassle by checking first.
Inspect Laptop Or Device Ports
Next, examine your laptop or device for its video output ports. Many modern laptops use HDMI or USB-C ports, but older models might have VGA or DisplayPort. Don’t forget to check if your device supports video output through USB-C, as not all do.
Knowing your device’s ports lets you prepare compatible cables or adapters ahead of time. If your laptop has only USB-C ports but the projector uses HDMI, you’ll need a USB-C to HDMI adapter. Have you tested your cables before? Trying them out beforehand can save you from unexpected problems during your presentation or movie night.
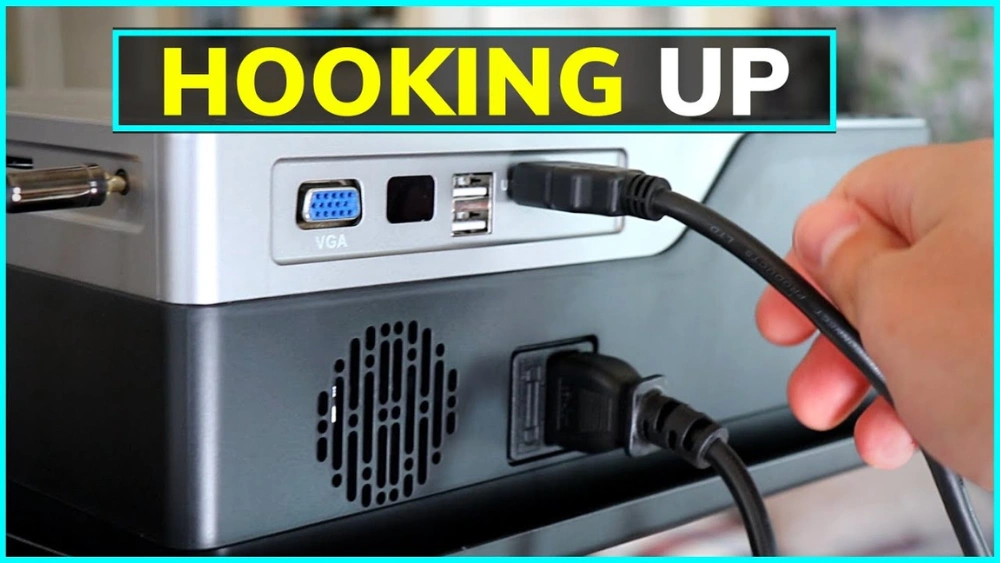
Connect The Projector
Connecting your projector correctly sets the stage for a seamless viewing experience. Whether you prefer a wired or wireless setup, understanding the connection process helps avoid frustration and saves time. Let’s dive into the practical steps that make your projector ready to display.
Wired Connection Steps
A wired connection often offers the most stable and reliable image quality. You’ll typically use HDMI, VGA, or USB-C cables depending on your devices.
- Locate the appropriate port on both your projector and your laptop or media player.
- Firmly plug the cable into both devices, ensuring a snug fit to avoid signal loss.
- Power on the projector and select the correct input source using the remote or buttons on the unit.
- Check your computer’s display settings to extend or duplicate the screen as needed.
Have you ever struggled with a fuzzy image? Sometimes, simply replacing a worn-out cable can make a big difference in picture clarity.
Wireless Connection Setup
Going wireless frees you from cable clutter but needs a bit of setup. Most modern projectors support Wi-Fi or Bluetooth connections.
- Enable the projector’s wireless mode through its menu.
- Connect your device to the projector’s network or pair via Bluetooth, depending on the technology available.
- Open the screen mirroring or casting option on your device to begin sharing content.
Wireless connections can sometimes lag or drop, so positioning your projector close to the router or device helps maintain a smooth stream. Have you checked if your device’s software supports the projector’s wireless features?

Credit: www.youtube.com
Configure Display Settings
Configuring your display settings correctly is essential to get the best image quality from your projector. It ensures the picture fits the screen perfectly and looks sharp, avoiding any distortion or blurriness. Let’s look at how you can fine-tune these settings to match your projector and presentation needs.
Adjust Resolution And Aspect Ratio
Start by matching the resolution of your device to the projector’s native resolution. This alignment prevents pixelation and blurry images.
Check your device’s display settings and select the highest resolution supported by the projector. You might notice options like 1080p, 720p, or 4K depending on your hardware.
Aspect ratio controls the shape of the image—common ratios are 4:3 and 16:9. Choosing the wrong one can stretch or squash your display.
Think about your content: are you showing a widescreen video or a standard presentation slide? Set the aspect ratio accordingly to avoid black bars or cropped edges.
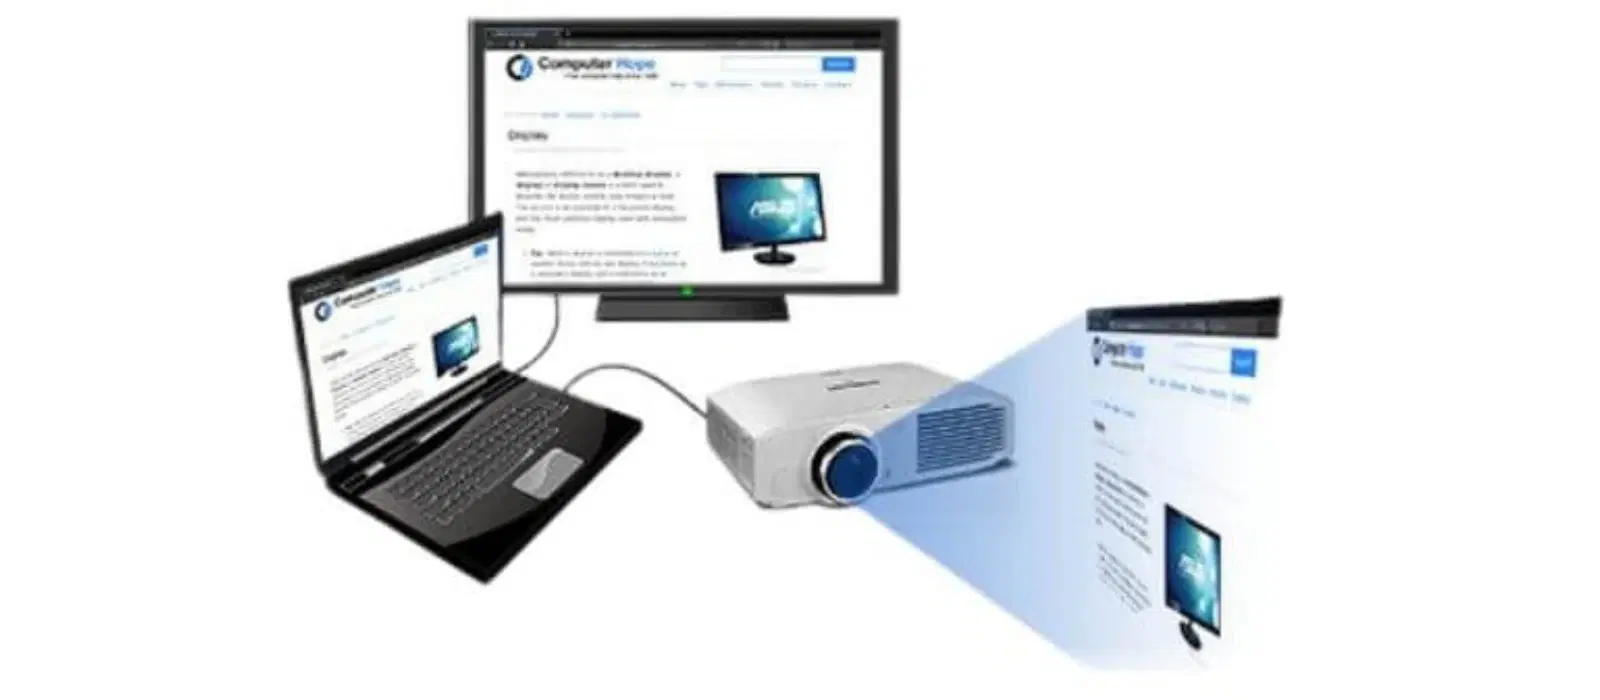
Set Up Multiple Displays
If you want to use your projector as a second screen, you need to configure multiple displays correctly. This setup lets you extend your desktop or mirror your primary screen.
In your device’s display settings, look for options like “Extend these displays” or “Duplicate these displays.” Extending allows you to show different content on each screen, while duplicating shows the same image on both.
Position the displays by dragging their icons to match the physical setup on your desk or room. This small step saves you from moving your mouse in the wrong direction when working.
Have you ever struggled with a projector showing only a black screen? Double-checking your display mode could fix that instantly.
Troubleshoot Common Issues
Connecting a projector can be a breeze, but sometimes you might encounter a few hiccups along the way. Whether you’re setting up for a business presentation or a movie night, troubleshooting common issues is crucial for a seamless experience. Let’s dive into some frequent problems you might face and how to tackle them effectively.
No Signal Or Blank Screen
Imagine setting up everything perfectly, only to be greeted by a blank screen. This is often due to a connection issue. First, check if the cables are securely connected to both the projector and the device. You might have missed a loose cable or even connected to the wrong port.
If your projector has multiple input sources, ensure you’re on the right one. A simple switch might solve the problem. Additionally, verify if your device’s output settings are correctly configured. Sometimes, the device might not automatically detect the projector, requiring manual input adjustments.
Poor Image Quality
A blurry or distorted image can ruin your presentation or movie night. Start by checking the focus ring on your projector. A slight adjustment can significantly improve clarity. Additionally, ensure that the projector is positioned at an appropriate distance from the screen.
Check the resolution settings on your device. A mismatch between your projector and device’s resolution can lead to poor image quality. You might need to tweak these settings for optimal viewing. Remember, your environment plays a role too. Dim the lights or adjust the blinds for better image projection.
Audio Problems
There’s nothing worse than watching a movie or giving a presentation without sound. Begin by checking if the audio cable is properly connected. It could be loose or connected to the wrong port. Also, verify if the projector’s volume is turned up and not muted.
If you’re using external speakers, ensure they’re powered on and correctly connected to the projector. Sometimes, it might be a simple device setting issue. Check your device’s audio output settings to ensure it’s routed to the projector or external speakers.
Encountering issues can be frustrating, but with the right steps, you can quickly resolve them. Have you faced any unexpected projector challenges recently? How did you handle them? Share your experiences and tips in the comments below!

Credit: www.youtube.com
Optimize Your Setup
Optimizing your projector setup ensures a clear and bright display. Small changes can make a big difference in viewing quality. Focus on the projector’s position and control the light in your room for the best results.
Positioning The Projector
Place the projector on a stable surface or mount it securely on the ceiling. Aim the lens directly at the screen or wall. Keep the projector at the right distance to fill the screen without distortion. Adjust the height so the image is level and not tilted. Use the projector’s zoom and focus features to sharpen the picture. Avoid placing the projector too close to walls or objects that block the light path.
Controlling Ambient Light
Ambient light reduces the projector image’s contrast and brightness. Close curtains or blinds to block sunlight during the day. Turn off or dim nearby lamps and overhead lights. Use dark-colored walls or screens to reduce light reflection. Consider using a projector screen designed to enhance image brightness. Keep light sources away from the projector lens to avoid glare. A darker room improves color richness and sharpness of the image.
Frequently Asked Questions
How Do I Connect My Laptop To A Projector?
Use an HDMI, VGA, or USB-C cable to link your laptop to the projector. Select the correct input source on the projector. Adjust display settings on your laptop to mirror or extend the screen.
What Cable Type Is Best For Projector Connection?
HDMI cables are the most common and provide high-quality video and audio. VGA cables work for older devices but offer lower quality. USB-C is great for newer laptops with compatible ports.
How Can I Fix No Signal On The Projector?
Check if the cable is securely connected to both devices. Ensure the projector input source matches the connected cable. Restart both the laptop and projector if the issue persists.
Can I Connect A Smartphone To A Projector?
Yes, use an HDMI adapter or wireless connection like Miracast or Chromecast. Make sure your projector supports these wireless options for seamless streaming.
Conclusion
Connecting to a projector is easier than it seems. Just follow the steps carefully and check your cables. Choose the right input source on your projector. Test the connection to make sure the picture shows well. Practice a few times to feel confident.
This helps in meetings, classes, or home use. Keep your devices charged and updated for smooth setup. Small efforts make your presentations clear and effective. Enjoy sharing your ideas with a bigger screen. Simple tips lead to better results every time.