Lighting can make or break your photos. If you want to take your photography to the next level, setting up a light kit is a game-changer.
But where do you start? How do you arrange your lights to get the perfect shot every time? This guide will walk you through simple steps to set up a light kit that brings out the best in your subjects.
By the end, you’ll feel confident and ready to create stunning images with the right lighting. Keep reading, and let’s brighten up your photography skills together!
Choosing The Right Light Kit
Choosing the right light kit sets the foundation for quality photography. The right setup improves your photos and makes shooting easier. Understanding different types and key features helps you pick the best kit for your needs. Budget is also important to balance quality and cost.
Types Of Light Kits
Light kits vary by source and use. Continuous lights provide constant illumination. They help see shadows and highlights live. Strobe lights flash briefly and offer strong power. They freeze motion and create sharp images. LED kits are energy-efficient and produce less heat. Softbox kits spread light evenly for softer shadows. Ring lights give even lighting, ideal for portraits and close-ups.
Key Features To Consider
Look for brightness control to adjust light intensity. Color temperature is important to match the scene’s mood. Portability matters if you shoot at different locations. Check if the kit includes stands and adapters. Durability ensures long-term use without issues. Compatibility with your camera and other equipment is a plus.
Budgeting For Equipment
Set a budget before shopping. Entry-level kits are affordable and good for beginners. Mid-range kits offer better quality and more features. High-end kits provide advanced options for professionals. Consider buying used gear to save money. Factor in extra costs like bulbs, batteries, and modifiers.
Essential Accessories
Setting up a light kit for photography needs more than just lights. Essential accessories help position, soften, and power the lights properly. These tools improve the quality of your photos and make the setup stable and safe.
Understanding these accessories will make your lighting setup easier and more efficient.
Light Stands And Mounts
Light stands hold your lights steady at the desired height and angle. Choose stands that are strong and adjustable to fit your needs. Mounts connect the lights to stands securely. Some mounts offer extra flexibility for tilting or rotating lights.
Good stands and mounts prevent lights from falling or moving during a shoot. Look for lightweight options if you travel often.
Diffusers And Reflectors
Diffusers soften harsh light and reduce strong shadows. They spread light evenly across your subject. Reflectors bounce light back onto the subject to fill dark areas. They come in various colors like white, silver, and gold to create different effects.
Using diffusers and reflectors creates balanced and natural-looking photos. They help control light without expensive equipment.
Power Sources And Cables
Reliable power keeps your lights running smoothly throughout the shoot. Use power cords with the right length and rating to avoid interruptions. Battery packs offer mobility but need charging before use. Extension cords can help reach distant outlets safely.
Organize cables to prevent tripping hazards and accidental unplugging. Safe and stable power setups protect your gear and your team.
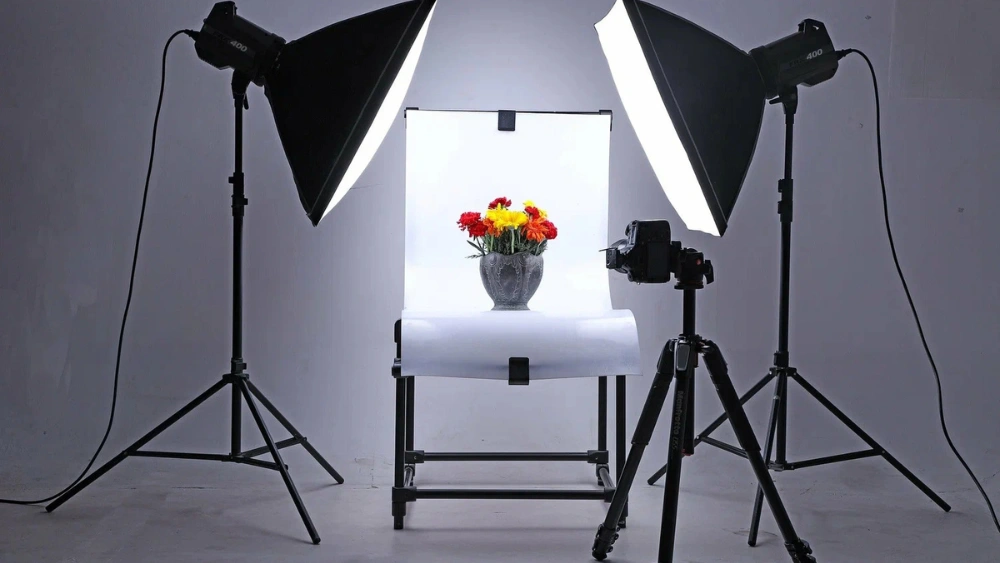
Setting Up Your Space
Choose a quiet space with enough room to place your light kit and camera. Position lights to reduce shadows and highlight your subject clearly. Adjust height and angles for soft, even lighting that suits your photo style.
Setting up your space for photography is a crucial step in achieving the perfect shot. The environment you choose can significantly impact the quality and mood of your photos. It’s not just about placing your lights; it’s about creating an atmosphere that complements your subject. Imagine transforming a simple room into a professional studio, where every element works together harmoniously. This requires a thoughtful approach to selecting your location, controlling ambient light, and choosing the right background and props.Selecting The Location
Choosing the right location sets the foundation for your shoot. Consider spaces that offer enough room to maneuver and adjust your equipment comfortably. Think about the overall vibe of the space. Does it resonate with the theme or mood of your photography? A clutter-free area often works best, allowing you to focus on the subject without distractions. Perhaps you’ve stumbled upon an unexpected corner in your home that offers natural light and an interesting backdrop. Experiment with it; sometimes the less obvious choices turn out to be gems.Controlling Ambient Light
Ambient light can be both a friend and a foe. Too much of it may wash out your subject, while too little can create unwanted shadows. Use curtains or blinds to adjust the natural light streaming in. This simple trick can help you control the intensity and direction of light, creating just the right atmosphere. Consider using black-out curtains if you need to eliminate external light sources completely. This gives you full control over the lighting setup, ensuring consistency across shots.Background And Props
The background you choose can enhance or detract from your subject. Opt for neutral tones or simple patterns to keep the focus on your main subject. Props can add depth and interest to your photos. Select items that complement the theme and colors of your shoot. Think about how props can tell a story or highlight certain aspects of your subject. Are they adding or distracting? A well-chosen prop can be the difference between a good photo and a great one.
Credit: www.harlowe.com
Positioning Your Lights
Positioning your lights correctly can transform an ordinary photo into a stunning one. The way you place your light sources shapes the mood, depth, and clarity of your images. Understanding the basics of light positioning is essential for creating professional-looking photos that stand out.
Basic Lighting Angles
Lighting angles affect how shadows and highlights fall on your subject. The most common angles include front lighting, side lighting, and backlighting. Front lighting reduces shadows and creates flat, even illumination, while side lighting adds depth by emphasizing textures and contours.
Try moving your light slightly above or to the side of your subject to see how shadows shift. Notice how a small change in angle can highlight different facial features or objects. Have you ever experimented with a low-angle light to create dramatic effects?
Key, Fill, And Backlight Roles
Each light in your kit has a specific role. The key light is your main source of illumination, defining the overall exposure and mood. The fill light softens shadows created by the key light, preventing harsh contrasts.
The backlight, also called rim or hair light, separates your subject from the background by creating a subtle glow around edges. Balancing these three lights helps you control contrast and depth. Which light will you adjust first to improve your shot’s dimension?
Adjusting For Shadows And Highlights
Shadows and highlights give your photo character, but too much of either can distract. Observe where shadows naturally fall on your subject and decide if you want to soften or deepen them. Use reflectors or additional fill lights to reduce unwanted shadows.
Highlights should draw attention without washing out details. If highlights appear too harsh, try diffusing your lights with softboxes or umbrellas. Experiment with distance and angle to find the perfect balance that complements your subject’s features.
Camera Settings For Lighting
Getting your camera settings right is key to making the most of your lighting setup. The way you adjust ISO, aperture, shutter speed, and white balance directly affects how your photos capture the light and mood you want. Let’s break down these settings so you can take full control of your light kit and create stunning images.
Adjusting Iso And Aperture
ISO controls your camera’s sensitivity to light. A lower ISO (like 100 or 200) keeps your images clean and noise-free, which is perfect when you have strong lighting. If your light source is dim, increasing ISO helps, but watch out for grainy photos.
Aperture, or f-stop, affects how much light enters the lens and the depth of field. A wide aperture (like f/1.8 or f/2.8) lets in more light and blurs the background, making your subject pop. Narrow apertures (f/8 or higher) give a sharper focus over a larger area but need more light or slower shutter speeds.
Think about your scene: Do you want a sharp background or a soft blur? Adjust ISO and aperture together to balance brightness and depth.
Shutter Speed Considerations
Shutter speed controls how long your camera’s sensor is exposed to light. Faster speeds (1/250 sec or higher) freeze motion perfectly, which is great for action shots under your light kit. Slower speeds allow more light but can cause motion blur if your subject or camera moves.
When using continuous lighting, shutter speed mostly affects motion blur, but with flash lighting, it controls ambient light exposure. Have you noticed how slower shutter speeds brighten backgrounds while your flash freezes the subject? Use this to add context to your photos.
White Balance Settings
White balance ensures colors look natural under different lighting. Your light kit may have a color temperature that differs from daylight, so adjusting white balance prevents weird color casts like orange or blue tones.
Most cameras have presets like “Flash,” “Tungsten,” or “Daylight,” but you can also set a custom white balance using a grey card or white surface. Have you tried tweaking white balance during a shoot to match your light source? It can dramatically improve color accuracy.
Don’t rely solely on post-processing; getting white balance right in-camera saves time and keeps your colors true to life.
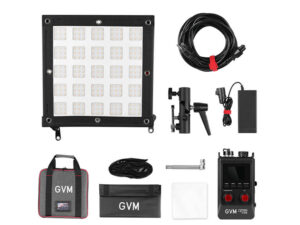
Credit: gvmled.com
Testing And Tweaking
Testing and tweaking your light kit is where your setup moves from theory to practice. This phase helps you see how light interacts with your subject and environment. It’s essential to spend time here, as even small changes can dramatically improve your photos.
Taking Test Shots
Start by capturing several test shots with your light kit in place. Use a subject that resembles your actual shoot to get a realistic feel. Vary your camera settings slightly to observe how exposure and white balance react to your lighting.
Don’t rush this step. Take multiple shots from different angles and distances. This gives you a broad view of how your lights behave in various conditions.
Analyzing Light Quality
Look closely at your test shots on a larger screen. Is the light harsh or soft? Are there unwanted shadows or hot spots? Pay attention to color temperature and how it affects your subject’s skin tone or object colors.
Ask yourself: Does the light highlight the important details? Does it create the mood you want? Sometimes, subtle imperfections reveal how you can improve your setup.
Making Necessary Adjustments
Based on your analysis, adjust your lights accordingly. Move them closer or farther, change their angle, or add diffusers to soften the light. Adjust power levels to avoid overexposure or underexposure.
Remember, small tweaks often have big effects. Don’t hesitate to experiment with reflectors or flags to control shadows and highlights. Keep testing after each change until the light feels just right.
Safety Tips And Maintenance
Setting up a light kit for photography requires careful attention to safety and maintenance. Proper care prevents accidents and extends the life of your equipment. This section covers key tips for handling, cleaning, and storing your light kit safely.
Handling Equipment Safely
Always unplug lights before adjusting or moving them. Avoid touching bulbs with bare hands to prevent burns. Use gloves if bulbs are hot. Secure stands firmly to avoid tipping. Keep cables organized and out of walkways to prevent tripping. Never overload power outlets. Check for damaged cords and replace them immediately.
Regular Cleaning
Turn off and unplug all equipment before cleaning. Use a soft, dry cloth to wipe light surfaces. Avoid water or harsh chemicals on bulbs and electrical parts. Clean reflectors and diffusers gently to keep light quality high. Dust buildup can cause overheating, so clean regularly. Inspect bulbs for signs of wear or damage.
Storage Best Practices
Store your light kit in a cool, dry place away from direct sunlight. Use padded bags or cases to protect fragile parts. Coil cables loosely to prevent damage. Label all components for easy access. Avoid stacking heavy items on top of your equipment. Regularly check stored items for dust or moisture buildup.

Credit: www.amazon.com
Frequently Asked Questions
What Equipment Is Essential For A Photography Light Kit?
A basic light kit includes a key light, fill light, and backlight. Stands, softboxes, and bulbs are also necessary. This setup helps create balanced and professional lighting for your photos.
How Do I Position Lights For Portrait Photography?
Place the key light at a 45-degree angle from the subject. Use a fill light on the opposite side to reduce shadows. Position the backlight behind the subject for depth and separation from the background.
What Are The Best Light Sources For Photography Kits?
LED lights, fluorescent bulbs, and tungsten lights are popular options. LED lights are energy-efficient and adjustable. Choose lights with a color temperature of 5000-6500K for natural daylight effects.
How Can I Avoid Harsh Shadows With My Light Kit?
Use softboxes or diffusers to soften light output. Position lights further from the subject to reduce shadow intensity. Adjust fill light strength to balance and minimize harsh shadows on the subject.
Conclusion
Setting up a light kit can improve your photos a lot. Start with the basics and adjust as you go. Test different angles and light strengths. Keep your setup simple at first to avoid confusion. Practice often to see what works best for you.
Good lighting makes subjects clear and colors bright. With patience, your photos will look more professional. Enjoy learning and creating with your light kit.