Setting up your Linco Photography Lighting Kit might seem tricky at first, but it doesn’t have to be. Imagine having the perfect lighting that makes every shot look professional and stunning.
You’re just a few simple steps away from mastering your kit and transforming your photos. In this guide, you’ll discover how to set up your Linco Lighting Kit quickly and easily, so you can focus on capturing amazing images without any hassle.
Ready to make your photos shine? Let’s get started!
Choosing The Right Location
Choosing the right location for your Linco Photography Lighting Kit can make a huge difference in the quality of your photos. The spot you pick affects how light behaves and interacts with your subject. Taking time to evaluate your shooting environment will help you get the most out of your lighting setup.
Assessing Space And Background
First, look at the size of the area where you plan to shoot. Do you have enough room to position your lighting kit without feeling cramped? Tight spaces can limit your light placement and angles, which may restrict creativity.
Also, examine the background carefully. A cluttered or distracting backdrop can steal attention from your subject. Try to find a plain or simple background that complements your shoot’s mood.
I once struggled with a busy background that made my portraits look chaotic. Moving just a few feet to the side and changing the angle cleared the clutter and improved the image instantly. Can you try different spots until the background feels right?
Controlling Ambient Light
Ambient light can either help or hurt your setup. Check how much natural or artificial light enters your chosen space. Too much ambient light might wash out your carefully positioned lights, while too little could make your images dull.
Consider blocking or diffusing unwanted light with curtains, reflectors, or even cardboard panels. This lets you take full control of the lighting environment and shape the mood you want.
Think about the time of day, too. Shooting in the morning or late afternoon usually means softer natural light, which can be easier to manage. Have you noticed how a little change in light intensity shifts the entire feel of your photos?

Credit: www.amazon.com
Unboxing And Identifying Components
Opening your Linco Photography Lighting Kit box is the first exciting step toward enhancing your photography setup. Before you start assembling, it’s essential to get familiar with each component inside. This helps prevent surprises later and ensures you have everything needed for a smooth setup.
Listing Kit Items
Start by laying out all the contents on a clean surface. Your Linco kit typically includes:
- Light stands
- Softboxes or umbrellas
- Flash heads or continuous lights
- Power cables and adapters
- Light bulbs or LED panels
- Carrying bags or cases
- Mounting brackets and screws
Checking this list against the kit manual helps you confirm nothing is missing. Have you ever started assembling gear only to realize a crucial part is absent? Avoid that frustration by double-checking now.
Checking For Damages
After verifying the items, inspect each piece carefully. Look for dents, cracks, or loose parts, especially on fragile items like flash heads and light bulbs.
Test the power cables for any signs of fraying or exposed wires. Even small damages can cause malfunctions or safety hazards during use.
If you spot any issues, contact the seller immediately. It’s better to address problems before you invest time setting up. How much time could you save by ensuring everything is perfect right from the start?
Assembling Light Stands
Setting up your Linco Photography Lighting Kit can transform your photo shoots from amateur to professional. One of the first steps in this process is assembling the light stands, a crucial task that ensures your lighting setup is stable and effective. With well-assembled light stands, you can achieve the perfect lighting angle and prevent any mishaps that could disrupt your creative flow.
Adjusting Height And Stability
Adjusting the height of your light stands is pivotal for creating the desired ambiance in your photos. Start by loosening the knobs on the stand’s central column. Gradually slide the column to your preferred height and tighten the knobs securely. This simple adjustment can dramatically alter the lighting effect, casting different shadows and highlights on your subject.
But how do you ensure that the stands remain stable? It’s crucial to spread the tripod legs wide enough. This increases the stability and prevents the stands from tipping over. A wider base offers more support, especially when you’re working in a bustling studio setting. Have you ever had a light stand tip over during a shoot? It can be quite a hassle!
Securing The Stands
Once you’ve adjusted the height and achieved stability, securing the stands is the next step. Use sandbags or weights at the base of each stand. This extra weight provides added security, particularly if your lighting equipment is on the heavier side. You wouldn’t want your precious gear to tumble during a session, would you?
Consider investing in sturdy clamps to hold your lights in place. Clamps can be easily attached to the stands, offering an extra layer of security. These accessories may seem minor, but they play a significant role in maintaining the integrity of your setup. Have you tried using clamps before? They can be a game-changer in ensuring your lights stay put.
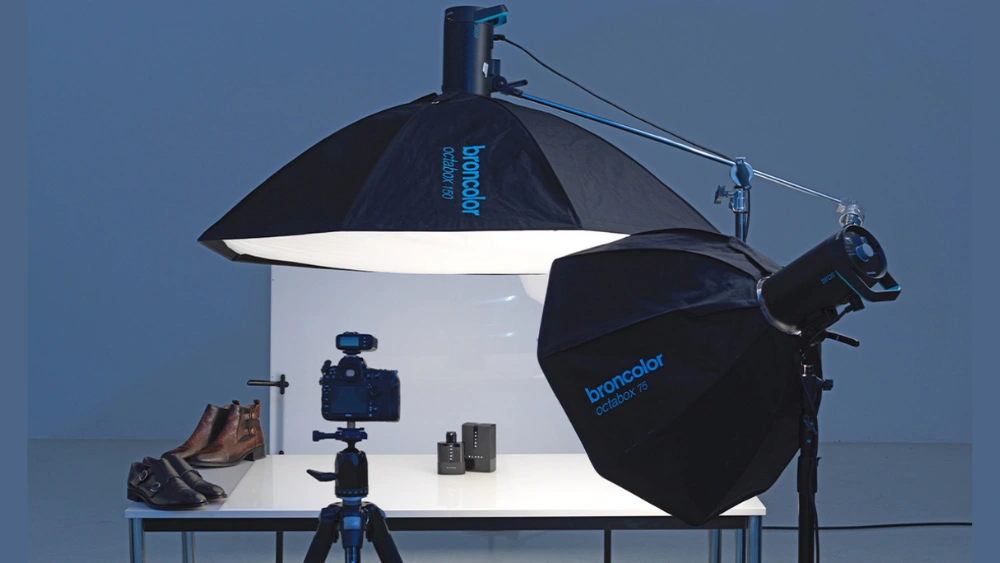
Mounting The Lights
Mounting your Linco Photography Lighting Kit correctly is crucial for achieving professional-looking photos. The setup affects how light interacts with your subject and scene, so taking time here pays off in the final image quality. This part focuses on securely attaching components and arranging lights for the best effect.
Attaching Bulbs And Reflectors
Start by carefully screwing the bulbs into the lamp holders. Make sure they are snug but not overly tight to avoid damage. Handle bulbs with clean hands or gloves to prevent oils from shortening their lifespan.
Next, attach the reflectors to the front of the light fixtures. Most Linco kits use a simple twist-and-lock system. Check that reflectors are aligned correctly to direct the light precisely where you want it.
Have you noticed how a loose reflector can cause uneven lighting? Securing these parts firmly prevents flickering and inconsistent shadows, which can ruin a shoot.
Positioning For Desired Effects
Think about what mood or style you want to create with your lighting. Position your lights at different angles and heights to experiment with shadows and highlights.
Placing a light higher creates natural-looking shadows, while lower angles can add drama. Moving lights closer intensifies the brightness and sharpens shadows; moving them back softens the effect.
Try positioning one light as the main source and another as a fill to balance harsh shadows. Have you tested how slight adjustments change the texture and depth in your photos? This hands-on tweaking is where you discover your unique lighting style.
Setting Up Power Sources
Setting up power sources for your Linco Photography Lighting Kit is a crucial step that ensures your shoot runs smoothly without interruptions. Power issues can cause delays and affect your lighting quality. Paying close attention to how you connect and manage your power sources can save you time and prevent hazards during your sessions.
Connecting Cords Safely
Always inspect your cords before plugging them in. Look for any frays, cuts, or exposed wires that could cause shorts or shocks. Using damaged cords not only risks your equipment but also your safety.
Plug cords fully into outlets to avoid loose connections that can cause flickering or power loss. Avoid daisy-chaining multiple extension cords together; this can overload circuits and create fire hazards. Instead, use a single, high-quality extension cord rated for your equipment’s power needs.
Think about the placement of your cords. Keep them away from walkways to prevent tripping accidents. You can tape cords down or use cable covers to keep your workspace tidy and safe. Have you ever experienced a shoot delay because someone tripped over a cord? A simple setup change can avoid this entirely.
Using Extension Cables
Choose extension cables that match or exceed the power requirements of your lighting kit. Underrated cables can overheat and fail during your shoot. Check the amperage and voltage ratings listed on the cable packaging.
Keep your extension cables as short as possible to reduce power drop and interference. If you need to run cables across large spaces, use thicker cables designed for longer distances. This ensures your lights maintain consistent brightness.
Consider the environment where you’ll be shooting. For outdoor shoots, use weather-resistant cables and connectors. Moisture can cause shorts or damage your equipment if you’re not careful. Have you planned for unexpected weather conditions when setting up your power sources?

Credit: www.amazon.com
Adjusting Light Intensity
Adjusting light intensity is crucial for perfect photography lighting. It helps create the right mood and highlights your subject well. Controlling brightness avoids harsh shadows and overexposure. It also improves the overall balance in your photos. Small tweaks to light intensity can make a big difference.
Using Dimmers And Switches
Most Linco Photography Lighting Kits come with dimmers or switches. These tools help you control how bright the lights are. Slowly turn the dimmer to increase or decrease light intensity. Use switches to turn lights on or off quickly. Adjust lights until you get the desired brightness. It’s easy and saves time during your shoot.
Balancing Key And Fill Lights
Key light is the main light source. Fill light reduces shadows made by the key light. Balance these two lights for a natural look. Keep the key light brighter than the fill light. Change the fill light’s intensity to soften shadows without removing them. This balance adds depth and dimension to your photos.
Adding Light Modifiers
Adding light modifiers to your Linco Photography Lighting Kit changes the light quality. These tools shape and soften light. They help create the right mood and highlight your subject perfectly.
Using the right modifiers controls harsh shadows and bright spots. This step is crucial for professional-looking photos. Let’s explore how to use softboxes and umbrellas effectively. Then, learn ways to control shadows for balanced lighting.
Using Softboxes And Umbrellas
Softboxes spread light evenly and reduce harshness. They create soft, natural light that flatters skin tones. Attach the softbox to the light stand securely. Position it close to your subject for best results.
Umbrellas also soften light but offer a wider spread. They are easy to set up and move around. Use reflective umbrellas to bounce light back onto the subject. Shoot-through umbrellas create a gentle, diffused glow.
Both tools help avoid bright spots and sharp shadows. Choose based on the size of your subject and space. Adjust distance and angle to find the perfect light balance.
Controlling Shadows
Shadows add depth but need control to avoid distraction. Use fill lights or reflectors to soften shadows. Move lights to different angles to change shadow shapes. Lower the light power to reduce harsh contrasts.
Experiment with distance between the light and subject. Closer lights create softer shadows, farther lights cast harder ones. Use flags or barn doors to block unwanted light. This limits spill and sharpens the light focus.
Regularly check your photos on screen. Adjust modifiers and light positions until shadows look natural. Balanced shadows make your images more professional and pleasing to view.
Testing And Fine-tuning
Testing and fine-tuning your Linco Photography Lighting Kit is key to capturing perfect photos. This stage helps you see how the lights affect your subject and background. Adjustments here ensure the light matches your creative vision.
Taking Test Shots
Start by taking several test shots with your current light setup. Use different camera settings and angles. Observe how the shadows fall and how bright the subject looks. Check for any unwanted glare or harsh spots. Take notes on what works and what doesn’t.
Making Final Adjustments
Adjust the position and angle of your lights based on test shots. Change the distance between the lights and the subject for softer or stronger light. Modify the power settings to control brightness. Use diffusers or reflectors to soften shadows. Keep testing until the lighting looks balanced and natural.
Safety Tips And Maintenance
Safety and maintenance are key to using the Linco Photography Lighting Kit efficiently. Proper care extends the life of your equipment and protects you from accidents. Handling the gear with care and maintaining it regularly keeps everything working smoothly. Follow these guidelines to ensure safety and maintain your kit in top condition.
Handling Equipment Carefully
Always carry lighting stands and lights with both hands. Avoid dropping or knocking them against hard surfaces. Secure cables to prevent tripping hazards during shoots. Keep lights away from water and damp areas. Allow lights to cool before moving or touching bulbs. Use gloves if bulbs are hot to avoid burns. Check stands and mounts for tightness before each use. Do not overload the stands with heavy equipment. Make sure the setup area is stable and level to avoid tipping.
Cleaning And Storage
Unplug all lights before cleaning. Use a soft, dry cloth to wipe dust and dirt. Avoid using water or cleaning sprays directly on lights. Clean bulbs gently to avoid damage. Store the kit in a cool, dry place away from direct sunlight. Keep all parts in their original bags or cases to prevent scratches. Coil cables loosely to avoid kinks and breaks. Inspect equipment regularly for damage or wear. Replace any broken parts immediately for safety.

Credit: www.amazon.com
Frequently Asked Questions
How Do I Assemble The Linco Photography Lighting Kit?
Start by unpacking all components carefully. Attach the light heads to the stands securely. Connect power cords to the light units and plug them into a power source. Adjust the height and angle of each light for optimal coverage.
What Is The Best Placement For Linco Lights?
Position lights at 45-degree angles on either side of your subject. Keep the lights at eye level or slightly above. This setup reduces harsh shadows and provides even illumination for portraits or product photography.
How Do I Adjust Brightness On The Linco Lighting Kit?
Use the built-in dimmer knobs on each light to control brightness. Turn the knob clockwise to increase light intensity and counterclockwise to decrease it. Adjust brightness based on your shooting environment and desired effect.
Can I Use Linco Lights For Video Shoots?
Yes, Linco lights are versatile and suitable for both photography and video. Their continuous lighting provides consistent illumination, reducing flicker and shadows. This makes them ideal for interviews, tutorials, and creative video projects.
Conclusion
Setting up the Linco Photography Lighting Kit is simple and quick. Follow the steps carefully for the best results. Adjust the lights to fit your scene perfectly. Good lighting makes your photos look clear and professional. Practice often to feel more confident with the kit.
This setup helps you create bright and sharp images. Enjoy capturing great photos with your new lighting kit.