Your camera is more than just a gadget—it’s your creative partner. But carrying it around without proper protection can lead to scratches, bumps, or worse.
What if you could make a padded camera bag that fits your gear perfectly, keeps it safe, and reflects your personal style? You’ll discover simple, step-by-step instructions to create your own custom camera bag. By the end, you’ll have a unique, durable bag that gives you peace of mind every time you head out to capture the perfect shot.
Ready to protect your gear the smart way? Let’s get started.
Materials Needed
Gathering the right materials is key to making a sturdy padded camera bag. Choosing quality fabrics and padding ensures your camera stays safe. This section covers the main materials needed.
Fabric Choices
- Outer Fabric:Use durable materials like canvas, nylon, or polyester. These resist wear and tear well.
- Lining Fabric:Soft fabrics such as cotton or microfiber protect your camera from scratches.
- Water-Resistant Fabric:Select fabrics with water-resistant coatings to keep moisture out.
Padding Options
- Foam Padding:High-density foam offers excellent shock absorption and shape support.
- Neoprene:Soft and flexible, neoprene provides good cushion and water resistance.
- Quilted Batting:Lightweight and easy to sew, it adds extra padding layers.
Additional Supplies
- Zippers:Choose sturdy zippers that glide smoothly for easy access.
- Velcro or Snaps:These help secure pockets and flaps.
- Thread:Use strong polyester or nylon thread for durability.
- Webbing Straps:Ideal for handles and shoulder straps.
- Sewing Needles and Pins:Essential for assembling the bag parts.
- Measuring Tape and Scissors:Accurate cutting and measuring make sewing easier.
Credit: sewverycrafty.com
Measuring Your Camera Gear
Measuring your camera gear is the first step to creating a perfect padded camera bag. Accurate measurements ensure your equipment fits safely and snugly. This helps protect your gear from damage and makes carrying easier.
Start by measuring your camera and lenses carefully. Don’t forget to include extra space for padding material. Also, consider any accessories you want to carry alongside your camera.
Measuring Camera Size
Use a ruler or tape measure to find the camera’s length, width, and height. Measure from the widest points, including any protruding parts like the lens mount or buttons. Write down these numbers clearly.
Include extra room for padding around the camera. Add about 1 to 2 inches on each side for soft foam or fabric. This padding will absorb shocks and prevent scratches.
Including Accessories
List all accessories you plan to carry in the bag. Common items include lenses, batteries, chargers, memory cards, and cables.
Measure each accessory separately. Use the same method as the camera size measurement. Add padding space around each accessory as well.
Plan the layout of your bag by grouping gear with similar sizes. This will help you design compartments that fit everything securely. Proper compartment size keeps items from moving inside the bag.
Cutting The Fabric And Padding
Cut fabric and padding carefully to match your camera bag’s size and shape. Use sharp scissors for clean edges and precise cuts. This ensures a perfect fit and better protection for your gear.
Cutting the fabric and padding is a crucial stage in crafting your padded camera bag. This process requires precision and attention to detail. It determines how well your camera gear will be protected. Proper cutting ensures that the bag fits your equipment snugly and securely.Marking Dimensions
Begin by measuring the dimensions of your camera. Include any accessories you wish to carry. Use a measuring tape to get accurate measurements. Mark these dimensions on the fabric with a fabric pencil. Ensure all sides are measured correctly to avoid errors.Cutting Tips
Use sharp scissors for clean cuts. Sharp edges prevent fraying and uneven lines. Cut slowly and carefully along the marked lines. Consider using a rotary cutter for more precision. Ensure the cutting surface is flat and stable. Double-check your measurements before making any cuts.Sewing The Padding Layers
Sewing the padding layers is where your camera bag starts to take shape and gain the protection it needs. The right stitching technique keeps the padding firmly in place, preventing it from bunching or shifting. This part requires patience and attention to detail to ensure your camera gear stays safe inside.
Attaching Padding To Fabric
Begin by choosing a padding material that balances softness and firmness, like foam or quilted batting. Lay your fabric flat and place the padding on top, making sure it covers the entire area without gaps.
Sew the padding to the fabric using a straight stitch or a zigzag stitch for extra hold. You can sew in a grid pattern or in straight lines to keep the padding evenly distributed. Avoid sewing too tightly to prevent puckering, which can reduce the padding’s effectiveness.
Have you noticed how even small shifts in padding can cause discomfort or damage? Securing it well stops that from happening and makes the bag more durable.
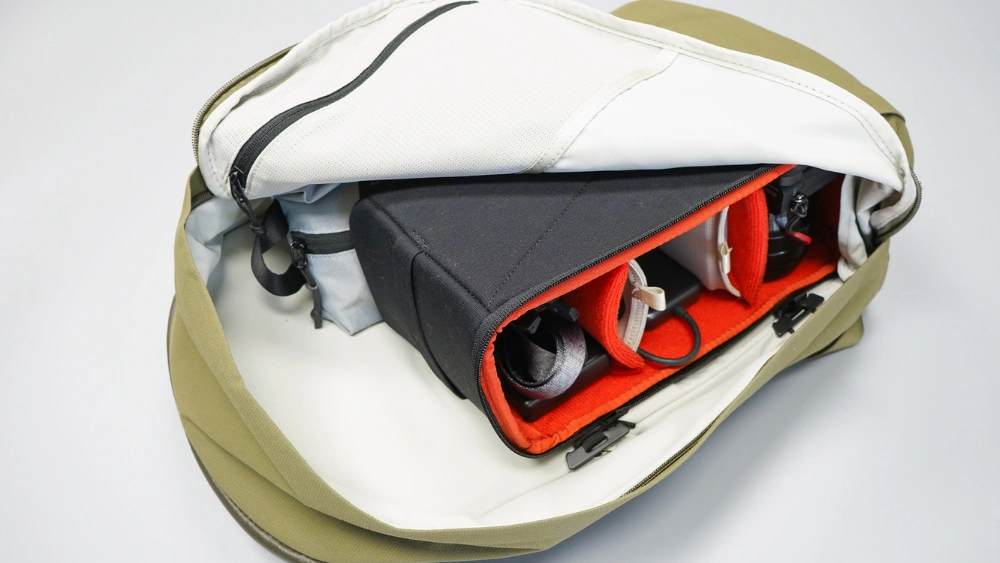
Creating Pockets For Protection
Pockets give your camera and lenses individual spaces, reducing scratches and impact damage. Start by deciding how many compartments you need and their sizes based on your gear.
Sew additional padding inside the pockets for extra cushion. You can stitch the pocket sections onto the main padded fabric, using reinforced seams for strength.
- Use velcro or snap fasteners to keep pockets closed securely.
- Consider adding removable dividers so you can customize the space.
Think about how you organize your gear daily—would pockets help speed up your packing and unpacking? Custom pockets let you tailor the bag to your routine, making every shoot easier.
Assembling The Bag
Assembling your padded camera bag brings your project to life. This stage requires careful stitching and adding practical features that protect your gear. Your focus now is on creating a strong structure and easy access to your camera and accessories.
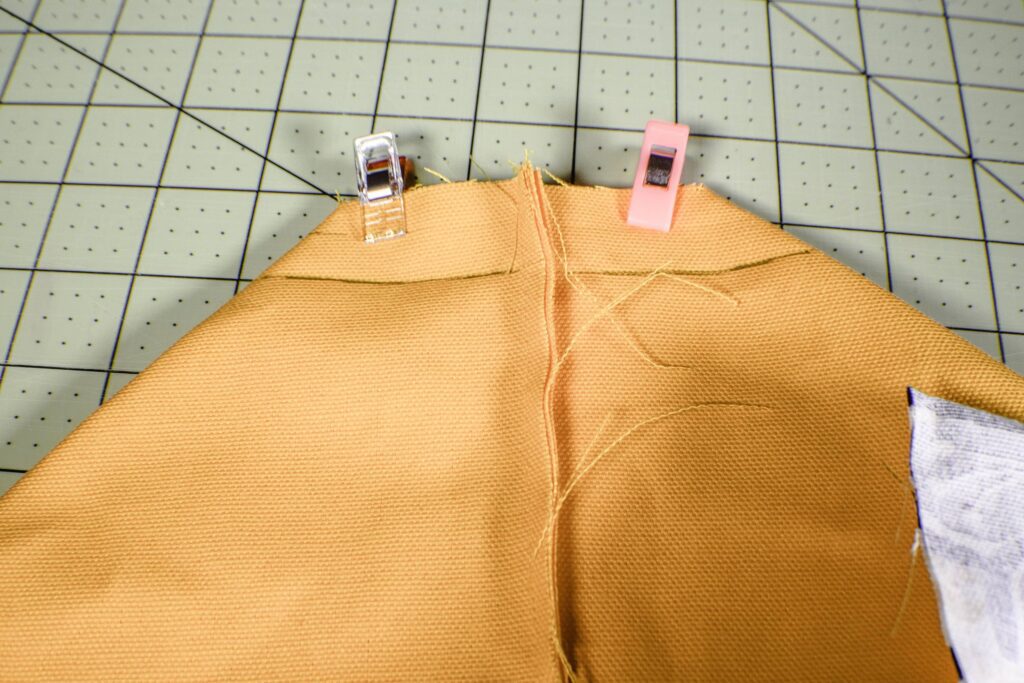
Sewing Sides And Base
Start by aligning the padded sides with the base fabric, making sure the padding faces inward. Pin the edges together to keep everything in place while sewing. Use a strong stitch like a backstitch or a sewing machine’s straight stitch for durability.
Take your time to sew slowly around the corners, as these areas take the most stress. Double stitch these spots if you want extra strength. Have you noticed how a well-sewn seam makes the bag feel sturdy and reliable? That’s what you’re aiming for.
Adding Zippers Or Closures
Next, add zippers or closures to keep your camera safe inside the bag. If you’re using zippers, sew them carefully along the edges where the bag opens. Make sure they move smoothly without catching on the fabric or padding.
Velcro or magnetic snaps are great alternatives if you want quicker access. Attach these securely to avoid accidental openings. Think about how you use your camera—would a zipper slow you down or keep your gear safer?
Credit: sewverycrafty.com
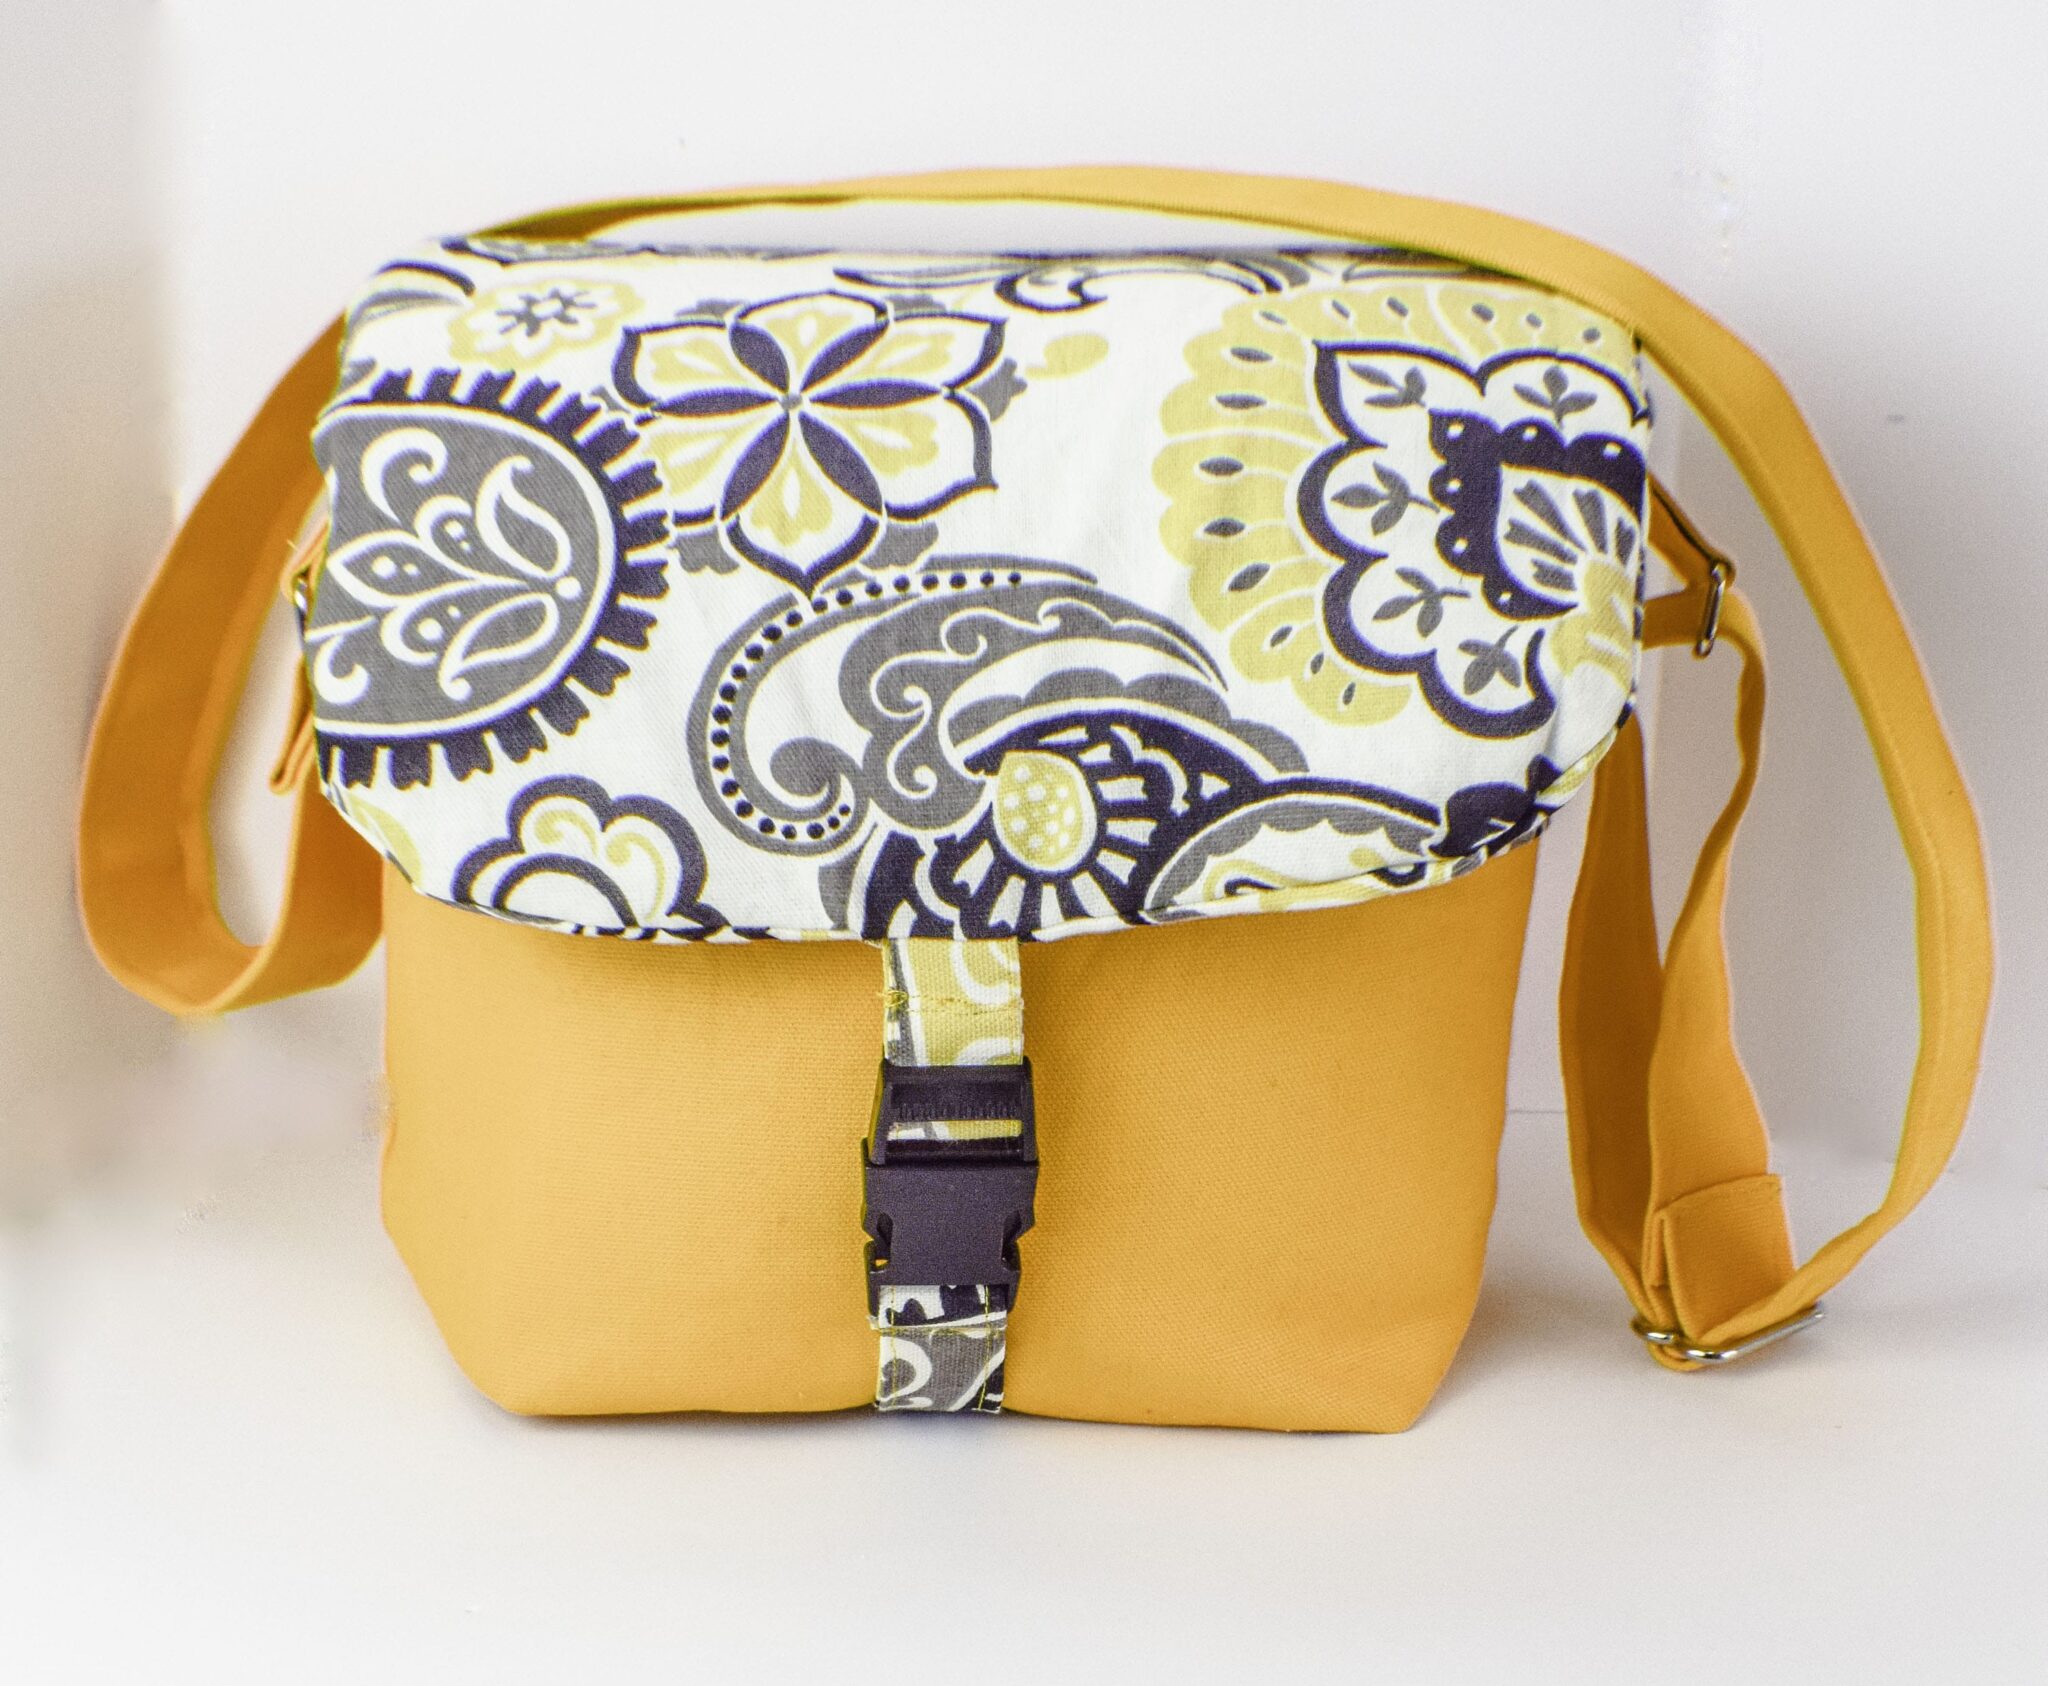
Adding Straps And Handles
Adding straps and handles transforms your padded camera bag from a simple storage solution into a convenient, portable companion. The right straps make carrying your gear easier and safer, especially during long shoots or travel. Let’s look at how to choose straps that feel good and attach them so they stay put.
Choosing Comfortable Straps
Think about how long you’ll carry your bag. Soft, padded straps reduce shoulder fatigue and prevent discomfort. Look for materials like neoprene or thick nylon webbing that won’t dig into your skin.
Adjustability is key. You want straps that let you change the length easily, so you can switch between carrying styles—shoulder, crossbody, or hand-held.
- Wide straps distribute weight better than thin ones.
- Breathable fabric helps if you’re out in warm weather.
- Consider detachable straps if you want versatility.
I once used a thin strap on a long hike, and my shoulder ached by midday. Switching to a wider, padded strap made a huge difference in comfort. What kind of carrying style fits your routine best?
Attaching Securely
Secure attachment is vital to keep your camera safe. Straps that loosen or detach can cause accidents you don’t want. Use strong stitches or rivets to anchor your straps firmly to the bag.
Metal D-rings or durable plastic clips offer reliable connection points. Make sure they’re rated for the weight your bag will carry.
- Sew straps with a box stitch or reinforced X pattern for strength.
- Double-check all connections before each use.
- Add extra padding at attachment points to avoid wear and tear.
During one shoot, a poorly attached clip broke, and my gear nearly fell. After reinforcing all connections, I never worried again. How confident are you in your strap attachments?
Finishing Touches
After assembling the main parts of your padded camera bag, focus on the finishing touches. These small details improve durability and protect your gear. They also give your bag a professional look. Pay attention to reinforcing seams and adding waterproofing layers. These steps ensure your bag lasts longer and keeps your camera safe from spills and rough use.
Reinforcing Seams
Strong seams prevent your bag from tearing under weight. Use a double stitch or backstitch along all edges. This adds extra strength where pieces join. Consider sewing with heavy-duty thread made for tough fabrics. You can also add fabric tape inside the seams. It stops fraying and gives more support. Reinforced seams handle daily wear and carry heavy camera gear easily.
Waterproofing Options
Protect your camera from water damage by waterproofing your bag. Use waterproof sprays designed for fabric. Spray all outer surfaces evenly and let dry completely. Another option is applying a waterproof liner inside the bag. It acts as a barrier against moisture and dust. For extra protection, sew on waterproof zippers or covers. These additions keep your camera safe in rainy or wet conditions.
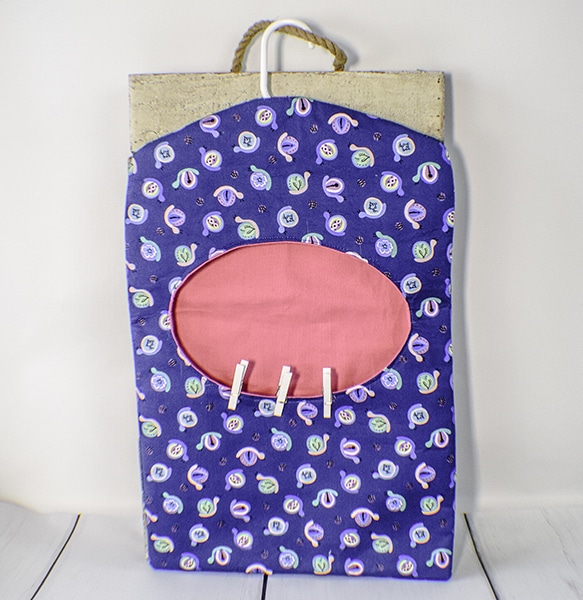
Tips For Customization
Customizing your padded camera bag makes it truly yours. It lets you match your style and suit your gear’s needs. These tips help you create a bag that fits perfectly and looks great. Focus on both how it looks and how it works. This way, your camera bag becomes a helpful companion on every shoot.
Personalizing Style
Choose colors that show your personality. Bright or neutral tones work well depending on your preference. Add patches or badges for a unique touch. Use fabric paint or markers for small designs. Pick materials that feel good and hold up over time. Consider adding your name or initials with embroidery or labels.
Enhancing Functionality
Include extra pockets for lenses, batteries, and memory cards. Use Velcro or zippers for easy access. Add padding in key areas for better protection. Make compartments adjustable with dividers to fit different gear sizes. Attach a sturdy strap that feels comfortable on your shoulder. Think about waterproof lining for rainy days. Small loops or clips can hold accessories like lens caps or cleaning cloths.
Credit: sewverycrafty.com
Frequently Asked Questions
What Materials Are Needed To Make A Padded Camera Bag?
You need durable fabric, foam padding, thread, zipper, and sewing tools. These materials ensure protection and durability for your camera gear.
How Thick Should The Padding Be For Camera Protection?
Padding should be at least 1 inch thick. This thickness absorbs shocks and prevents damage during transport.
Can I Customize The Size Of My Padded Camera Bag?
Yes, customize the size based on your camera and accessories. Measure your equipment to ensure a perfect fit and protection.
How Do I Sew The Padding Securely Inside The Bag?
Attach padding between fabric layers using strong stitching. Reinforce edges to keep padding in place and maintain bag structure.
Conclusion
Making a padded camera bag protects your gear well. You control the size and cushioning. It saves money compared to buying expensive bags. Plus, you get a unique bag that fits your needs. Use soft materials and strong stitches for durability.
Keep practicing your sewing skills for better results. Enjoy carrying your camera safely on every trip. This project is simple, useful, and fun to do. Your camera deserves good care, and you can provide it.