
Do you have a backpack that’s just sitting around, and you wish it could carry your camera gear safely? Turning your regular backpack into a camera bag is easier than you think.
Imagine having a sturdy, organized space where every lens, battery, and accessory fits perfectly. You’ll discover simple steps and smart tips to transform your backpack into a reliable camera bag. Keep reading, and you’ll soon carry your camera gear with confidence and ease.
Credit: mintatravels.com
Choosing The Right Backpack
Choosing the right backpack is the first step to creating a perfect camera bag. The backpack must protect your gear and offer easy access. It should fit your camera, lenses, and accessories comfortably. The right choice makes carrying your equipment safe and convenient.
Size And Shape Considerations
Select a backpack with enough space for your camera body and lenses. Look for compartments that hold items securely. A rectangular or boxy shape often works best to fit camera gear. Avoid backpacks that are too small or too large. Proper size keeps equipment from moving inside.
Material And Durability
Choose a backpack made from strong, water-resistant materials. Nylon and polyester are good choices for durability. Check for reinforced stitching and sturdy zippers. These features protect your gear from weather and rough use. A tough backpack lasts longer and keeps your camera safe.
Comfort And Portability
Pick a backpack with padded shoulder straps for comfort. Adjustable straps help fit the bag to your body. A padded back panel improves airflow and reduces sweating. Lightweight backpacks are easier to carry for long periods. Comfort matters when you walk or hike with your camera gear.
Credit: alexlostak.medium.com
Gathering Essential Supplies
Gathering the right supplies is key to turning a backpack into a camera bag. The goal is to protect your gear and keep it organized. Choosing the right materials and accessories makes a big difference. This section covers the must-have items for a safe, functional camera bag.
Padding Materials
Padding shields your camera and lenses from shocks and bumps. Look for soft foam or neoprene sheets. These materials absorb impact well and fit easily inside any backpack. You can buy pre-cut pads or cut your own to size. Thick padding works best around fragile items.
Dividers And Inserts
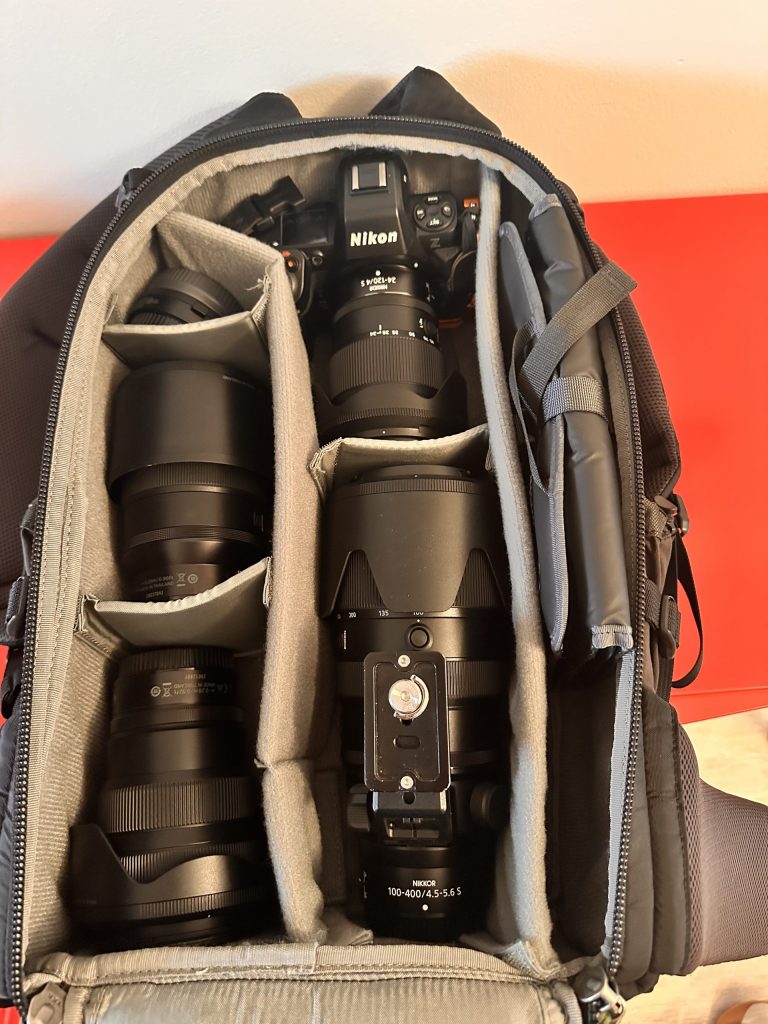
Dividers help organize your gear and stop items from moving. Use adjustable inserts with Velcro to customize space. Soft fabric covers on dividers prevent scratches. Inserts come in various sizes to fit lenses, cameras, and accessories. This setup keeps everything neat and easy to find.
Tools And Accessories
- Scissors or a utility knife for cutting foam and fabric
- Velcro strips or adhesive tape for securing dividers
- Measuring tape or ruler to ensure a perfect fit
- Marker or pen to mark cut lines on materials
- Fabric glue for extra bonding strength
Having these tools makes the assembly smooth and precise. Prepare your supplies before starting for the best results.
Preparing The Backpack
Choose a backpack with enough space and sturdy material. Clear out all items to create room for camera gear. Use soft padding or foam inserts to protect your equipment safely.
Preparing the Backpack Transforming your backpack into a camera bag starts with preparation. This ensures safety for your camera gear. A clean and organized backpack is essential. You will need to clean, inspect, and plan the layout. This provides a solid foundation for your camera bag conversion.Cleaning And Inspecting
Start by thoroughly cleaning the backpack. Remove any dirt or dust from the fabric. Check for stains and wipe them with a damp cloth. Inspect seams and zippers for wear or damage. Ensure everything is in good condition. This step prevents future problems.Removing Unnecessary Compartments
Take out compartments you don’t need. This makes space for camera gear. Use scissors to remove dividers that take up space. Focus on creating an open interior. This flexibility allows easy customization for your camera bag. Keep only what helps organize your gear.Planning The Layout
Visualize where each piece of gear will go. Sketch a simple layout on paper. Consider the size and shape of your camera and lenses. Place larger items in the main compartment. Smaller items fit in pockets or side sections. Use padded inserts to protect delicate gear. Organize for easy access and safety.Creating Custom Compartments
Creating custom compartments is the key to transforming your backpack into a camera bag that fits your gear perfectly. Off-the-shelf camera bags often don’t match your exact needs, but custom compartments let you organize every lens, body, and accessory with ease. Let’s dive into how you can measure, cut, and secure your dividers to make your backpack truly your own.
Measuring Your Gear
Start by gathering all your camera equipment. Measure the width, height, and depth of each item, including lenses, flashes, and batteries.
Don’t forget to add a little extra space for padding—about 1 to 2 centimeters—to keep your gear safe. Write down these dimensions clearly; they will guide your divider sizes.
Cutting And Shaping Dividers
Use foam or padded material for your dividers to protect your gear from bumps. Cut pieces according to the measurements you took, ensuring each compartment fits snugly but not too tight.
Shape the edges with scissors or a craft knife to fit into the backpack’s interior curves and corners. This step lets you maximize space and keeps everything stable while you move.
Securing Padding
Once your dividers are cut and shaped, attach them inside the backpack. Velcro strips are great for flexibility, allowing you to rearrange compartments later.
Alternatively, strong adhesive or double-sided tape works if you want a more permanent setup. Adding an extra layer of soft fabric over the dividers can prevent scratches and add comfort.
Enhancing Protection And Accessibility
Turning your backpack into a camera bag means balancing protection and easy access. Your gear needs to stay safe from bumps and weather, but you also want to grab your camera or lenses quickly when the perfect shot appears. Enhancing both protection and accessibility transforms a regular backpack into a smart, camera-ready companion.
Adding Shock Absorption
Protecting your camera gear from impacts is crucial. You can add shock absorption by inserting padded dividers or foam inserts inside your backpack. These cushions create safe compartments, preventing your equipment from shifting or getting damaged during movement.
Look for foam that is dense but flexible, which absorbs shocks without making your bag bulky. You can even repurpose foam from old packaging or buy pre-cut camera inserts online. Have you noticed how much softer your gear feels when surrounded by good padding?
Installing Quick-access Pockets
Quick-access pockets save you time and frustration. Add external or internal pockets with zippers or magnetic closures near the top or side of your bag. These pockets keep your camera body, memory cards, or batteries within easy reach.
Think about your shooting style: do you need to grab your camera fast for street photography or have lenses ready for nature shots? Position pockets so you can reach them without taking the entire backpack off. Small changes here can speed up your workflow dramatically.
Waterproofing Tips
Keeping your gear dry is a must. Use waterproof sprays on your backpack’s fabric to repel rain and spills. You can also line the inside with waterproof bags or plastic covers for extra security.
If you often shoot outdoors, consider adding a rain cover that fits snugly over your backpack. Do you carry your camera in unpredictable weather? Waterproofing gives peace of mind and keeps your gear ready for the next shot.
Final Adjustments And Testing
Final adjustments and testing are key to making your backpack a reliable camera bag. This stage ensures your gear fits well and stays safe. It also confirms that carrying the bag feels comfortable. Testing the bag in real conditions helps spot any issues early. Let’s explore the essential steps to perfect your DIY camera bag.
Fitting Your Camera Gear
Start by placing all your camera equipment inside the bag. Check if each item fits securely without moving around. Use padded dividers or soft cloths to protect lenses and camera bodies. Make sure there is enough space for extra batteries and memory cards. Adjust compartments to avoid any pressure points on your gear.
Adjusting Straps And Handles
Next, adjust the shoulder straps for a snug fit. The bag should sit comfortably on your back without sliding. Use padding on straps to reduce strain during long carries. Check the handles for easy grip and strength. Tighten or loosen straps to balance the bag’s weight evenly across your shoulders and back.
Field Testing Your Diy Bag
Take your modified backpack on a short trip outdoors. Pack your camera gear and wear the bag as you would in the field. Move around to check comfort and accessibility of your gear. Listen for any unusual noises or signs of wear. Note any changes needed for better protection or ease of use.
Maintenance Tips For Longevity
Maintaining your backpack-turned-camera bag is key to keeping your gear safe and your bag functional for years. Regular care prevents small problems from turning into costly repairs. Let’s dive into practical tips that make your camera bag last longer and perform better.
Cleaning Your Camera Bag
Dust, dirt, and spills can damage your camera gear if left unchecked. Clean your bag regularly by emptying it completely and using a soft brush or cloth to remove debris from pockets and compartments.
If your bag’s fabric is washable, spot clean stains with mild soap and water. Avoid harsh chemicals that can degrade materials or remove waterproof coatings. Don’t forget to air dry your bag thoroughly before storing it to prevent mold and odors.
Repairing Wear And Tear
Small tears or loose seams can grow quickly with daily use. Inspect your bag often, paying attention to zippers, straps, and padding.
A simple stitch or fabric glue can fix minor rips. Replace broken zippers or buckles promptly to avoid further damage. Have you ever delayed a repair only to find your bag unusable on a crucial shoot? Catching issues early saves time and money.
Upgrading Components
Sometimes, upgrading parts of your bag can extend its life and improve functionality. Swap out worn shoulder straps for padded ones to reduce shoulder fatigue during long shoots.
Add extra dividers or cushioned inserts to better protect your lenses and accessories. You might also upgrade to weather-resistant zippers or add rain covers for enhanced protection. What small upgrade could transform your camera bag experience today?
Credit: fittwo.co.jp
Frequently Asked Questions
What Materials Do I Need To Convert A Backpack Into A Camera Bag?
To convert a backpack, you’ll need padded dividers, foam inserts, Velcro strips, and small pouches. These materials protect your gear and keep it organized inside the backpack.
How Can I Protect My Camera Gear Inside A Regular Backpack?
Use padded inserts or foam to cushion your camera and lenses. Secure gear with adjustable dividers to prevent movement and damage during travel.
Can I Customize A Backpack For Different Camera Sizes?
Yes, adjustable padded dividers and modular inserts let you customize the space. This flexibility accommodates various camera bodies, lenses, and accessories.
Is It Cost-effective To Turn A Backpack Into A Camera Bag?
Converting a backpack is often cheaper than buying a dedicated camera bag. It also lets you reuse your existing backpack and tailor it to your needs.
Conclusion
Transforming a backpack into a camera bag saves money and adds convenience. You can protect your gear with simple padding and dividers. This DIY approach fits your style and needs perfectly. Carry your camera safely on any trip or shoot.
Small changes make a big difference in organizing your equipment. Try these easy steps and enjoy your new camera bag. Ready to capture great moments with ease?