
If your submersible pump isn’t working right, you might feel stuck and unsure where to start. Testing it with a multimeter is one of the easiest ways to find out what’s wrong—and you don’t need to be an expert to do it.
In this guide, you’ll learn simple, step-by-step instructions to check your pump quickly and safely. By the end, you’ll know exactly how to spot issues before they become costly problems. Ready to take control of your pump’s performance? Let’s dive in.
Gathering Tools And Safety Gear
Testing a submersible pump with a multimeter needs the right tools and safety gear. Gathering these items before starting saves time and prevents accidents. Proper preparation helps you work confidently and accurately.
Selecting The Right Multimeter
Choose a multimeter that measures voltage, resistance, and continuity. A digital multimeter is easier to read and more precise. Make sure it has a suitable range for low voltage and resistance readings. Check for features like a backlit display for use in dim light. A multimeter with a hold function helps capture readings without rushing.
Essential Safety Precautions
Wear insulated gloves to protect against electric shock. Use safety goggles to guard your eyes from debris or sparks. Avoid testing in wet areas to reduce risk. Make sure the pump is disconnected from power before testing. Work in a dry and well-lit space to see clearly. Keep a first-aid kit nearby just in case of minor injuries.
Preparing The Pump For Testing
Preparing your submersible pump for testing is crucial to get accurate results and ensure your safety. Before you touch any wires or terminals, you need to make sure the pump is completely disconnected from power and easily accessible. Taking a little extra time now can save you from potential damage or injury later.
Disconnecting Power Supply
Start by turning off the main power source to the pump. This is often at the circuit breaker or a dedicated switch near the pump. Confirm that the power is off by trying to turn the pump on or using a non-contact voltage tester.
Never assume the pump is safe to handle just because it’s off. Double-checking prevents accidental shocks. If you have a protective cover on the control panel, remove it carefully to avoid damaging any wires.
Accessing The Pump Terminals
Once the power is off, locate the terminal box on your submersible pump. This is usually a small, sealed compartment attached to the pump’s body. Use a screwdriver to remove the cover and expose the terminals inside.
Be gentle when opening the terminal box to avoid breaking seals or damaging wires. If you see any corrosion or dirt, clean it with a dry cloth before proceeding. Clear terminals make it easier to get accurate multimeter readings.
Have you ever tried testing a pump only to find the terminals were hidden or stuck behind debris? Taking a few minutes to prepare can prevent frustrating delays and help you focus on the real task—accurate testing.
Checking Continuity
Checking continuity is an essential step to ensure your submersible pump’s electrical parts work correctly. Continuity testing helps find broken wires or damaged motor windings that stop the pump from running. A multimeter set to continuity mode makes this task simple and quick.
This process confirms that the electrical path is complete and uninterrupted. Detecting issues early prevents bigger problems and saves repair costs. Let’s explore how to use a multimeter for continuity testing on your submersible pump.
Setting Multimeter To Continuity Mode
First, turn on your multimeter and look for the continuity symbol. It usually looks like a sound wave or diode icon. Set the dial to this mode.
Next, test the multimeter by touching its two probes together. The meter should beep or show zero resistance. This confirms the tool is ready to check continuity.
Always ensure the pump power is off before testing. Safety is important to avoid shocks or damage.
Testing Motor Windings
Locate the motor winding terminals on the submersible pump. These are the points where the motor wires connect.
- Touch one probe to a terminal.
- Touch the other probe to the next terminal.
- Listen for a beep or watch for a low resistance reading.
A beep or low resistance means the winding is continuous and not broken. No beep or high resistance signals a broken winding or wire.
Repeat this test between all terminal pairs to check every winding. This ensures the motor’s internal connections are intact.
Measuring Resistance
Testing a submersible pump with a multimeter involves measuring resistance across its terminals. This helps identify electrical issues like shorts or breaks in the motor windings. Ensure the pump is disconnected from power before testing for safety.
Measuring the resistance of a submersible pump is crucial. It helps determine the pump’s electrical health. This process ensures the internal components are functioning properly. A multimeter is the tool used for this task. It measures resistance in ohms. Regular checks can prevent unexpected failures. Below are detailed instructions on how to measure resistance effectively.Adjusting Multimeter Settings
First, ensure your multimeter is set to the correct mode. Turn the dial to the ohms setting. This is often represented by the symbol Ω. Make sure the probes are connected correctly. The black probe goes into the COM port. The red probe should be in the VΩ port. Double-check the multimeter’s battery. A weak battery can give inaccurate readings.Interpreting Resistance Readings
After setting up, touch the probes to the pump’s terminals. Observe the reading on the multimeter. A low resistance indicates a healthy pump. High resistance may suggest internal issues. No reading might mean a break in the circuit. Compare the readings with manufacturer specifications. This helps in identifying any anomalies. Remember, consistent readings ensure the pump’s efficiency. Regular monitoring aids in maintaining pump longevity.Testing Insulation Resistance
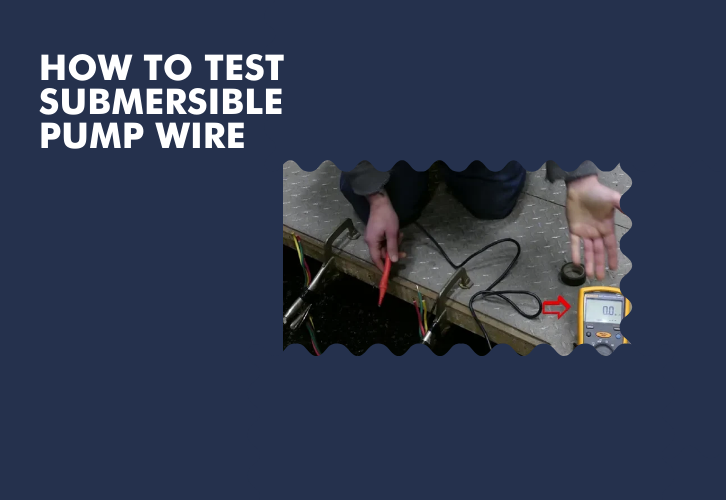
Testing insulation resistance is vital for submersible pump health. It helps find electrical leaks that cause failures. Low insulation resistance means moisture or damage inside the pump. This test prevents motor burnout and electrical shocks. Using a multimeter with a megohmmeter function gives accurate results. Regular checks extend the pump’s life and improve safety.
Using Megohmmeter Function
A megohmmeter measures high resistance in insulation. Set your multimeter to the megohmmeter mode. Connect one lead to the pump’s motor winding. Attach the other lead to the pump’s metal body. Hold the leads steady and press the test button. The reading shows insulation resistance in megaohms (MΩ).
A good submersible pump usually has resistance above 1 MΩ. Lower readings suggest moisture or dirt inside the motor. Test several points to check all winding sections. Always discharge the motor after testing to avoid electric shocks.
Identifying Insulation Issues
Low insulation resistance means the pump insulation is weak. Causes include water seepage, dirt buildup, or aging insulation. Watch for readings below 1 MΩ as a warning sign. Consistent low values require immediate attention or repair.
Check for physical damage or cracks on the pump casing. Moisture inside the motor may cause short circuits. Use insulation resistance tests as part of regular maintenance. Early detection saves money and prevents pump breakdowns.
Credit: rcworst.com
Evaluating Voltage And Current
Evaluating voltage and current is key to testing a submersible pump. These measurements reveal if the pump receives proper power and works correctly. Incorrect voltage or current can indicate wiring issues or motor problems. Using a multimeter helps identify these faults quickly and safely.
Voltage Measurement Steps
- Turn off the power to the pump before testing.
- Set the multimeter to AC voltage mode.
- Connect the multimeter probes to the pump’s power terminals.
- Turn the power back on carefully.
- Read the voltage value on the multimeter display.
- Compare the reading with the pump’s rated voltage.
- Turn off the power after the measurement.
Voltage should match the pump’s specifications closely. Low or no voltage means power supply issues. High voltage can damage the pump motor.
Current Measurement Techniques
- Switch the multimeter to the current (amperage) setting.
- Use a clamp meter attachment if available for safety.
- Clamp around one power wire feeding the pump.
- Turn on the pump and observe the current reading.
- Compare the reading with the pump’s normal operating current.
- Turn off the pump after checking.
High current suggests motor strain or blockage. Low current may indicate a broken motor winding or loose connection. Measuring current helps detect motor and electrical faults early.
Troubleshooting Common Problems
Troubleshooting common problems with a submersible pump can save you time and money. Using a multimeter to test the pump’s electrical components helps pinpoint issues quickly. Understanding how to detect short circuits, open circuits, and ground faults will empower you to fix problems confidently.
Detecting Short Circuits
A short circuit occurs when wires touch each other or the pump casing, causing an unintended path for electricity. To detect this, set your multimeter to the continuity or resistance mode. Check between the pump terminals and the motor casing; a low resistance reading indicates a short.
If you find a short circuit, inspect the wiring insulation carefully. Damaged insulation often leads to shorts and can be repaired with electrical tape or replaced entirely. Have you ever encountered a pump that tripped your circuit breaker repeatedly? This is often a sign of a short circuit inside the motor.
Identifying Open Circuits
An open circuit means the electrical path is broken, preventing current from flowing. Use your multimeter’s resistance setting to test continuity between motor terminals. Infinite resistance or no beep signals an open circuit.
Open circuits may result from broken wires or disconnected terminals. Double-check connections and wiring inside the pump housing. If you spot a wire break, replacing or soldering the wire restores proper function. How often do you check your pump’s wiring? Regular inspection can catch open circuits before the pump fails.
Addressing Ground Faults
A ground fault happens when current leaks from the motor winding to the pump’s metal body or ground. Set your multimeter to resistance mode and measure between each motor terminal and the pump casing. Any reading other than infinite resistance suggests a ground fault.
Ground faults can cause electric shocks or damage to your pump. They often result from worn insulation or moisture inside the motor. Drying the motor and replacing damaged insulation can fix the problem. Have you experienced unexpected power trips? Checking for ground faults might reveal hidden risks.

Credit: m.youtube.com
Final Steps After Testing
After testing your submersible pump, ensuring it works efficiently is crucial. Proper reassembly and careful monitoring are essential to prevent future issues. Follow these final steps to bring your pump back to life and ensure a smooth operation.
Reassembling The Pump
Start by gathering all the pump parts. Ensure every piece is clean and free from debris. Align each part correctly before securing them in place. Use the right tools to tighten bolts and screws. This prevents leaks and ensures stability.
Double-check connections for any signs of wear. Replace worn-out parts to avoid complications. Consider lubricating moving parts to enhance performance. This step helps maintain the pump’s efficiency.
Restoring Power And Monitoring
Reconnect the power supply carefully. Check all electrical connections for safety. Turn on the pump and observe its operation. Listen for unusual noises. Monitor the pressure levels closely.
Watch for vibrations or fluctuations. These indicate potential issues. Regularly check the pump’s performance. This ensures it runs smoothly. Conduct periodic inspections to maintain its longevity.

Credit: www.facebook.com
Frequently Asked Questions
How Do I Test A Submersible Pump With A Multimeter?
To test a submersible pump, first disconnect power. Set the multimeter to resistance mode. Check the motor winding resistance for continuity. Measure between terminals and ground to detect shorts. Values should match the pump’s specifications for proper function.
What Multimeter Settings Are Best For Pump Testing?
Use the ohmmeter (resistance) setting to test motor windings. Set the multimeter to the lowest resistance range. For voltage checks, switch to AC or DC voltage mode as needed. Proper settings ensure accurate readings and safe testing.
Why Is Checking Motor Winding Resistance Important?
Measuring motor winding resistance detects open or short circuits. It confirms if the pump’s internal coils are intact. Abnormal readings indicate motor faults, helping prevent pump failure. This step is crucial for diagnosing electrical issues.
Can A Multimeter Detect Submersible Pump Motor Shorts?
Yes, by measuring resistance between terminals and ground. A low or zero reading indicates a short circuit. Proper testing helps identify motor faults early. This prevents damage and ensures safe pump operation.
Conclusion
Testing a submersible pump with a multimeter is simple and useful. You can check if the pump works well or needs fixing. Always follow safety steps before starting your test. Understanding the readings helps you decide what to do next.
Regular checks can save you time and money later. Keep your pump running smoothly with these easy tests. Now, you have the basic skills to test your submersible pump confidently.