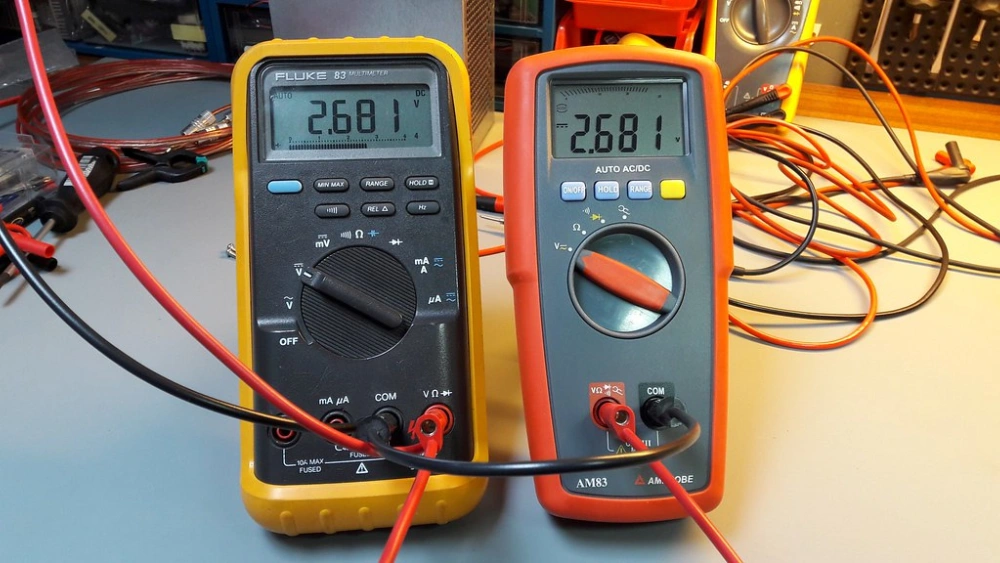
Are you trying to measure milliamps but don’t know where to start? Understanding how to measure small electric currents with a multimeter can save you time and prevent costly mistakes.
Whether you’re fixing electronics or working on a DIY project, knowing the right steps will boost your confidence and keep you safe. In this guide, you’ll learn exactly how to measure milliamps easily and accurately, even if you’re new to using a multimeter.
Ready to take control of your measurements? Let’s dive in.

Credit: www.youtube.com
Preparing Your Multimeter
Before you begin measuring milliamps with a multimeter, it’s essential to prepare your device properly. This preparation ensures accurate readings and protects both you and your equipment from damage. Understanding how to set up your multimeter correctly can save you time and frustration during your measurement process.
Selecting The Right Multimeter
Not all multimeters are created equal, especially when it comes to measuring small currents like milliamps. Choose a multimeter that specifically lists milliamps (mA) in its measurement capabilities. Digital multimeters with a dedicated mA or μA port and range selection are ideal.
Consider the range of current you expect to measure. If you anticipate currents below 200mA, a multimeter with a low-current mode is necessary. This prevents blowing the multimeter’s fuse and ensures precise readings.
Understanding Milliamps Measurement
Measuring milliamps means you are working with current flowing through your circuit. Unlike voltage, current measurement requires you to connect the multimeter in series with the component or section of the circuit you want to test.
Knowing this, you should never try to measure current by placing the multimeter probes across a power source. That mistake can lead to short circuits or damage. Always pause and ask yourself: Am I breaking the circuit to insert the meter correctly?
Safety Precautions
Safety should be your top priority when measuring current. Before connecting the multimeter, turn off the power to the circuit. This prevents accidental shocks or damage to the meter.
Always inspect your probes and leads for damage. Worn or frayed wires can cause inaccurate readings or even electric shock. Use insulated gloves if you’re working with higher voltages or unfamiliar setups.
Lastly, start with the highest current range on your multimeter and work your way down. This step protects your device from overload and helps you find the right measurement range quickly.
Setting Up The Multimeter
Setting up your multimeter correctly is essential before you start measuring milliamps. A small mistake here can lead to inaccurate readings or even damage to your device. Let’s walk through the key steps to prepare your multimeter for precise current measurement.
Choosing The Correct Mode
Begin by turning the dial on your multimeter to the current measurement mode, often marked as “A” for amperes. Since you want to measure milliamps, look for a setting labeled “mA” or “milliamp.”
Some multimeters combine amps and milliamps on one dial, so double-check you have selected the milliamps range specifically. Are you sure you’re not on the voltage or resistance mode? That’s a common slip that can confuse your readings.
Connecting The Test Leads
Insert the test leads into the correct ports. Usually, the black lead goes into the “COM” (common) port.
The red lead must be plugged into the port labeled for milliamps, often marked “mA” or “10A” if your device has multiple current ports.
- Use the “mA” port for currents under its maximum rating (usually up to 200mA or 400mA).
- Switch to the “10A” port only if you expect a higher current to avoid blowing the fuse.
Remember, inserting the red lead in the wrong port can blow a fuse or damage your multimeter. Have you ever had to replace a blown fuse? It’s a simple fix, but easily avoidable.
Adjusting The Range
Some multimeters allow manual range selection, while others auto-range. If yours is manual, start with the highest current range available.
This protects your device and helps avoid an overload reading. Gradually dial down to a more precise range until you get a stable reading.
If your multimeter is auto-ranging, it will adjust automatically, but you should still keep an eye on the display to ensure it’s measuring correctly.
Measuring Milliamps In A Circuit
Measuring milliamps in a circuit is essential for understanding current flow. This process helps you check if devices work correctly and safely. Using a multimeter allows accurate measurement of small currents in electronics.
Breaking The Circuit
To measure milliamps, you must open the circuit first. Find the point where you want to measure the current. Carefully disconnect one wire or component at that point. This break creates a gap to insert the multimeter.
Inserting The Multimeter In Series
Connect the multimeter probes to the open ends of the circuit. The multimeter must be in series with the circuit elements. This setup lets current flow through the meter for accurate reading. Use the correct ports on the multimeter for milliamp measurement.
Reading The Measurement
Turn on the multimeter and observe the display. The reading shows the current in milliamps (mA). Note the value carefully for your records or troubleshooting. Disconnect the multimeter and close the circuit after measuring.
Common Mistakes To Avoid
Measuring milliamps with a multimeter seems straightforward, but small errors can lead to inaccurate readings or even damage your device. Avoiding common mistakes will save you time and protect your equipment. Let’s look at some frequent errors and how you can steer clear of them.
Incorrect Lead Placement
Many beginners place the multimeter leads in the wrong ports. The red lead must go into the port labeled for current measurement, often marked as “mA” or “10A.” Using the voltage or resistance ports instead can blow the fuse or damage the meter.
Also, you need to connect the leads in series with the circuit, not parallel. If you connect them incorrectly, the meter might show zero or an unexpectedly high reading. Have you double-checked which port your red lead is in before measuring?
Using The Wrong Range
Setting the range too high or too low affects accuracy. If the range is too high, you lose detail in the reading. Too low, and the meter might overload or display an error.
For example, measuring a current of 15mA on a 200mA range gives a clearer result than on a 10A range. If unsure, start with the highest setting and work your way down. Does your multimeter have an auto-range feature? If yes, let it do the work for you.
Ignoring Safety Guidelines
Handling electrical measurements carelessly can be dangerous. Never touch exposed wires during measurement to avoid shocks. Always turn off power before connecting your meter in series to the circuit.
Using insulated probes and wearing safety glasses adds extra protection. Remember, your safety matters more than a quick reading. What safety steps do you take before testing current?
Tips For Accurate Measurements
Ensure the multimeter is set to the correct milliamp range before measuring. Always connect the meter in series with the circuit to get accurate readings. Double-check all connections to avoid errors and protect your device.
Tips for Accurate Measurements Measuring milliamps with a multimeter requires precision. Accurate readings are crucial for safe and efficient electrical work. Understanding the right techniques helps achieve this accuracy. Here are some tips to ensure your measurements are spot on.Calibrating Your Multimeter
Calibration is the first step for precise readings. Check your multimeter’s manual for calibration instructions. This process adjusts your device to meet a standard. Regular calibration prevents errors and ensures reliability. Use a known reference point for accurate calibration.Handling Fluctuating Readings
Fluctuating readings can be frustrating. They often occur due to unstable connections. Ensure your probes are firmly attached to the circuit. Keep your hands steady to avoid movement. If readings still fluctuate, check the circuit for issues. Stable connection improves measurement consistency.Maintaining Your Equipment
Proper maintenance extends your multimeter’s life. Clean the probes regularly to prevent corrosion. Store your multimeter in a dry place to avoid moisture damage. Replace batteries as needed for uninterrupted functionality. Regular checks keep your device in top condition. Reliable equipment ensures accurate measurements.
Credit: www.youtube.com

Credit: www.youtube.com
Frequently Asked Questions
What Is The Best Multimeter Setting For Measuring Milliamps?
Set your multimeter to the lowest current (mA) range. Use the dedicated mA port if available. This ensures accurate and safe measurement of milliamps.
How Do I Connect A Multimeter To Measure Current?
Connect the multimeter in series with the circuit. Insert the probe leads correctly: red to mA port, black to common. This allows current to flow through the meter for measurement.
Can I Measure Milliamps Without Breaking The Circuit?
No, measuring current requires breaking the circuit to insert the multimeter in series. This is essential for accurate milliamp readings.
What Safety Precautions Are Needed When Measuring Milliamps?
Always start with the highest current range to avoid damage. Never exceed the multimeter’s current limit. Disconnect power before connecting the meter.
Conclusion
Measuring milliamps with a multimeter is simple and useful. Always set your multimeter correctly before testing. Connect the probes in the right spots to get accurate readings. Take your time and follow safety steps carefully. This skill helps check small electric currents easily.
Practice a few times to feel confident and sure. Soon, measuring milliamps will become a quick routine task. Keep your multimeter handy for any future electric checks. Understanding these basics makes your work safer and clearer.