
Are you struggling to measure impedance accurately with your multimeter? Understanding how to check impedance can save you time and prevent costly mistakes when working with electronics.
You’ll discover simple, step-by-step methods to measure impedance using your multimeter—no complicated tools or technical jargon needed. By the end, you’ll feel confident handling your devices like a pro and ensuring everything works perfectly. Ready to unlock this essential skill?
Let’s dive in.
What Is Impedance
Understanding what impedance is can make measuring it much clearer and more meaningful. Impedance affects how electrical signals flow through circuits and devices, influencing performance and compatibility. Grasping this concept helps you use your multimeter more effectively to get accurate readings.
What Is Impedance?
Impedance is the total opposition a circuit offers to the flow of alternating current (AC). It combines resistance, which opposes direct current (DC), with reactance, which depends on capacitance and inductance in the circuit.
Think of it as a more complete way to measure how a circuit resists current, especially when signals are changing rapidly.
How Impedance Differs From Resistance
Resistance only measures opposition to direct current and stays constant regardless of frequency.
Impedance, however, changes with frequency because capacitors and inductors react differently to different signal speeds.
This means your multimeter needs to account for frequency if you want an accurate impedance measurement.
Why Impedance Matters In Everyday Electronics
Your headphones, speakers, and even smartphone circuits rely on proper impedance matching to work well.
If the impedance is off, sound quality can drop, and devices might consume more power or even get damaged.
Checking impedance can help you troubleshoot these problems before they get worse.
Components That Affect Impedance
- Resistors:Provide constant opposition regardless of frequency.
- Capacitors:Store and release energy, affecting impedance more at higher frequencies.
- Inductors:Resist changes in current flow, impacting impedance mainly at lower frequencies.
Knowing these components’ roles helps you interpret your multimeter readings better.
Tools Needed
Measuring impedance accurately requires more than just any multimeter. You need the right tools to get reliable results and avoid damaging your equipment. Choosing the correct tools can make the process straightforward and even enjoyable.
Multimeter With Impedance Or Ohm Measurement Capability
Your multimeter must have the ability to measure resistance or impedance. Not all basic multimeters include this feature, so check the specifications carefully. A digital multimeter with an ohmmeter function is ideal for this task.
Test Leads With Probes
Good quality test leads are essential for accurate readings. Look for leads with sharp, pointed probes that can easily contact small components. Insulated and flexible wires make handling easier and safer.
Calibration Tools Or Reference Components
Calibrating your multimeter before measuring impedance helps ensure accuracy. You can use known resistors or calibration kits designed for your multimeter. This step helps you verify that your readings are trustworthy.
Optional: Impedance Bridge Or Lcr Meter
While a multimeter can measure basic impedance, an impedance bridge or LCR meter provides more precise measurements. If you work with complex circuits or need frequency-dependent impedance, consider adding these to your toolkit. They offer detailed insights that a standard multimeter cannot.
Preparing The Multimeter
Preparing your multimeter correctly is key to measuring impedance accurately. This step ensures the readings are reliable and the device functions well. Proper preparation avoids errors and saves time during testing.
Selecting The Right Mode
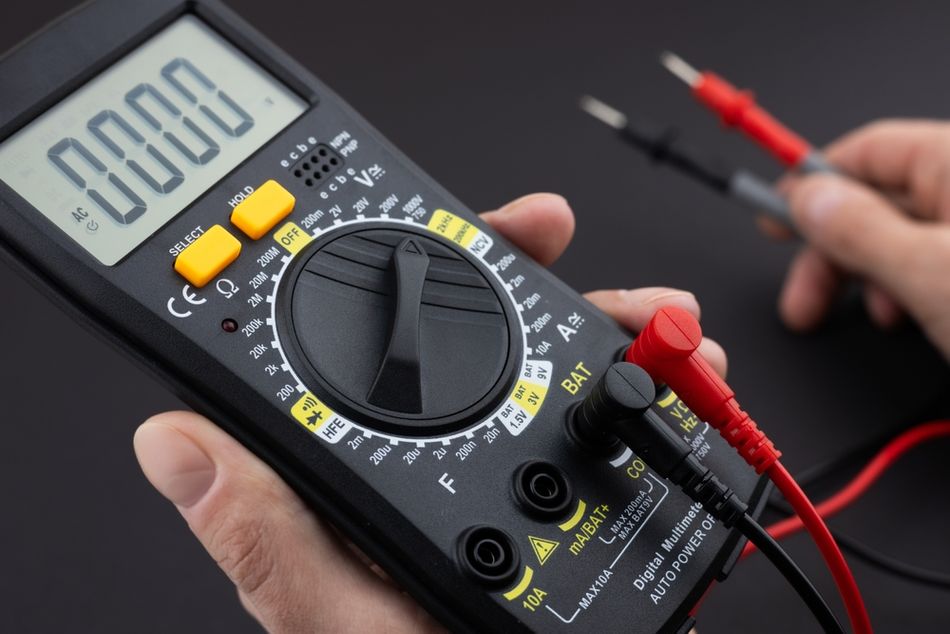
Turn on the multimeter and find the mode selector dial. Choose the impedance or ohms (Ω) setting, as impedance is measured in ohms. Some multimeters have a dedicated impedance mode, while others use the resistance setting for this purpose.
Ensure the range is appropriate for the expected impedance. Use manual range selection if your multimeter supports it. This helps improve reading precision.
Calibrating The Device
Before measuring, calibrate the multimeter to zero the device. Short the test leads by touching their tips together. The display should read zero or near zero ohms.
If the reading is off, use the zero adjustment knob or button. This step removes resistance caused by the test leads themselves. Calibration ensures the results reflect the true impedance of the component being tested.
Credit: www.wevolver.com
Step-by-step Measurement
Measuring impedance with a multimeter requires careful attention to detail and a clear understanding of the device’s setup. The process is straightforward once you know how to properly connect the probes and interpret the readings. Let’s walk through the essential actions that help you get accurate impedance measurements.
Connecting The Probes
Start by turning off the power to the circuit or device you’re testing to avoid any damage or inaccurate readings. Attach the multimeter probes to the component terminals you want to measure. Make sure the probes have a solid connection; loose contacts can cause fluctuating or false readings.
Use the black probe on the common (COM) jack and the red probe on the impedance or ohms (Ω) jack of your multimeter. If your device has multiple settings, select the appropriate impedance or resistance mode. Have you noticed how even a slight slip of the probe changes your results? That’s why steady hands and patience matter here.
Reading The Display
Once the probes are connected, turn on the multimeter and observe the display. It will show a numerical value representing the impedance in ohms (Ω). If the reading fluctuates wildly or shows “OL” (overload), check your connections or switch to a higher impedance range if available.
Take a moment to verify if the displayed value matches the expected impedance for your component. If the number is too high or too low, it might indicate a faulty part or incorrect setup. Have you tried testing a known resistor first to ensure your multimeter is working correctly? This simple check can save you troubleshooting time later.
Tips For Accurate Results
Ensure the multimeter is set to the correct mode before measuring impedance. Keep the test leads clean and steady for precise readings. Avoid touching the metal parts during measurement to reduce interference.
Measuring impedance with a multimeter requires precision for accurate results. Getting precise readings can be tricky, but with the right tips, you can improve your accuracy. Paying attention to common mistakes and ensuring proper contact can make all the difference.Avoiding Common Mistakes
When measuring impedance, ensure the multimeter is set to the correct mode. Double-check your settings before starting. Wrong settings can lead to inaccurate readings. Use a multimeter with a high impedance setting for better results. Choose the right leads for impedance measurement. Using incorrect leads can affect the accuracy.Ensuring Proper Contact
Proper contact between the multimeter leads and the circuit is crucial. Make sure leads are clean and free from corrosion. Dirty leads can cause unreliable readings. Ensure the leads are connected securely to the test points. Loose connections might result in fluctuating measurements. Check that the test points are clean and well-maintained. Clean test points provide more accurate results.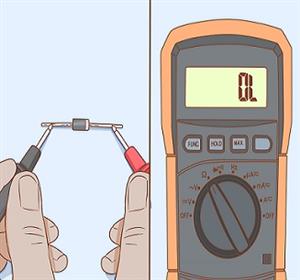
Credit: www.kynix.com
Troubleshooting Issues
Measuring impedance with a multimeter can sometimes lead to confusing results. Troubleshooting these issues quickly helps you avoid wasted time and incorrect conclusions. Let’s look at common problems and how to fix them so your measurements become reliable.
Check Your Multimeter’s Settings And Limits
Before you take any measurement, make sure your multimeter is set to the correct mode. Some multimeters don’t directly measure impedance, so you might need to use resistance mode or a specific impedance setting if available.
Have you ever measured impedance only to get a reading of “OL” or zero? This often means the meter is out of range or in the wrong mode. Adjusting the range or switching modes can solve this quickly.
Inspect The Test Leads And Connections
Faulty or loose test leads can cause inaccurate or fluctuating readings. Check for visible damage, loose connections, or corrosion on the probes. Even a small break in the wire inside the insulation can throw off your measurement.
Try swapping out your test leads with a known good pair. If the readings stabilize, you’ve found your problem. Clean the contacts with a soft cloth to improve connection quality.
Understand The Impact Of Component And Circuit Conditions
Impedance measurements depend heavily on the condition of the component you’re testing. A damaged capacitor or coil might show wildly different values than expected.
Also, measuring impedance in-circuit can cause interference from surrounding components. Whenever possible, remove the component or isolate it to get a more accurate reading.
Account For Environmental Factors
Temperature and humidity can influence impedance readings. If you’re working in a very cold or humid environment, your multimeter may show unexpected values.
Try to perform measurements in a controlled environment. If that’s not possible, note the conditions and compare them with typical values to understand if your reading is reasonable.
Use A Reference Component To Calibrate
Sometimes you need a baseline to know if your multimeter is working properly. Using a component with a known impedance value helps verify your setup.
If your reading is off, recalibrate your meter or check the manual for troubleshooting tips specific to your model. This step saved me hours once when I thought my meter was broken but just needed calibration.

Credit: www.youtube.com
Frequently Asked Questions
What Is Impedance And Why Measure It With A Multimeter?
Impedance is the resistance to AC current flow in circuits. Measuring it with a multimeter helps diagnose electronic device performance and detect faults. It ensures proper signal transmission and component function.
Can All Multimeters Measure Impedance Accurately?
Not all multimeters measure impedance directly. Only those with a dedicated impedance or ohm function can do this accurately. Standard multimeters typically measure resistance but may not provide precise impedance values.
How Do I Set My Multimeter To Measure Impedance?
Set your multimeter to the resistance (ohm) mode. Connect the probes across the component or circuit. For AC impedance, specialized meters or additional equipment may be required.
What Precautions Should I Take Before Measuring Impedance?
Always disconnect power from the circuit before measuring. Avoid touching probe tips to prevent inaccurate readings. Ensure the component is isolated to get precise impedance measurements.
Conclusion
Measuring impedance with a multimeter is simple and useful. You only need to follow a few easy steps. This skill helps check electronic parts and circuits fast. Always make sure your multimeter is set correctly. Take your time and be careful with connections.
Practice will improve your confidence and accuracy. Now, you can test impedance without extra tools. Try it on different devices to see how it works. Keep learning and exploring electronics at your own pace.