
Are you struggling to figure out how to measure frequency with a multimeter? You’re not alone.
Whether you’re a hobbyist or working on a project, understanding frequency can be tricky without the right tools and know-how. But here’s the good news: your multimeter can do more than just measure voltage or resistance—it can help you measure frequency too.
You’ll discover simple, step-by-step instructions to unlock this powerful feature. By the end, you’ll feel confident using your multimeter to get accurate frequency readings every time. Let’s get started and make your measurements easy and precise!
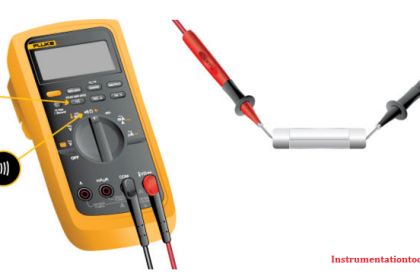
Credit: instrumentationtools.com
Multimeter Basics
Understanding multimeter basics is essential before you dive into measuring frequency. A multimeter is a versatile tool that can test voltage, current, resistance, and, in many cases, frequency. Knowing what type of multimeter you have and how its features work will save you time and frustration.
Types Of Multimeters
You’ll find two main types of multimeters: analog and digital. Analog multimeters use a needle to display readings, which can be hard to read precisely, especially for frequency. Digital multimeters (DMMs) show numbers on a screen, making frequency measurements clearer and easier to interpret.
Digital multimeters often come in different quality levels. Basic models handle simple tasks like voltage and resistance. More advanced models include additional features like frequency measurement, temperature, and capacitance.
Frequency Measurement Feature
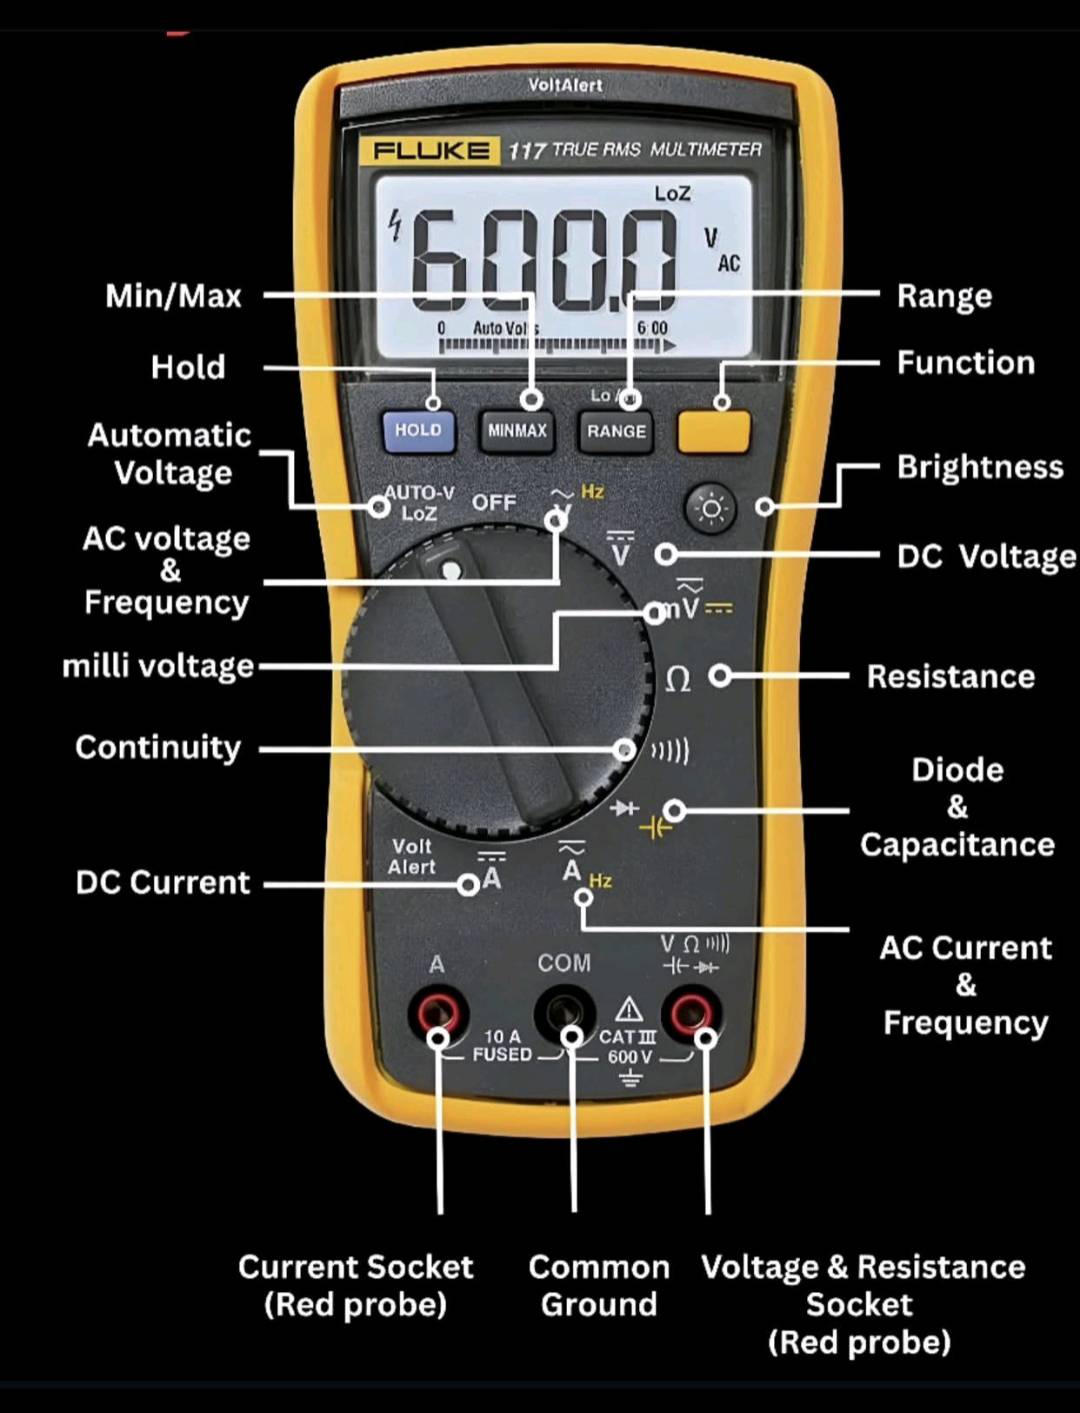
Not all multimeters measure frequency, so check if your device has this feature before starting. Frequency measurement is usually indicated by a “Hz” symbol on the dial or screen. If your multimeter supports this, it will let you measure the frequency of AC signals, which is crucial for troubleshooting electronic circuits or verifying signal generators.
Using this feature is straightforward. You connect the probes to the circuit, select the frequency mode, and read the measurement. Have you ever wondered how often a signal cycles per second? Measuring frequency with your multimeter gives you that exact number, helping you understand the behavior of your electronics.
Preparing Your Multimeter
Getting your multimeter ready before measuring frequency is crucial for accurate readings. Skipping this step can lead to confusing results or even damage your device. Let’s focus on two key preparations: selecting the correct mode and setting the range.
Selecting The Correct Mode
Most multimeters come with multiple modes, so finding the right one is your first task. Look for the “Hz” symbol on the dial or screen—that’s the frequency mode. If you miss this, your multimeter might display voltage or resistance instead, which won’t help you measure frequency.
Think about the last time you grabbed your multimeter without checking the mode. You probably wasted time and got frustrated. By double-checking the mode, you save effort and get straight to reliable results.
Setting The Range
Some multimeters require you to manually set the frequency range, while others adjust automatically. If your device needs manual input, check the expected frequency before you start. For example, if you’re measuring a 60 Hz household signal, set the range to cover that or slightly higher.
Choosing the wrong range can either limit your reading or cause your multimeter to display an error. It’s like trying to weigh a car on a kitchen scale—it just won’t work. If you’re unsure, start with the highest range and work your way down for precision.
Connecting The Probes
Connecting the probes correctly is crucial when measuring frequency with a multimeter. This step ensures you get accurate readings and protects both you and your device. Let’s dive into how to place your probes right and stay safe during the process.
Probe Placement Tips
Start by identifying the signal source you want to test. The red probe usually connects to the positive or signal input, while the black probe goes to the ground or negative terminal.
Make sure the probes are firmly attached and not touching each other. Even a slight slip can cause false readings or short circuits.
Use probe tips that suit the test points. For tiny components, needle-like probes help reach tight spots without slipping off.
Check your multimeter’s manual to confirm the correct input jacks for frequency measurement. Some meters require you to plug the red probe into a special frequency input terminal.
Safety Precautions
Before you touch any wires, double-check the circuit is powered off or isolated if possible. Live circuits carry risks that can damage your meter or injure you.
Wear insulated gloves if you expect to work on high-voltage areas. Even a simple slip can lead to serious shocks.
Never let the probe tips touch each other while connected to a circuit. This might cause sparks or damage sensitive components.
Keep your hands steady and avoid rushing. Accurate frequency measurement demands patience and care.

Credit: www.youtube.com
Measuring Frequency Step-by-step
Measuring frequency with a multimeter is a straightforward task once you understand the process. It’s not just about connecting leads; it’s about setting the device correctly and interpreting the results accurately. Let’s walk through the essential steps to get reliable frequency readings.
Turning On The Device
Start by powering on your multimeter and setting it to the frequency measurement mode, often labeled as “Hz.” If your device has a rotary dial, rotate it until the frequency symbol appears.
Some multimeters require pressing a mode button to switch from voltage to frequency. Check your device’s manual if you’re unsure where the frequency setting is. Ensuring the right mode is selected prevents inaccurate readings or confusion later.
Taking The Measurement
Connect the test leads to the appropriate input jacks—usually, the black lead goes into the common (COM) port, and the red lead into the voltage/frequency input.
Touch the leads to the circuit points where you want to measure frequency. Make sure your contact is stable to avoid fluctuating readings. If you’re measuring frequency from a signal generator or an AC source, the leads will detect the oscillations to calculate frequency.
Reading The Display
Look at the multimeter’s screen to see the frequency value, typically shown in Hertz (Hz). Some devices also show kilohertz (kHz) or megahertz (MHz) depending on the frequency range.
If the reading seems off, double-check your connections and ensure the device is set correctly. Remember, steady readings are more reliable than fluctuating numbers, so take a moment to confirm stability before recording your measurement.
Common Issues And Fixes
Using a multimeter to measure frequency can be tricky. Many users face common issues while doing this task. Knowing these problems and their solutions can save you time and frustration. Below, find solutions to typical problems encountered when measuring frequency with a multimeter.
No Frequency Reading
A multimeter may sometimes show no frequency reading. This can happen due to incorrect settings or faulty connections. Check if the multimeter is set to the frequency mode. Ensure all leads are connected properly. Sometimes, the problem lies in the test points. Make sure the component you’re testing is active and functioning. If the issue persists, inspect the multimeter’s battery. A weak battery can cause reading errors.
Inaccurate Measurements
Inaccuracy can stem from several factors. Ensure the multimeter is calibrated correctly. Calibration helps deliver precise readings. Check the probe condition. Damaged probes can lead to errors. Always use the appropriate range setting. A wrong range might cause misleading values. External noise can affect accuracy. Try to measure in a quiet environment to avoid disruptions.
Troubleshooting Tips
Troubleshooting frequency issues requires patience. Start by inspecting the device settings. Verify all connections are secure. Use fresh batteries for optimal performance. Avoid measuring near strong electromagnetic fields. These fields can interfere with readings. If problems continue, consult the multimeter’s manual. It often contains specific troubleshooting advice. Regular maintenance can prevent future issues. Clean and store the multimeter properly after use.
Applications Of Frequency Measurement
Measuring frequency with a multimeter is more than just a technical skill; it’s a key part of maintaining and troubleshooting many electronic devices. Knowing where and why to check frequency can save you time and prevent costly repairs. Here are some practical ways frequency measurement plays a crucial role in everyday electronics work.
Testing Electronic Circuits
When building or repairing electronic circuits, verifying the frequency helps ensure components work as intended. You can quickly spot if oscillators or timers are producing the correct signal. This saves hours you might otherwise spend chasing down circuit faults.
Have you ever encountered a circuit that just wouldn’t behave? Measuring frequency can pinpoint whether a component like a crystal oscillator is dead or if the problem lies elsewhere.
Audio Equipment Checks
Audio devices rely heavily on accurate frequencies for clear sound reproduction. Using a multimeter to measure frequency lets you confirm if speakers, amplifiers, or synthesizers are outputting signals at the right rates. This can reveal issues like distortion caused by incorrect frequencies.
Imagine you’re tuning a guitar amp and wondering why the sound feels off. Checking the frequency output can help you identify problems before they affect your performance or recording.
Signal Verification
Frequency measurement is essential for verifying signals in communication devices such as radios, transmitters, and receivers. It ensures signals fall within their designated bands, preventing interference with other devices. This step is critical for compliance with regulatory standards and smooth device operation.
Have you ever thought about how your Wi-Fi or Bluetooth devices keep working without interference? Regularly verifying signal frequency helps maintain clear and reliable connections.
Tips For Accurate Frequency Measurement
Accurate frequency measurement is essential for reliable results. Small mistakes can cause errors and affect your readings. Follow these tips to improve precision and get consistent data from your multimeter.
Using Proper Probes
Choose probes designed for frequency testing. Use probes with good insulation to prevent signal loss. Connect probes firmly to the test points for stable contact. Avoid using damaged or worn probes, as they reduce accuracy.
Avoiding Interference
Keep the test area free from electrical noise. Stay away from strong electromagnetic sources like motors or wireless devices. Use short probe leads to reduce pickup of stray signals. Measure in a calm environment to prevent signal distortion.
Regular Calibration
Calibrate your multimeter often to maintain accuracy. Follow the manufacturer’s instructions for calibration. Use a known frequency source to check the meter’s readings. Record calibration dates and results for reference and quality control.
Credit: www.facebook.com
Frequently Asked Questions
How Do I Measure Frequency With A Multimeter?
To measure frequency, set your multimeter to the frequency mode (Hz). Connect the probes to the circuit points. The display shows the frequency value in Hertz.
Can All Multimeters Measure Frequency Accurately?
No, not all multimeters measure frequency. Only those with a dedicated frequency or Hz setting provide accurate readings. Check your multimeter’s specifications before use.
What Is The Best Multimeter Setting For Frequency?
Use the “Hz” or frequency mode on your multimeter. This setting is designed to detect and display the signal frequency precisely.
Why Is Measuring Frequency Important In Electronics?
Measuring frequency helps verify signal integrity and component functionality. It ensures circuits operate within desired frequency ranges for proper performance.
Conclusion
Measuring frequency with a multimeter is simple and useful. Just follow the steps carefully for accurate results. Always check your multimeter’s settings before starting. Use the right probes and connect them properly. Practice often to feel confident with the tool.
This skill helps in fixing and testing many devices. Keep safety in mind while working with electricity. With patience, frequency measurement becomes quick and easy. Try measuring different signals to learn more. You can handle basic electrical tasks better now.