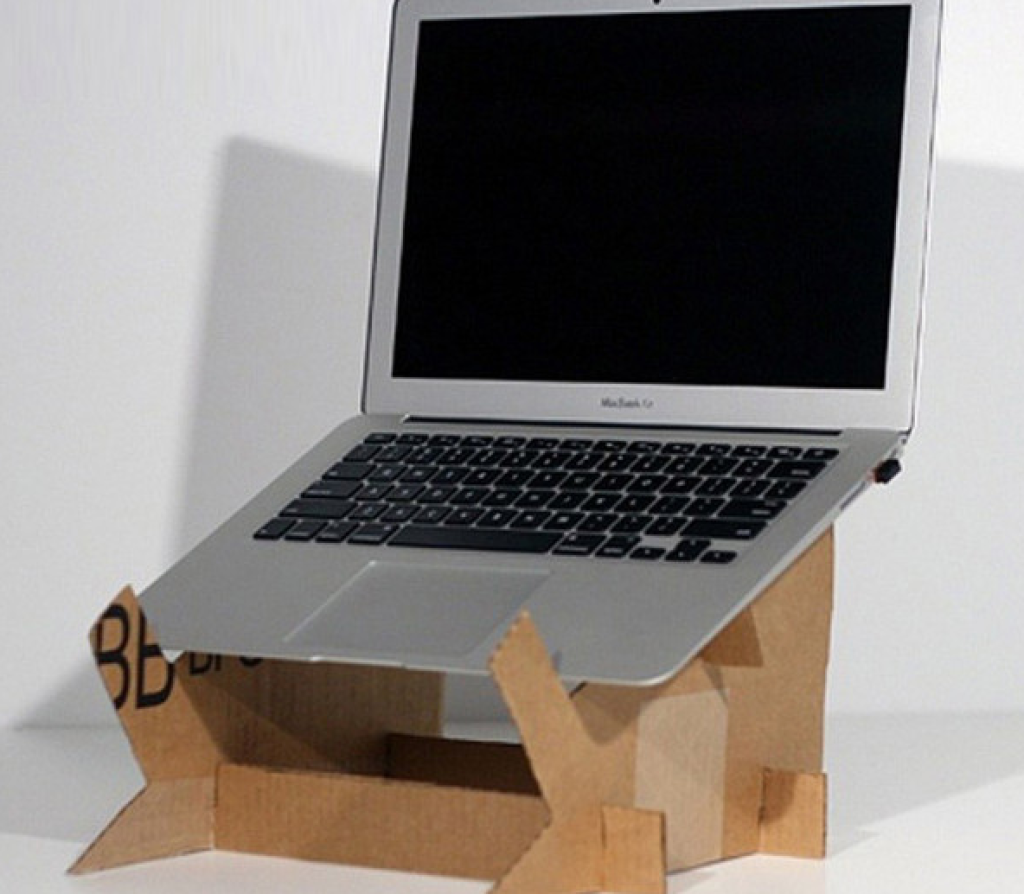
Looking for a simple, affordable way to improve your workspace? You can make a laptop stand out of cardboard right at home.
It’s easy, eco-friendly, and perfect for keeping your laptop cool and at the right height. Imagine how much better your posture and focus could be with just a small change like this. Keep reading, and you’ll discover step-by-step how to create your own sturdy laptop stand using materials you probably already have.
Let’s get started!
Materials Needed
Creating a laptop stand from cardboard needs just a few simple materials. Most of these items are easy to find at home or local stores. Using the right materials ensures your stand will be sturdy and functional.
Gathering all materials before starting helps the building process go smoothly. Each item plays a key role in making the stand strong and stable. Below are the materials you need.
Cardboard Sheets
Choose thick, strong cardboard sheets for better support. Avoid thin or weak cardboard as it may bend or break.
Measuring Tools
A ruler or measuring tape is necessary to get accurate dimensions. Precise measurements help your stand fit your laptop perfectly.
Cutting Tools
Use a sharp utility knife or scissors to cut the cardboard. Be careful and cut on a safe surface.
Adhesive Materials
Glue or strong tape helps hold the parts together. Hot glue works well for quick drying and strong bonds.
Marking Tools
A pencil or pen is needed to mark cutting lines on the cardboard. This makes cutting easier and more accurate.
Optional: Decorative Supplies
Paint, colored paper, or stickers can decorate your stand. Personalize your stand to match your style.
Credit: medium.com
Choosing The Right Cardboard
Choosing the right cardboard is crucial for building a sturdy and functional laptop stand. The cardboard needs to support the laptop’s weight without bending or breaking. It also should be easy to cut and shape to fit your design.
Not all cardboard is the same. Different types vary in thickness, strength, and flexibility. Picking the right one makes your project easier and the final product better.
Types Of Cardboard Suitable For Laptop Stands
- Corrugated Cardboard:Has three layers – two flat outer layers and a wavy inner layer. Strong and durable, perfect for heavy laptops.
- Single-Layer Cardboard:Thin and flexible, good for light or small laptops but less sturdy.
- Double-Wall Cardboard:Two layers of corrugated cardboard for extra strength. Ideal for bigger or heavier laptops.
Thickness And Strength
Thicker cardboard supports more weight. Aim for cardboard at least 4-5 millimeters thick. Avoid thin cardboard that bends easily.
Test the cardboard by pressing it with your fingers. It should feel firm and resist bending.
Size And Surface Area
Choose cardboard large enough to fit your laptop comfortably. Allow extra space for the stand’s base and support parts.
A bigger surface area helps keep the laptop steady and balanced.
Durability And Quality
Look for cardboard that is clean and free from tears or holes. Damaged cardboard reduces strength and stability.
High-quality cardboard lasts longer and holds its shape better.
Designing Your Laptop Stand
Creating a laptop stand from cardboard is both fun and practical. Designing your stand is a crucial step in ensuring it fits your needs. A well-designed stand enhances comfort and style while providing stability for your laptop.
Measuring Laptop Dimensions
Start by measuring your laptop’s dimensions accurately. Use a ruler or measuring tape for precision. Note the width, length, and height of your laptop. These measurements will guide your design and help create a stand that fits perfectly. Consider leaving a little extra space for ventilation and ease of use.
Sketching The Stand Layout
Sketch a layout of your stand on paper. Visualize how your laptop will sit on it. Draw the base and the support structure needed to hold the laptop. Think about height and angle for optimal viewing comfort. Use simple shapes and lines to represent different parts of the stand. This sketch will serve as a blueprint for cutting and assembling the cardboard.

Credit: www.musicradar.com
Cutting The Cardboard
Cutting the cardboard is the first important step in making a laptop stand. Precise cuts help the stand hold the laptop firmly and look neat. Taking time to measure and mark the cardboard before cutting improves the final product. Using the right tools and safe cutting methods makes the process easier and safer.
Tools For Cutting
Choose sharp tools to cut cardboard smoothly. Here are some useful tools:
- Box cutter or utility knife – for clean, straight cuts
- Scissors – good for small or curved cuts
- Cutting mat – protects your work surface
- Ruler or straight edge – guides your cuts
- Pencil – for marking measurements
Keep your tools sharp to avoid tearing the cardboard. Dull blades require more force and cause rough edges.
Safe Cutting Techniques
Cutting cardboard can be risky without care. Follow these tips for safety:
- Cut away from your body to avoid injuries.
- Use a stable surface to support the cardboard.
- Hold the cardboard firmly but keep fingers clear of the blade.
- Make light, repeated passes instead of one deep cut.
- Wear gloves for extra hand protection if needed.
Good lighting helps you see the cutting lines clearly. Take breaks if your hands get tired to maintain control.
Assembling The Stand
Assembling your cardboard laptop stand is where your project starts to take shape. This stage combines all your carefully cut pieces into a functional and sturdy support. Paying attention to how you fold and join parts will make a big difference in the stand’s durability and usability.
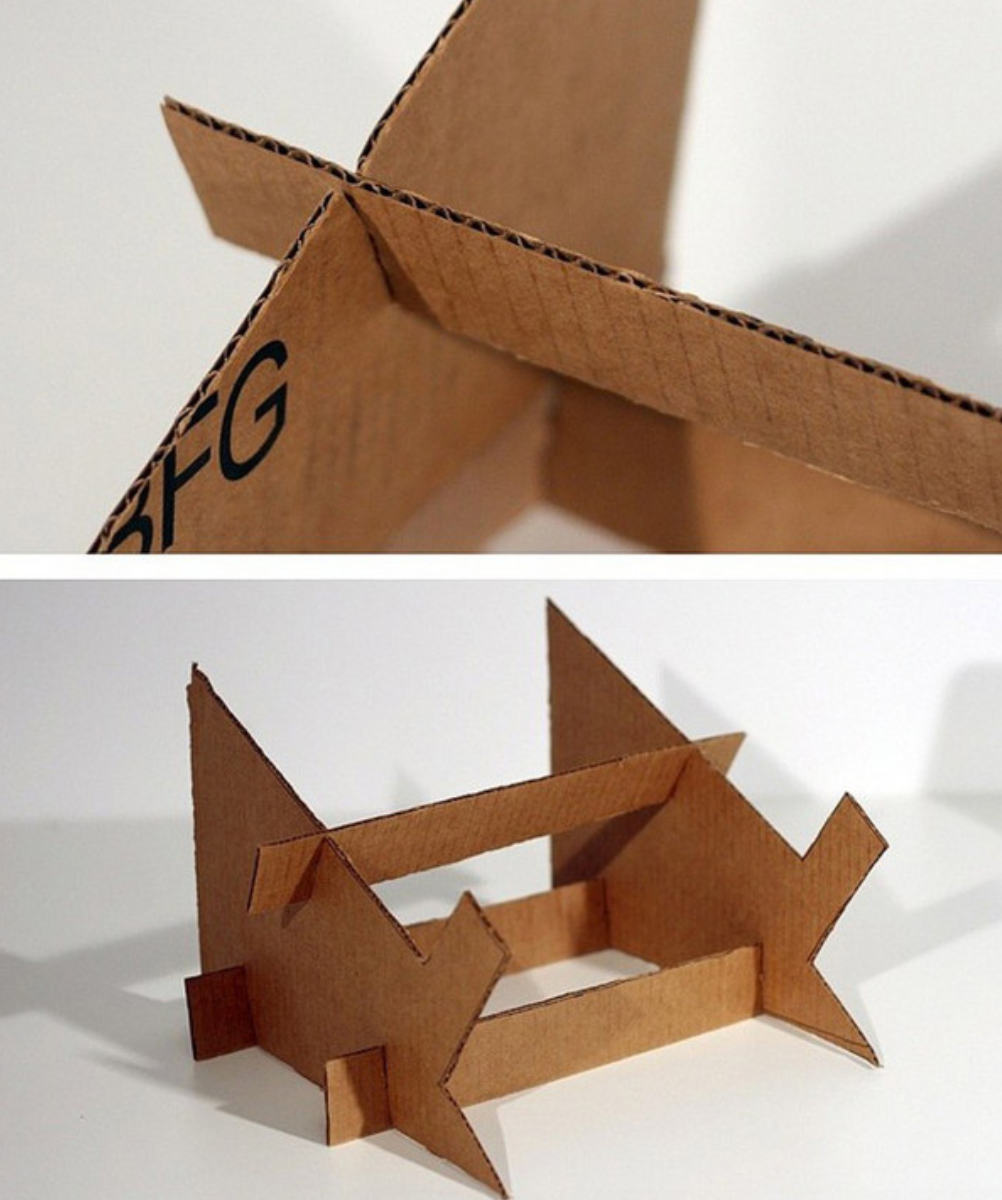
Folding And Joining Pieces
First, fold the cardboard along the scored lines to create clean edges. Sharp folds add strength and help the pieces fit together snugly. You might find it easier to use a ruler or a flat edge to press down folds firmly.
Joining the pieces requires patience. Use strong tape or glue, but remember that tape often works better for cardboard because it holds immediately. Align edges precisely before securing them, or you risk a wobbly stand that won’t support your laptop safely.
Have you noticed how slight misalignments can cause instability? Take your time here; the effort pays off with a stand that feels solid and reliable.
Reinforcing The Structure
Once your main frame is assembled, add extra layers of cardboard at stress points. These are usually where your laptop’s weight presses down. Reinforcements stop the cardboard from bending or collapsing over time.
Think about the base and the back support—these areas need the most attention. You can glue additional strips or even small cardboard triangles inside corners to boost strength.
Try testing your stand by pressing gently before placing your laptop. Can you feel any flex or weakness? If so, add more reinforcements before using it regularly.
Customizing And Decorating
Customizing and decorating your cardboard laptop stand is where your creativity can truly shine. This step transforms a simple DIY project into something uniquely yours. It’s about making the stand not only functional but also visually appealing and tailored to your style and needs.
Painting And Covering
Painting your cardboard stand adds a splash of color and protects the surface from wear and tear. Use acrylic paints for vibrant colors that dry quickly and stick well to cardboard. You could go for solid colors, patterns, or even create your own designs with stencils or freehand painting.
If you prefer a cleaner look, covering the stand with decorative paper or fabric works wonders. Wrapping it with colorful wrapping paper or textured fabric can add personality and durability. Secure the covering with glue or double-sided tape to avoid wrinkles or peeling.
Adding Functional Features
Decorating isn’t just about looks—adding functional features can make your stand even more useful. Consider attaching small hooks or loops on the sides for cables and headphones. This keeps your workspace tidy and your accessories close at hand.
Another smart addition is creating slots or compartments to hold pens, notes, or USB drives. You can cut small pockets from extra cardboard pieces and glue them to the stand. These little touches not only personalize your stand but also improve your daily workflow.
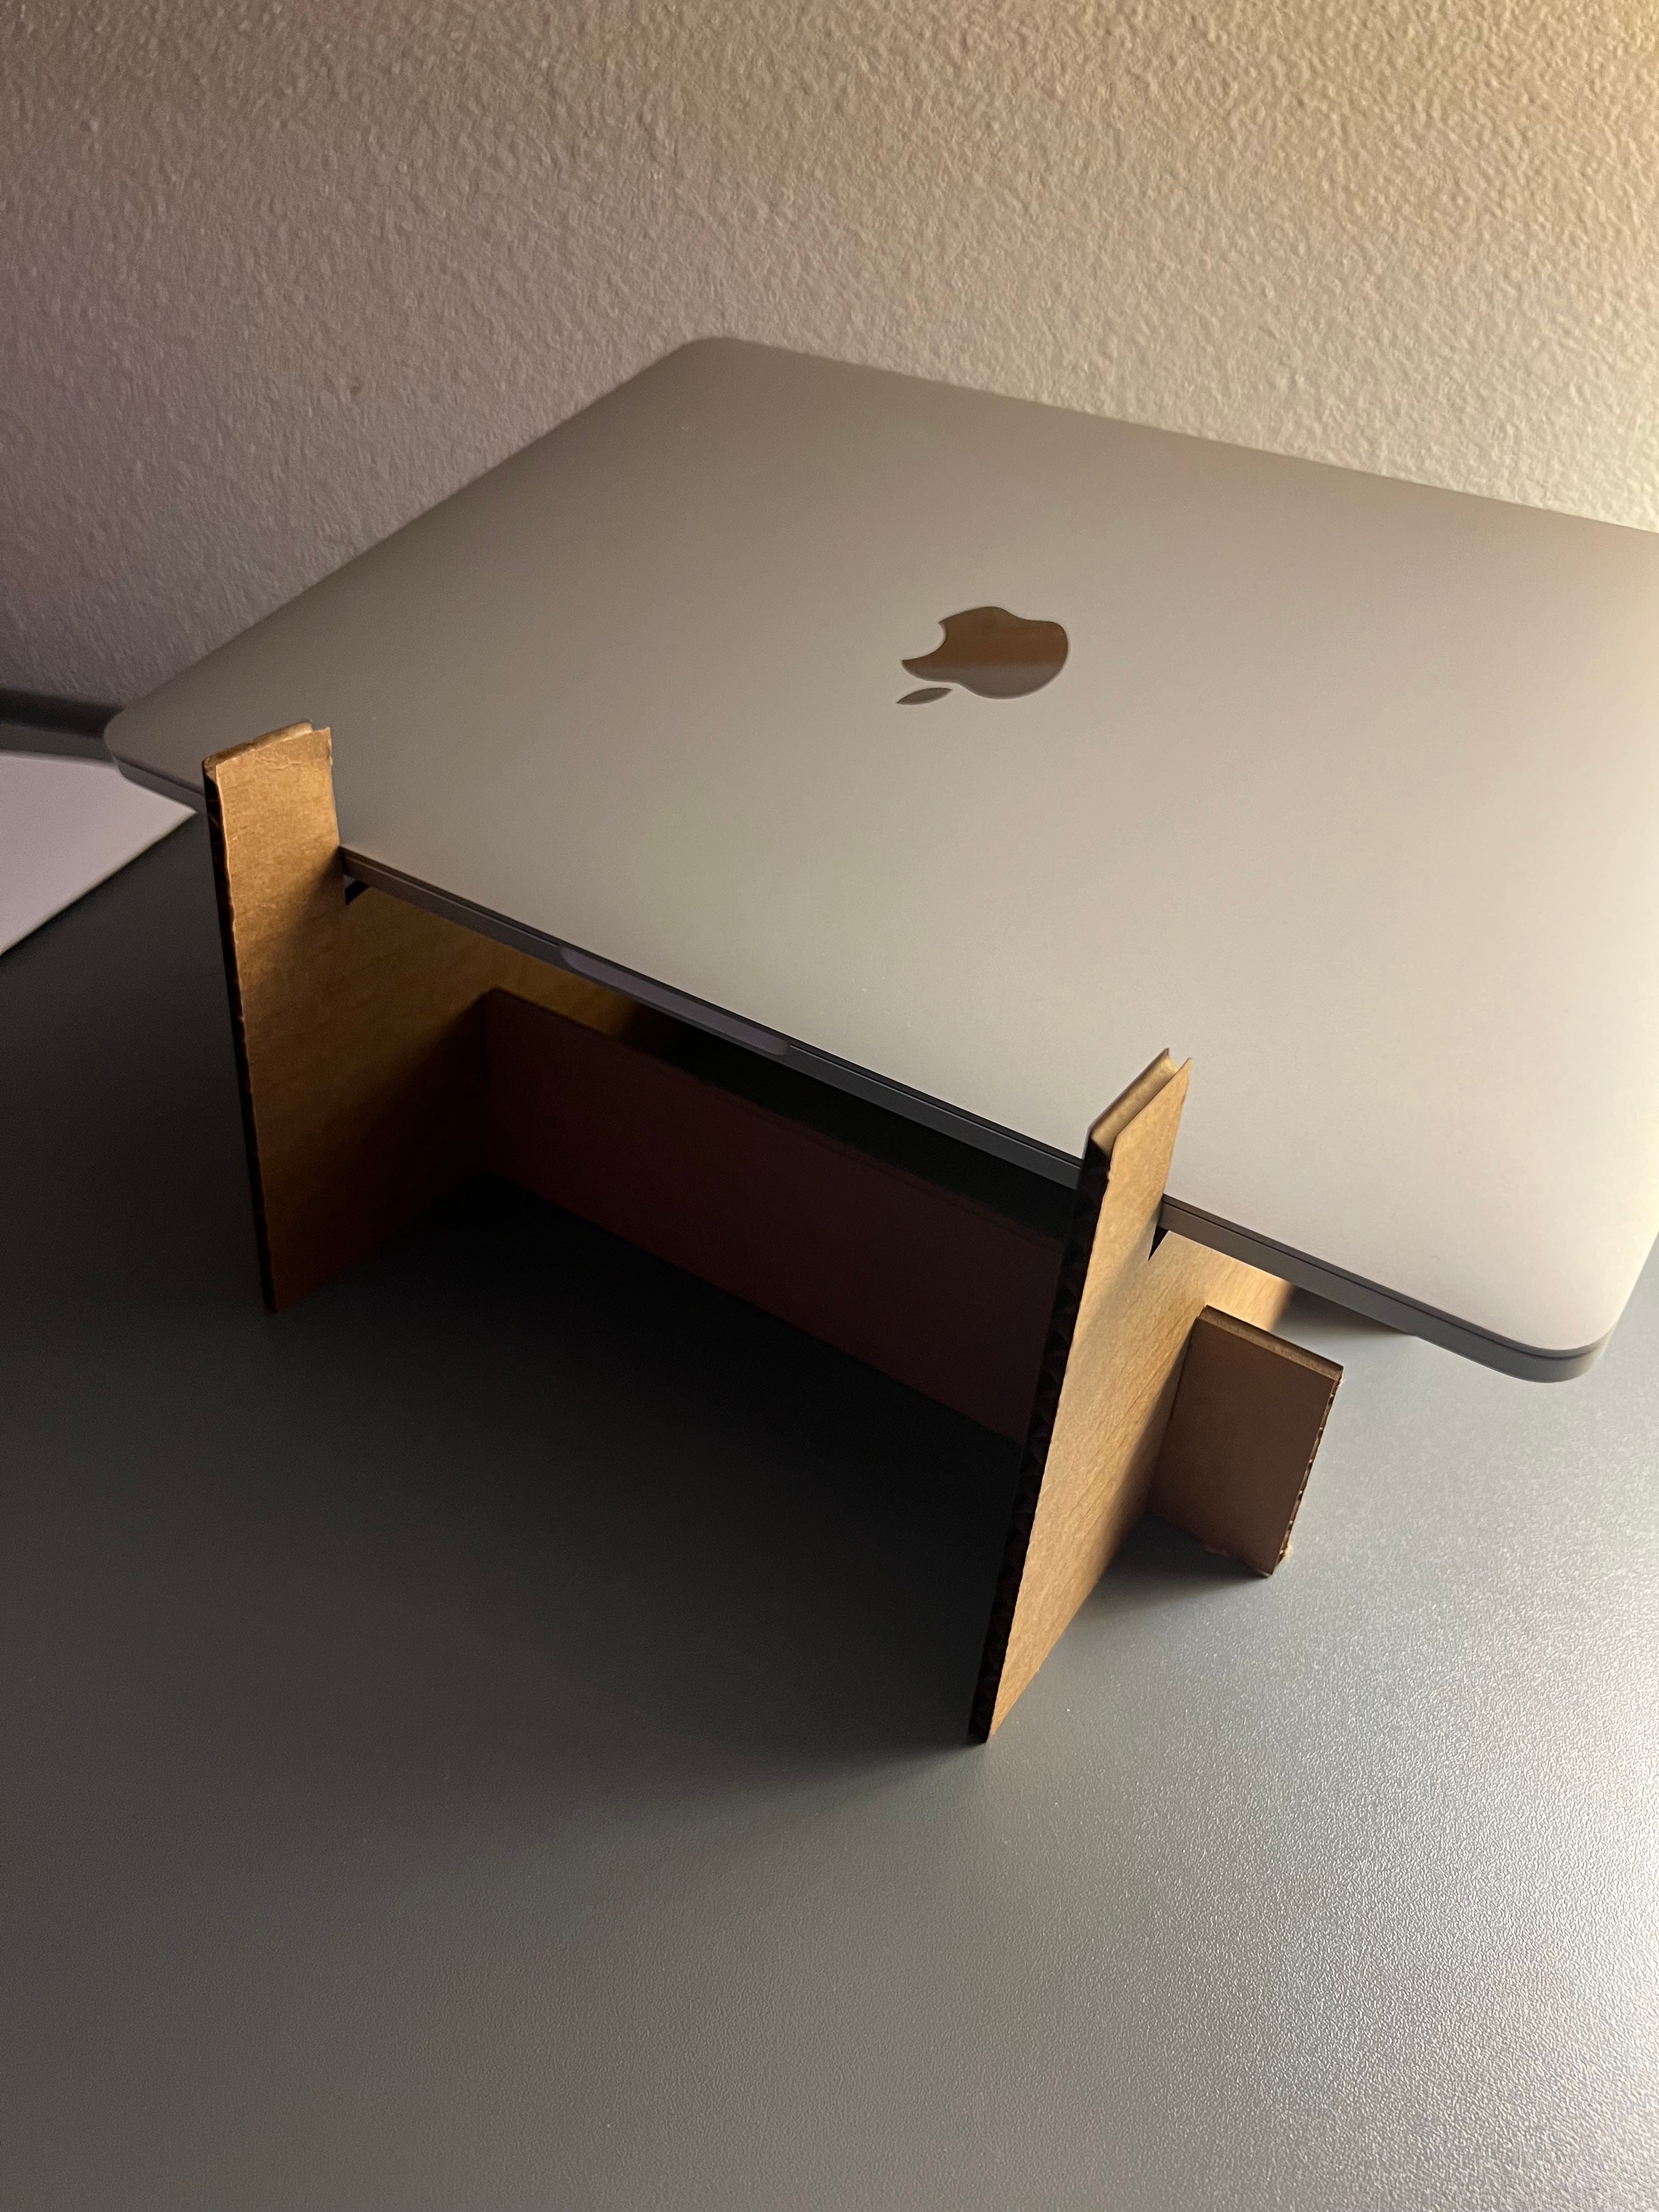
Testing And Adjusting
After building your cardboard laptop stand, testing and adjusting it ensures comfort and safety. This phase helps find the best balance between usability and durability. Small tweaks can greatly improve your experience.
Stability Check
Place your laptop on the stand gently. Watch for any wobbling or tipping. Press lightly on different parts to test strength. The stand should hold firm without bending or collapsing. If it feels unstable, add extra cardboard layers or reinforce weak spots with tape. Stability keeps your laptop safe and improves work comfort.
Adjusting Height And Angle
Check if the laptop screen is at eye level. Adjust the height by adding or removing cardboard layers. Tilt the stand forward or backward to find a comfortable angle. The right angle reduces neck and wrist strain. Test typing and viewing positions to ensure comfort. Make small changes and test each time for the best setup.
Credit: doankn.medium.com
Maintenance Tips
Keeping your cardboard laptop stand in good shape takes a little care but can extend its life significantly. Maintenance isn’t just about fixing damage; it’s about preventing it before it happens. Paying attention to a few simple tips can keep your stand sturdy and reliable for daily use.
Cleaning Your Cardboard Laptop Stand
Dust and dirt can build up on your cardboard stand, making it look worn out quickly. Use a soft, dry cloth to gently wipe the surface regularly. Avoid using water or cleaning products, as moisture can weaken the cardboard and cause it to lose shape.
Protecting Against Moisture
Have you ever left a cardboard item near a drink and regretted it? Moisture is the biggest enemy of cardboard. Place your stand on a dry surface and keep liquids away. If you want extra protection, consider applying a thin layer of clear, waterproof spray designed for paper products—just test a small area first.
Reinforcing Weak Spots
After a few weeks, you might notice some edges or corners starting to bend or fray. Strengthen these spots by gluing small strips of extra cardboard or using clear tape. This little fix can prevent bigger tears and help your stand hold its shape longer.
Storing Your Stand When Not In Use
Do you store your laptop stand somewhere safe when you’re not using it? If not, try to keep it in a cool, dry place where it won’t get crushed or bent. Laying it flat or standing it upright against a wall helps maintain its structure.
Regular Inspection For Damage
Take a moment once a week to check your stand for signs of wear. Look for soft spots, cracks, or any wobbling. Catching problems early allows you to fix them before your stand becomes unusable.
Frequently Asked Questions
How Durable Is A Cardboard Laptop Stand?
A cardboard laptop stand can be quite durable if made with thick, high-quality cardboard. Reinforcing folds and using glue improve strength. However, it is less sturdy than plastic or metal stands and is best for light to moderate use.
What Tools Do I Need For A Cardboard Stand?
You need basic tools like a utility knife, ruler, pencil, and glue. Cutting mats protect surfaces. Optional items include clamps or tape for holding parts while drying. These tools help create precise cuts and ensure a stable laptop stand.
Can Cardboard Stands Support Heavy Laptops?
Cardboard stands can support most lightweight to mid-weight laptops under 5 pounds. For heavier laptops, reinforce the stand with additional layers or supports. Always test the stand’s stability before regular use to avoid damage or accidents.
How To Improve Cardboard Stand Stability?
Increase stability by adding extra cardboard layers at stress points. Use strong adhesive to bond parts securely. Design wider bases and avoid tall, narrow shapes. These steps help prevent wobbling and provide better laptop support.
Conclusion
Making a laptop stand from cardboard is simple and cost-effective. You only need a few materials and some patience. This project helps keep your workspace neat and your laptop cool. Plus, it’s eco-friendly and easy to customize. You can change the size or color anytime.
Try it yourself and enjoy a better laptop setup. Small effort, big difference.