
Are you ready to take your home theater or office presentations to the next level? Hanging your projector from the ceiling is a smart way to save space, improve your viewing experience, and keep your setup neat and tidy.
But if you’re unsure where to start or worried about making mistakes, don’t worry—you’re in the right place. This guide will walk you through every step, making it simple and stress-free. By the end, you’ll know exactly how to hang your projector securely and perfectly aligned for the best picture possible.
Keep reading, and let’s get your projector up and running!
Choosing The Right Projector Mount
Choosing the right projector mount is key to a stable and clear projection. It affects both the safety of your device and the quality of your viewing experience. Consider your room setup, projector size, and how often you might need to adjust the image before making a choice.
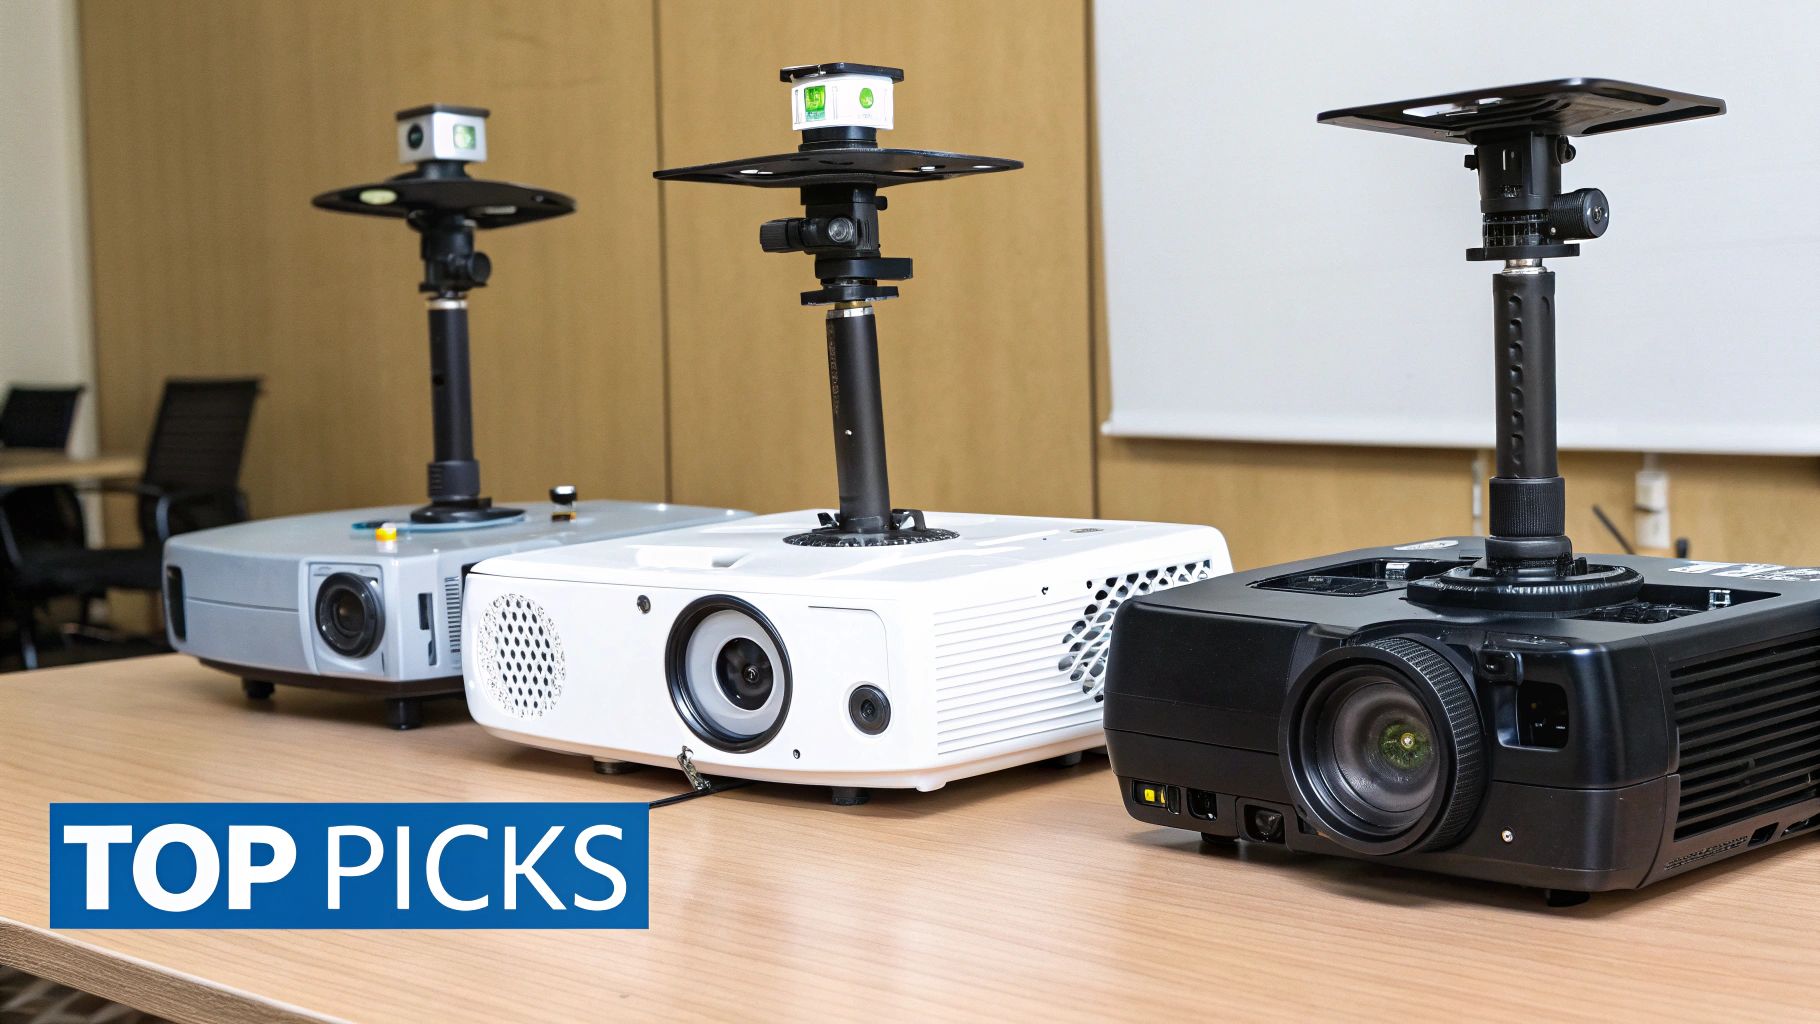
Fixed Vs Adjustable Mounts
Fixed mounts keep your projector in one position. They are simple, usually cheaper, and perfect if your setup won’t change. But what if you need to tweak the angle or move the projector slightly? Adjustable mounts offer flexibility with tilt, swivel, and rotation options, giving you more control over the image.
Think about whether you want quick adjustments or a set-it-and-forget-it solution. Have you ever struggled with blurry corners or a skewed image? An adjustable mount might solve that without hassle.
Weight Capacity And Compatibility
Every mount has a weight limit. Check your projector’s weight and choose a mount that supports more than that to be safe. Overloading a mount can lead to accidents or damage to your projector.
Also, look at the mounting pattern—the holes on the projector and mount must match. Some mounts are universal, but others fit only specific models. Don’t assume a mount will fit all projectors; verify compatibility before buying.
Material And Build Quality
Strong materials like steel or aluminum provide durability and stable support. Cheap plastic mounts might save money upfront but risk breaking or bending over time. Quality build also means less vibration, which keeps your image steady.
Think about the environment too. If your ceiling is high or if the projector will stay mounted for years, investing in a robust mount pays off. Have you noticed any wobbling or noise from your current setup? That’s a sign to upgrade your mount material.
Credit: www.mount-it.com
Selecting The Ideal Ceiling Location
Choosing the right ceiling spot for your projector is crucial for a great viewing experience. It affects picture quality, ease of installation, and even room aesthetics. Spend time planning this to avoid headaches later on.
Distance From Screen
Check your projector’s throw distance specs before picking a location. The throw distance is how far the projector needs to be from the screen to display a clear image.
Measure the distance from your screen and compare it with your projector’s recommended range. Hanging it too close or too far can cause blurry or distorted images.
If you’re unsure, test by placing the projector temporarily on a table to see how the image fills the screen. This quick check saves you from drilling holes in the wrong spot.
Avoiding Obstructions
Make sure nothing blocks the projector’s light path. Ceiling fans, light fixtures, or exposed beams can cast shadows or block the beam.
Think about the cables too—avoid placing the projector near vents or pipes that could interfere with wiring or cause heat issues.
Once, I installed a projector only to realize a hanging plant was partially blocking the image. Removing it made a huge difference, so look around carefully before you drill.
Considering Room Layout
Look at where your seating and furniture are placed. Your projector should be centered with the screen and not too close to where people walk.
Consider the ceiling height as well. A very low ceiling might need a different mount to keep the projector out of the way.
Think about future changes in your room. Will you rearrange furniture or add new decor that could affect the projector’s position? Planning ahead saves time and effort.
Gathering Necessary Tools And Materials
Before hanging a projector from the ceiling, gather all the needed tools and materials. Having everything ready saves time and avoids interruptions. Prepare each item carefully for a smooth installation.
Mounting Hardware
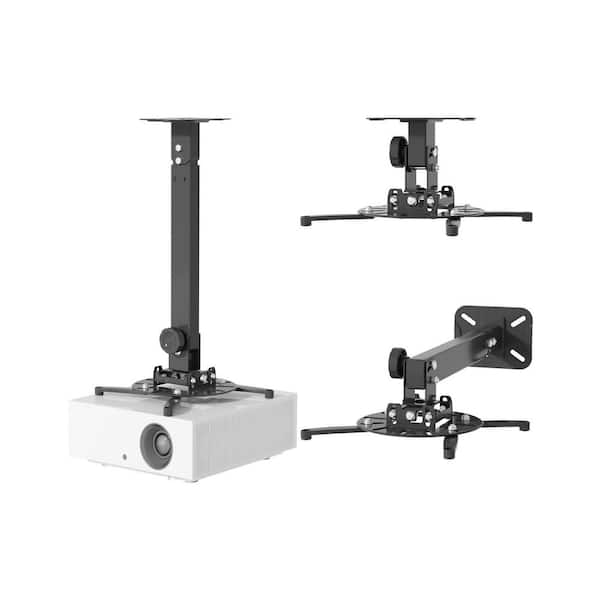
Select strong mounting hardware made for projectors. This includes a ceiling mount bracket, screws, and washers. Choose hardware that fits your projector’s weight and size. Using the right parts ensures the projector stays secure and stable.
Drill And Anchors
A power drill is essential for making holes in the ceiling. Use drill bits that match your anchors and screws. Anchors help hold the screws firmly, especially in drywall or plaster ceilings. Pick anchors rated for the projector’s weight to prevent accidents.
Measuring Tools
Accurate measurements are key for proper placement. Use a tape measure to check distances and heights. A pencil helps mark drill spots clearly. A level tool ensures the mount is perfectly horizontal. These tools guarantee your projector hangs straight and works well.
Credit: www.homedepot.com
Preparing The Ceiling Surface
Preparing the ceiling surface is a crucial part of hanging your projector safely and securely. Skipping this step or rushing through it can lead to poor installation and even damage to your ceiling or projector. Before you grab your drill, you need to understand where and how to fix the mount so it holds steady over time.
Locating Ceiling Joists
Ceiling joists are the wooden beams that support your ceiling’s weight. Finding these is key because they provide the strongest anchor points for your projector mount. You can locate joists using a stud finder or by tapping gently and listening for solid spots versus hollow sounds.
Joists are usually spaced 16 or 24 inches apart. Marking their exact positions helps avoid drilling into drywall alone, which won’t support the projector’s weight. Have you checked your ceiling type yet? Knowing this saves you from unnecessary repairs later.
Marking Drill Points
Once you find the joists, mark the exact spots where you’ll drill. Use a pencil and a level to ensure your marks are straight and aligned. Precise drill points prevent wobbly mounts and uneven projector angles.
Keep in mind the size of the mounting bracket and the projector’s weight. Your drill points should match the bracket’s holes perfectly. Double-checking now means fewer surprises when you start mounting.
Ensuring Stability
Stability depends on using the right anchors and screws for your ceiling type. For wooden joists, heavy-duty wood screws work best. If your ceiling has metal framing, you’ll need special anchors designed for metal.
After drilling, test the mount’s firmness by gently pulling on it before attaching the projector. If it feels loose, reassess your drill points or hardware choice. Would you want your expensive projector falling because of weak support? Taking time here prevents accidents and costly fixes.
Installing The Projector Mount
Secure the mount firmly to a ceiling stud for stability. Attach the projector carefully, ensuring all screws are tight. Adjust the angle to align the image perfectly on your screen.
Installing the projector mount requires precision and careful planning. Proper installation ensures clear projection and prevents damage. This part of the process is crucial for optimal viewing experience. Follow these simple steps to securely install your projector mount.Drilling And Securing Mount
Start by marking the drill spots on the ceiling. Use a pencil or marker for accuracy. Ensure your marks align with the mount’s holes. Double-check your measurements for precision. Once marked, drill holes using a suitable drill bit. The holes must match the size of your mount screws. Insert anchors into the drilled holes. These provide extra support and prevent the mount from loosening. Ensure the anchors fit snugly for maximum stability.Attaching Mount To Ceiling
Align the mount with the drilled holes. Hold it steady and insert screws into the anchors. Tighten screws using a screwdriver. Make sure they are firmly in place. Avoid overtightening to prevent damage. Check each screw for secure attachment. The mount should sit flush against the ceiling. This ensures even weight distribution.Double-checking Stability
Test the mount’s stability. Gently wiggle it to check for movement. It should feel firm and secure. Inspect each screw and anchor. Ensure nothing is loose or wobbly. This step prevents future issues. A stable mount keeps your projector safe. Consider additional support if necessary. Regular checks maintain long-term stability.
Credit: www.amazon.com
Attaching Projector To Mount
Attaching the projector to the mount is a critical step. It ensures the device stays secure and works properly. This process involves fixing the mount brackets, securing the projector, and adjusting its angle. Proper attachment helps avoid damage and ensures clear image projection.
Aligning Mount Brackets
Start by matching the mount brackets to the projector’s mounting holes. Check the manual for exact hole locations. Use the screws provided with the mount or projector. Tighten screws just enough to hold brackets in place but still allow adjustment. Make sure brackets are level and parallel to the projector’s body.
Securing Projector
Lift the projector carefully and place it onto the ceiling mount. Align the bracket holes with the mount hooks or screws. Use bolts or locking screws to fasten the projector firmly. Double-check that all screws are tight. Avoid over-tightening to prevent damage to the projector or mount.
Adjusting Tilt And Rotation
Adjust the projector’s tilt to align the image with the screen. Use the mount’s tilt adjustment knobs or screws for this. Rotate the projector left or right to center the image. Lock the adjustments firmly once the image looks perfect. Small tweaks here can greatly improve viewing experience.
Cable Management Tips
Managing cables neatly is crucial when hanging a projector from the ceiling. Proper cable management keeps your setup tidy and protects cables from damage. It also improves the room’s appearance and avoids tripping hazards. Follow these tips to keep cables hidden, safe, and easy to reach.
Hiding Cables
Conceal cables along walls or ceilings to keep them out of sight. Use adhesive clips to guide cables along corners or edges. Run cables through small holes in the ceiling or wall if possible. This method creates a clean look and avoids loose wires hanging down.
Using Cable Covers
Cable covers are plastic or fabric channels that hide cables effectively. Choose covers that match your wall or ceiling color for a seamless look. Install covers by snapping them over cables and securing them with screws or adhesive. They protect cables from dust and accidental pulls.
Ensuring Safety And Accessibility
Keep cables away from heat sources or sharp edges to prevent damage. Leave enough slack in cables to allow projector movement or future adjustments. Use cable ties or Velcro straps to bundle excess cable length neatly. Arrange cables so you can easily unplug or service the projector without hassle.
Testing And Adjusting The Setup
Test the projector’s image by turning it on and adjusting the focus and position. Move the projector slightly to center the picture on the screen. Check the brightness and clarity, then tighten all screws to secure the setup.
After successfully mounting your projector to the ceiling, the next step is essential. Testing and adjusting the setup ensures the best viewing experience. Proper alignment, focus, and troubleshooting are crucial in this phase. By following these steps, you can enjoy sharp visuals and optimal performance.Powering On And Aligning Image
Start by powering on the projector. Ensure all connections are secure. Adjust the projector’s position for the correct image alignment. Use the keystone correction feature to get a straight image. Check if the image is centered on the screen. A centered and aligned image offers the best viewing quality.Fine-tuning Focus And Position
Adjust the focus ring until the image is clear. A sharp image enhances viewing pleasure. Slightly move the projector if necessary. Small adjustments can make a big difference. Ensure the image fills the screen properly. Proper positioning prevents distortion and improves clarity.Troubleshooting Common Issues
If the image is blurry, check the focus and lens. Ensure the projector is at the correct distance from the screen. If the image is tilted, adjust the keystone settings. Double-check all connections for loose cables. Regular maintenance avoids frequent issues and ensures long-term performance.Frequently Asked Questions
How Do I Choose The Right Projector Mount?
Select a mount compatible with your projector’s size and weight. Ensure it supports ceiling installation and allows angle adjustments for perfect alignment.
What Tools Are Needed To Hang A Projector From Ceiling?
You’ll need a drill, screwdriver, stud finder, measuring tape, pencil, and level. These tools help secure the mount and ensure proper positioning.
How High Should A Projector Be Mounted On Ceiling?
Mount the projector at a height that aligns with your screen size. Typically, 6 to 8 feet high ensures optimal image projection and viewing comfort.
Can I Install A Ceiling Mount Without Studs?
Installing without studs is risky. Use heavy-duty anchors designed for drywall or consult a professional for secure mounting and safety.
Conclusion
Hanging a projector from the ceiling is a smart choice for better viewing. Choose a strong spot and use the right tools. Measure carefully to get the perfect angle and height. Secure the mount tightly to keep the projector stable.
Take time to connect all cables neatly. Adjust the projector lens for a clear picture. This setup keeps your space clean and your image sharp. Enjoy your movies or presentations with ease and comfort. Small effort now saves big hassle later.
Easy, safe, and effective.