
Are you tired of sitting all day while working on your laptop? A standing desk can change the way you work and boost your energy, focus, and health.
The best part? You don’t need to spend a fortune or buy complicated equipment. In this guide, you’ll learn simple, practical steps to create your own standing desk using things you already have. Ready to feel more active and productive?
Keep reading to discover how easy it is to transform your workspace for good.
Credit: www.autonomous.ai
Benefits Of A Standing Desk
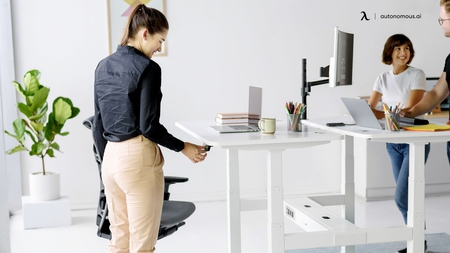
Standing desks offer more than just a change in posture—they can transform your workday and health. Switching between sitting and standing helps keep your body active and your mind sharp. You might be surprised how much this simple change improves your focus and energy levels.
Improved Posture And Reduced Back Pain
Sitting for long hours can strain your back and neck. Using a standing desk encourages better posture by aligning your spine naturally. Many people notice less discomfort and fewer aches after switching to standing while working.
Increased Energy And Productivity
Standing keeps your blood flowing and reduces feelings of sluggishness. You may find it easier to stay alert and finish tasks faster. Have you ever felt that mid-afternoon slump? Standing could be the simple fix you need to power through it.
Burn More Calories Throughout The Day
Even small movements while standing burn more calories than sitting. This can add up over time and support your weight management goals. Think about how a few extra calories burned daily can impact your health long term.
Encourages Movement And Reduces Health Risks
A standing desk makes it easier to take short breaks and stretch regularly. This breaks up long periods of inactivity, lowering the risk of health issues like heart disease and diabetes. How often do you currently move during your workday?
Customizable To Your Needs
You can adjust your standing desk height to fit your body perfectly. This flexibility helps prevent strain on wrists, neck, and eyes. A setup that fits you well makes work more comfortable and enjoyable.
Choosing The Right Location
Choosing the right location for your standing desk is important for comfort and productivity. The spot affects your focus, posture, and how often you want to stand or sit. Picking a good place helps you use your desk more often and avoid distractions.
Consider Natural Light And Glare
Place your desk near a window for natural light. It reduces eye strain and boosts mood. Avoid direct sunlight on your screen to stop glare. Use curtains or blinds if needed to control light.
Check Available Space
Choose a spot with enough room for your desk and movement. You need space to adjust your desk height and move freely. Avoid cramped corners or busy areas that limit your motion.
Think About Power Outlets
Your laptop and accessories need power. Pick a location close to electrical outlets to keep cables tidy. Use cable organizers to prevent tripping hazards and clutter.
Minimize Noise And Distractions
Find a quiet place to help your focus. Avoid spots near loud appliances or busy walkways. Noise can distract and reduce work quality.
Ensure Good Ventilation
Choose a well-ventilated area to stay comfortable. Fresh air helps you stay alert and reduces fatigue. Avoid stuffy or hot rooms that cause discomfort.
Materials Needed
For a DIY standing desk, gather a sturdy table or adjustable platform, laptop stand, and ergonomic chair. Add cable organizers and a desk mat for a tidy workspace.
Creating your own standing desk for a laptop can be an exciting DIY project that transforms your workspace into a more ergonomic and comfortable environment. The key to success lies in selecting the right materials. With the right components, you can construct a sturdy and functional desk that meets your needs. Let’s explore the essential materials needed for building your perfect standing desk.Wooden Planks Or Boards
Wooden planks or boards serve as the primary surface for your desk. Choose a durable wood like pine or oak for longevity. Consider the size based on the space available and how much room you need for your laptop and other essentials. Opt for smooth, finished wood to prevent splinters and ensure a professional look.Adjustable Desk Legs
Adjustable desk legs are crucial for flexibility in height. These can be purchased online or at local hardware stores. Look for legs that are easy to install and adjust. This feature allows you to customize the desk height to suit your posture, promoting better health and productivity.Screws And Fasteners
Screws and fasteners are necessary to secure the desk components. A variety pack with different sizes can be handy, as you might need different lengths for various parts. Ensure they are compatible with the wood and metal you are using to provide stability and prevent wobbling.Drill And Screwdriver
A drill and screwdriver are essential tools for assembling the desk. They help in making precise holes and securing screws tightly. If you don’t own these tools, they can often be rented from hardware stores. Make sure to have a few spare drill bits on hand, as they can wear out quickly.Measuring Tape And Level
Accuracy is key in any DIY project. A measuring tape ensures you cut wood to the correct dimensions, while a level helps to keep your desk even. These tools are vital for avoiding a crooked workspace, which can lead to discomfort over time.Sandpaper
Sandpaper smooths out any rough edges on your wooden planks. This not only enhances the appearance but also prevents potential injuries. A medium-grit sandpaper is usually sufficient for this task, but you might want a finer grit for a smoother finish.Decorative Elements (optional)
Decorative elements add a personal touch to your desk. Consider adding paint, varnish, or decorative knobs. These small details can make your desk more inviting and reflect your personal style. Why not make your workspace a place you love to be? As you gather these materials, think about how each component will contribute to your ideal desk setup. Are you choosing elements that will enhance your productivity and comfort?
Credit: www.amazon.com
Measuring Ideal Desk Height
Measuring the ideal desk height is key to comfort while using a standing desk. The right height helps prevent strain on your neck, shoulders, and wrists. It also boosts focus and productivity during work.
Each person’s body is different, so the desk height should match your own measurements. A well-fitted desk encourages good posture and reduces fatigue.
Find Your Elbow Height
Stand straight with your arms relaxed at your sides. Bend your elbows to about 90 degrees. Measure the distance from the floor to your elbows. This measurement is the starting point for your desk height.
Consider Your Keyboard And Mouse Position
The desk surface should keep your keyboard and mouse at or just below elbow height. This keeps your wrists straight and avoids strain. Your forearms should be parallel to the floor when typing.
Adjust For Your Laptop Screen
The top of your laptop screen should be at eye level. This prevents neck bending and eye strain. Use a laptop stand or books to raise the screen if needed.
Use A Simple Measurement Chart
| Height (inches) | Suggested Desk Height (inches) |
|---|---|
| 5’0″ – 5’2″ | 36 – 38 |
| 5’3″ – 5’6″ | 38 – 40 |
| 5’7″ – 5’10” | 40 – 42 |
| 5’11” – 6’2″ | 42 – 44 |
| 6’3″ and above | 44 – 46 |
Test And Fine-tune Your Desk Height
Try standing at your desk for a few minutes. Check if your arms and neck feel relaxed. Adjust the height up or down in small steps. Find the spot where you feel most comfortable.
Simple Diy Desk Designs
Creating a standing desk for your laptop doesn’t have to be complicated or expensive. Simple DIY desk designs can transform your workspace quickly using items you already have at home. These setups not only save money but also give you flexibility to adjust your desk height as needed.
Stacked Books Method
Using stacked books is the easiest way to raise your laptop to a comfortable standing height. Gather sturdy books of similar sizes to create a stable platform. Place your laptop on top, and adjust the stack until it feels right for your posture.
One tip is to use hardcover books because they provide better support. If you find the height too high or low during your work, just add or remove a book. This method is perfect if you want a quick fix without buying anything extra.
Adjustable Box Platform
An adjustable box platform gives you more control over the desk height. Find a few boxes or storage containers that fit well together. Stack them and secure with tape or clips, so they don’t slip during use.
You can add a flat board or tray on top to place your laptop securely. The beauty of this setup is how easy it is to change the height by swapping or removing boxes. Plus, you can store office supplies inside the boxes to keep your desk tidy.
Wooden Crate Setup
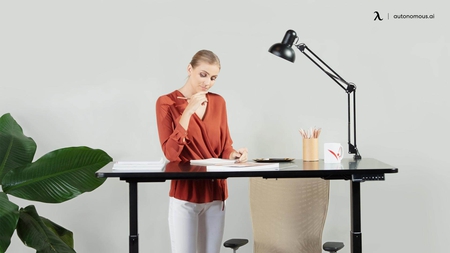
Wooden crates offer both style and functionality as a standing desk base. Turn one or two crates upside down to create a sturdy platform. Place a flat board or thick plywood on top for a smooth surface to hold your laptop.
This setup can be customized with paint or cushions for extra comfort. Wooden crates also allow for storage under your desk, which is great if you have limited space. Have you tried using crates for furniture before? They can surprise you with their versatility.
Credit: www.autonomous.ai
Assembling Your Standing Desk
Assembling your standing desk for a laptop is a straightforward process. It requires some basic tools and a bit of patience. Following clear steps helps create a sturdy workspace that suits your height and comfort. You can customize the desk to fit your needs and space easily.
Gathering Necessary Tools And Materials
Start by collecting all parts for the desk. Common items include:
- Desk surface (wood or sturdy board)
- Adjustable legs or risers
- Screws and bolts
- Screwdriver and wrench
- Measuring tape
Having everything ready avoids interruptions during assembly.
Preparing Your Workspace
Choose a clean, flat area to build the desk. This space should be large enough to hold all parts comfortably. Clear away any clutter to prevent losing small pieces. Good lighting helps see screws and bolts clearly.
Attaching The Legs To The Desk Surface
Align the legs with the desk surface corners. Use screws or bolts to secure them tightly. Check that all legs are straight and even. Tighten each screw slowly to avoid stripping or damage.
Adjusting The Desk Height
Set the desk height based on your standing position. A good rule: elbows should bend at 90 degrees when typing. Adjustable legs or risers let you customize this easily. Test the height before final tightening.
Ensuring Stability And Safety
Press down on the desk to check for wobbling. Tighten any loose screws or bolts. Add non-slip pads under the legs if needed. Stability prevents accidents and improves comfort.
Cable Management Tips
Managing cables around your standing desk setup can transform your workspace from chaotic to clean. Without a plan, cords tangle and clutter your area, making it harder to focus or adjust your desk height. Good cable management keeps your laptop and accessories connected without the mess.
Use Cable Clips And Holders
Cable clips keep cords secured to the edge of your desk or underneath it. They prevent cables from dangling and getting tangled as you move your desk up or down. You can easily add these clips yourself; just stick them where cables naturally run.
Try grouping cables by type—power cords in one clip, USB cables in another. This separation makes it faster to unplug or switch devices without disturbing other connections.
Install A Cable Tray Under Your Desk
A cable tray attaches beneath your desk and hides power strips and excess cables. It keeps everything off the floor and out of sight. This setup also reduces dust collection around your cords, which often slows down devices.
When I added a cable tray, my floor space opened up, and I stopped tripping over wires. Consider the tray size based on how many devices you use to avoid overcrowding.
Label Your Cables
Labeling cables helps you quickly identify what goes where, especially when unplugging or troubleshooting. Use simple tags or colored tape to mark each cable near the plug and device ends.
This small step saves time and avoids confusion, particularly if you share your workspace. How many times have you unplugged the wrong device? Labels prevent that hassle.
Choose The Right Cable Lengths
Extra-long cables add unnecessary clutter and loops. Use cables that fit your desk height and distance to power sources. Measure before buying to get cables that are just right.
Shorter cables reduce the need to coil or hide excess length, making your desk look cleaner. If you already have long cables, try bundling the extras neatly with Velcro straps.
Ergonomic Adjustments
Ergonomic adjustments play a key role in making a standing desk comfortable and healthy for your body. Proper setup helps reduce strain and fatigue during work hours. Small changes can improve posture and boost focus. Pay attention to screen, keyboard, mouse, and foot placement. These adjustments support natural body positions and prevent pain.
Screen Positioning
Place your laptop screen at eye level to avoid neck bending. Use a laptop stand or stack books under the laptop. Keep the screen about an arm’s length away. Tilt the screen slightly backward to reduce glare. This keeps your head straight and your eyes relaxed.
Keyboard And Mouse Placement
Keep your keyboard and mouse close to your body. Your elbows should form a 90-degree angle when typing. Place the keyboard flat or with a slight negative tilt. Use an external keyboard and mouse for better hand positioning. This setup prevents wrist strain and keeps your shoulders relaxed.
Foot Support Ideas
Stand with your weight evenly on both feet. Use a footrest to shift your weight and reduce pressure on your legs. A small stool or a stack of sturdy books works well. Change foot positions often to avoid stiffness. Proper foot support improves circulation and comfort during long standing sessions.
Maintaining Your Diy Desk
Maintaining your DIY standing desk is key to keeping it functional and safe over time. A well-cared-for desk not only lasts longer but also ensures your workspace remains comfortable. Regular attention can prevent small issues from becoming costly repairs.
Cleaning And Dusting Your Desk
Dust and dirt can build up quickly, especially around moving parts or joints. Use a soft cloth to wipe down all surfaces weekly. Avoid harsh chemicals—mild soap and water usually do the job well.
Don’t forget to clean underneath and behind the desk. These spots often collect dust that can affect your laptop’s cooling if airflow is blocked.
Checking For Loose Screws And Joints
Every few weeks, inspect your desk for any loose screws or unstable joints. Tighten them gently with the right tools to avoid stripping the threads.
Have you noticed any wobbling or creaking? That’s a clear sign your desk needs some quick maintenance to stay sturdy.
Protecting The Surface From Damage
Consider using a desk mat or protective pads under your laptop to prevent scratches and spills. If you used wood for your desk, applying a light coat of oil or sealant can keep it looking fresh and prevent warping.
Think about how you use your desk daily—could a simple addition like a coaster or keyboard tray extend its life?
Lubricating Moving Parts
If your desk has adjustable height features or hinges, applying a small amount of lubricant can keep movements smooth. Use a silicone-based spray or a light machine oil, avoiding excess to prevent dust buildup.
Try moving your desk through its full range of motion monthly to spot any stiffness early.
Storing Your Desk When Not In Use
If you need to store your DIY desk temporarily, keep it in a dry, cool place to avoid moisture damage. Cover it with a breathable cloth to protect against dust while allowing air circulation.
What’s the best way to store your desk without losing any parts? Label small components and keep them together to save time when you set it up again.
Frequently Asked Questions
What Materials Do I Need To Build A Standing Desk?
You need a sturdy tabletop, adjustable legs or risers, screws, and a drill. Choose materials that support your laptop’s weight safely.
How High Should A Standing Desk For Laptop Be?
The desk height should allow your elbows to be at a 90-degree angle. Your laptop screen should be at eye level to reduce neck strain.
Can I Convert My Existing Desk Into A Standing Desk?
Yes, use adjustable risers or a desktop converter. These solutions are affordable and easy to install without major modifications.
Is A Standing Desk Better For Laptop Use?
Standing desks improve posture and reduce back pain. They encourage movement and can boost productivity when used correctly.
Conclusion
Creating a standing desk for your laptop can improve comfort and health. It only takes a few tools and simple steps. You can adjust the height to fit your needs. Standing while working helps reduce back pain and boosts focus.
Try making your own desk at home today. Small changes make a big difference in your workspace. Enjoy a more active and productive workday with your new setup.