
Are you struggling to connect your USB mouse to your Mac? You’re not alone.
Many Mac users find this simple task confusing at first. But don’t worry—connecting your USB mouse is easier than you think. In this guide, you’ll discover clear, step-by-step instructions that anyone can follow. By the end, you’ll be using your mouse smoothly and efficiently.
Keep reading to unlock the quick tips that will make your Mac experience more comfortable and productive.

Credit: www.amazon.ca
Check Mac Usb Ports
Before connecting your USB mouse to your Mac, it’s essential to check which USB ports are available. Macs have evolved over the years, and the type of USB ports they come with can vary significantly. Knowing what ports your Mac has will save you time and prevent frustration when trying to connect your device.
Identify Available Ports
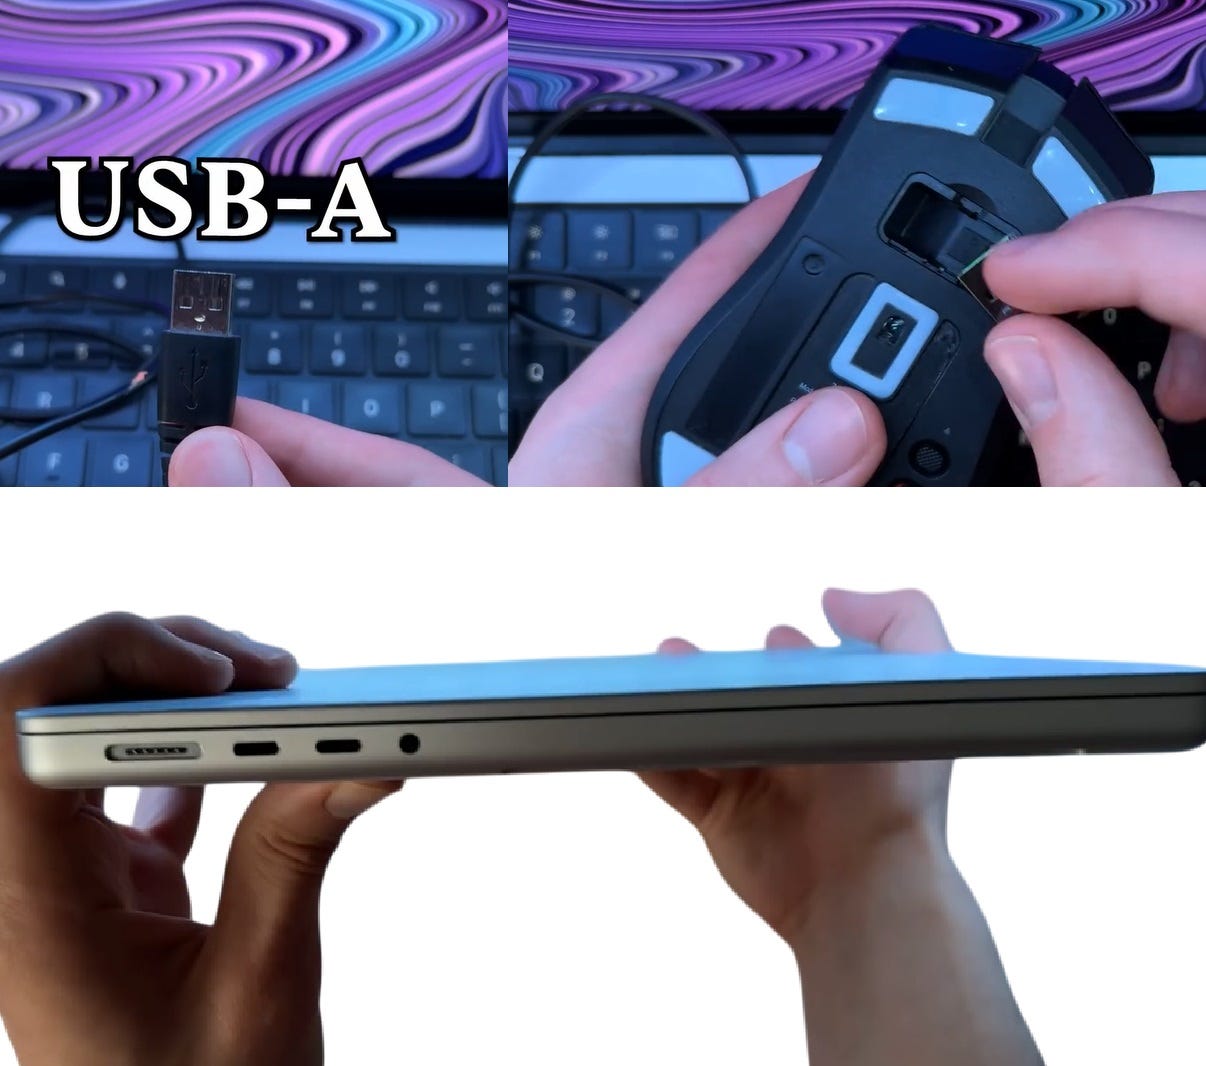
Look closely at the sides or back of your Mac to see the types of USB ports it offers. Older models often have standard USB-A ports, which are rectangular and familiar. Newer Macs typically feature USB-C or Thunderbolt ports, which are smaller, oval-shaped, and reversible.
If you’re unsure, you can check your Mac’s specifications by clicking the Apple menu, selecting “About This Mac,” and then viewing the “System Report.” Under the “Hardware” section, click on “USB” to see a detailed list of all available ports. This helps you confirm exactly what you have before attempting to connect anything.
Use Usb-c Adapters If Needed
If your Mac only has USB-C ports but your mouse uses a traditional USB-A connector, you will need a USB-C to USB-A adapter. These adapters are affordable and easy to find online or in electronics stores. Having one handy ensures you can use older peripherals without hassle.
Remember, not all adapters support all USB functions equally. Some cheaper adapters may only support charging or data transfer but not input devices like mice. Double-check the adapter’s specifications to ensure it supports USB peripherals fully.
Have you ever tried to connect a device only to realize you needed an adapter? Knowing your port types upfront can spare you that common tech headache.
Credit: discussions.apple.com
Prepare Your Usb Mouse
Preparing your USB mouse before connecting it to your Mac can save you time and prevent frustration. It’s important to make sure your mouse and Mac are compatible and that the USB connector is in good condition. Taking a few moments to check these details ensures a smooth setup experience.
Inspect The Usb Connector
Start by examining the USB connector on your mouse. Look for any visible damage like bent pins, cracks, or dirt that could interfere with the connection. A damaged connector might cause your Mac not to recognize the mouse or lead to intermittent disconnections.
If you notice any dust or debris, gently clean the connector using a soft brush or compressed air. Avoid using liquids, as they can damage the electronics inside. A clean and intact USB connector is essential for a reliable connection.
Ensure Mouse Compatibility
Not every USB mouse will work seamlessly with your Mac. Check the packaging or the manufacturer’s website to confirm the mouse supports macOS. Some gaming mice or advanced models may require specific drivers or software to function properly.
Have you ever plugged in a mouse only to find it doesn’t move the cursor? That’s often because the device isn’t compatible or lacks the necessary drivers. If your mouse is older, it’s a good idea to check if macOS supports it or if you need to download additional software.
Connect The Mouse To Mac
Connecting a USB mouse to your Mac is usually straightforward, but a few details can make the process smoother and safer for your device. Whether your Mac has multiple USB ports or you need to use a hub, understanding the right way to connect can save you hassle and protect your hardware. Let’s look at how to properly plug in your mouse and use USB hubs without risking damage.
Plugging Into Usb Port
Start by locating a free USB port on your Mac. These ports are typically on the side or back, depending on your model. Gently insert the USB connector of your mouse straight into the port without forcing it.
Make sure the connector is aligned correctly—USB plugs only fit one way. If it doesn’t slide in smoothly, flip it over and try again. Once connected, your Mac should recognize the mouse instantly, and you’ll see the cursor move as you move the mouse.
Using Usb Hubs Safely
If your Mac has limited USB ports, a USB hub can expand your options. However, not all hubs are created equal. Choose a powered hub with its own power source to ensure stable connections and protect your Mac from power surges.
Avoid plugging too many high-power devices into one hub. This can lead to connection drops or even hardware damage. Have you noticed your mouse lagging or disconnecting when other devices are plugged into the same hub? That’s a sign to invest in a better-powered hub or connect devices directly.
Always unplug the hub safely by ejecting it through your Mac’s system controls before disconnecting the cable. This helps prevent data loss and hardware issues. Taking these small precautions keeps your mouse and Mac running smoothly.
Configure Mouse Settings
Configuring mouse settings on your Mac can enhance your experience. It allows you to tailor the mouse’s responsiveness and functionality to your needs. Dive into the settings to make your mouse work just right for you.
Adjust Tracking Speed
Tracking speed determines how quickly the pointer moves across the screen. Open System Preferences and select ‘Mouse’. Drag the slider under ‘Tracking Speed’ to adjust. Experiment with different speeds to find the perfect balance. This makes navigation smoother and more efficient.
Customize Buttons
Customizing mouse buttons can improve productivity. In System Preferences, click on ‘Mouse’. Look for ‘Secondary Click’ to enable right-click functionality. Assign different actions to each button as needed. This enhances the mouse’s versatility for various tasks. Explore options like ‘Mission Control’ or ‘Dashboard’. Tailor the setup to suit your workflow. Remember, customization offers a personalized experience.
Troubleshoot Connection Issues
Connection issues between your USB mouse and Mac can be frustrating, especially when you need to get work done quickly. Instead of giving up or rushing to buy a new mouse, try troubleshooting the problem step-by-step. Identifying the root cause can save you time and money while ensuring your device works smoothly again.
Check For Hardware Problems
First, inspect the USB mouse and the port on your Mac. Sometimes, dirt or debris can block the connection, so clean the USB plug gently with a dry cloth. Also, try plugging the mouse into a different USB port to rule out a faulty port.
If your mouse has a detachable cable, swap it with another compatible one if possible. You can also test the mouse on another computer to see if it works there. If it doesn’t, the issue is likely with the mouse itself.
Have you ever overlooked a loose connection? Double-check that the USB plug is fully inserted and not wobbly. A secure connection is essential for proper recognition by your Mac.
Reset Mac Usb Preferences
Your Mac stores USB device settings that sometimes get corrupted, causing connection problems. Resetting these preferences can help your system recognize the mouse again.
To reset USB preferences, you can restart your Mac’s System Management Controller (SMC). This resets hardware-related settings, including USB ports. The process varies by Mac model, so it’s important to follow the correct steps for your device.
- Shut down your Mac.
- Press and hold the Shift + Control + Option keys and the power button simultaneously for about 10 seconds.
- Release all keys and press the power button to turn your Mac back on.
After the reset, reconnect your USB mouse and check if it works. If issues persist, consider resetting the NVRAM/PRAM as well, since these store system settings that might affect USB devices.
Use Third-party Software
Using third-party software can improve your USB mouse experience on a Mac. These tools offer features that macOS may not support by default. They help customize buttons, sensitivity, and scrolling behavior to fit your needs. Installing such software is simple and adds more control over your device.
Enhance Functionality
Third-party apps allow you to change mouse settings beyond the standard options. You can adjust pointer speed and acceleration easily. Some programs support smooth scrolling and customizable gestures. This makes navigation more fluid and comfortable. It also helps if your mouse has extra buttons that macOS does not recognize.
Manage Advanced Features
Advanced settings include assigning actions to extra mouse buttons. You can create shortcuts for common tasks like copy, paste, or switching apps. Some software supports profiles for different apps or games. This means your mouse reacts differently depending on what you use. You can also tweak DPI settings for better precision in tasks or games.
Credit: medium.com
Frequently Asked Questions
How Do I Connect A Usb Mouse To Mac?
To connect a USB mouse to Mac, plug the USB cable into your Mac’s USB port. Your Mac will automatically recognize the device, and the mouse should work immediately without extra setup.
Can I Use A Usb Mouse Without Adapters On Mac?
Most modern Macs have USB-C ports, so you may need a USB-C to USB-A adapter. Older Macs with USB-A ports can connect USB mice directly without adapters.
How To Fix A Usb Mouse Not Working On Mac?
Try unplugging and reconnecting the mouse. Restart your Mac if needed. Check System Preferences > Mouse to confirm settings and ensure the device is recognized.
Is A Wired Usb Mouse Better Than Bluetooth On Mac?
Wired USB mice offer a reliable, lag-free connection with no battery worries. Bluetooth mice provide wireless convenience but may experience occasional lag or battery issues.
Conclusion
Connecting a USB mouse to your Mac is simple and quick. Just plug the mouse into the USB port and wait a few seconds. Your Mac will recognize it right away. You can start using the mouse without extra steps.
This small device can make navigation easier and faster. No need to worry about settings or software. Enjoy smooth control and better comfort while working or browsing. A USB mouse works well with most Mac models. Try it yourself and see how easy it feels.