You’re ready to share your presentation or stream a video from your Chromebook, but the projector connection has you stuck. Don’t worry—connecting your Chromebook to a projector is easier than you think.
Whether you’re in a classroom, meeting room, or anywhere else, this guide will walk you through simple, clear steps to get your screen projected quickly. Keep reading, and you’ll be ready to impress your audience without any technical headaches.

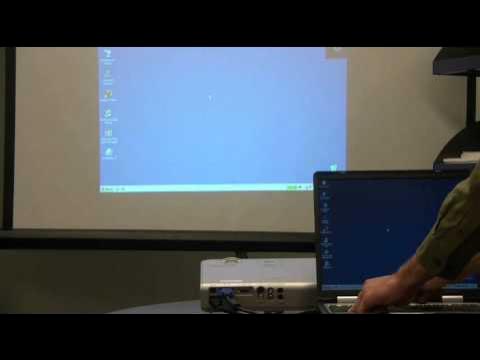
Credit: www.amazon.ca
Chromebook And Projector Compatibility
Connecting your Chromebook to a projector can seem tricky if you don’t first understand their compatibility. Knowing the types of ports and connections both devices support is essential before you start. This knowledge saves time and prevents frustration during presentations or movie nights.
Check Chromebook Ports
Look closely at your Chromebook’s sides to find the available ports. Most modern Chromebooks come with USB-C ports, which support video output. Older models might have HDMI or even VGA ports, though these are less common now.
If you only see USB-C ports, you’ll likely need an adapter to connect to older projectors. Remember, not all USB-C ports support video, so double-check your Chromebook’s specifications online or in the manual. Have you ever assumed a port would work, only to find out it doesn’t? Avoid that hassle by confirming this first.
Identify Projector Inputs
Projectors usually offer a mix of input options like HDMI, VGA, DVI, or USB. Check your projector’s input panel and note what types are available. This helps you decide if you need adapters or special cables.
For example, if your projector only has VGA input and your Chromebook has USB-C, you’ll need a USB-C to VGA adapter. Keep in mind some older projectors might not support digital signals directly, which can affect image quality. Have you checked your projector’s manual recently? It might hold the key to a smoother connection.
Wireless Vs Wired Connection Options
You can connect your Chromebook to a projector either wirelessly or with cables. Wired connections usually deliver more stable and high-quality video, ideal for important presentations. However, wires can be limiting if you want to move around or if cables aren’t handy.
Wireless options, like Chromecast or Miracast, let you project without cables, but they may introduce slight delays or require network setup. If your projector supports wireless casting, you could save yourself the hassle of cables. Do you prioritize convenience or reliability? Your answer will guide the best connection method for your needs.

Credit: camerastudio.app
Connecting Via Hdmi Cable
Connecting your Chromebook to a projector using an HDMI cable is one of the simplest and most reliable ways to display your screen. This method provides a stable connection with clear video and audio output. Let’s walk through how to do this effectively so your presentation or movie night goes smoothly.
Locate Hdmi Ports
First, find the HDMI port on your Chromebook. Most newer Chromebooks come with a built-in HDMI port, but some might require an adapter, especially if they have USB-C ports only.
Next, check the projector for its HDMI port. It’s usually labeled clearly and looks like a slightly wider USB slot.
Wondering what to do if your Chromebook lacks a standard HDMI port? A USB-C to HDMI adapter can bridge the gap without losing quality.
Plugging In The Cable
Take your HDMI cable and connect one end to your Chromebook’s HDMI port or adapter. Make sure it fits snugly to avoid signal issues.
Then, plug the other end into the projector’s HDMI port. A loose connection can cause flickering or no display at all.
After plugging in, power on your projector. Some models automatically switch to the HDMI input, but others may need you to select the input source manually.
Adjusting Display Settings
Once connected, open your Chromebook’s settings by clicking the time in the bottom-right corner, then selecting the gear icon.
Under “Device,” click on “Displays.” Here, you can choose how you want your screen to appear: mirrored (same image on both screens) or extended (use the projector as an additional screen).
Adjust the resolution if the image looks blurry or stretched. Have you noticed how small text or icons on the projector can make reading difficult? Tweaking resolution can fix that instantly.
Using Usb-c To Hdmi Adapter
Using a USB-C to HDMI adapter is a simple way to connect your Chromebook to a projector. Most modern Chromebooks have USB-C ports that support video output. This adapter changes the USB-C signal into HDMI, which projectors commonly use. It creates a clear and stable connection for your presentations or videos.
Selecting The Right Adapter
Choose an adapter that supports HDMI 2.0 or higher for better video quality. Check the Chromebook’s USB-C port to ensure it supports video output. Some adapters come with extra ports like USB or Ethernet. Pick one that fits your needs without adding clutter.
Connecting Adapter And Cable
Plug the USB-C end of the adapter into your Chromebook’s port. Connect an HDMI cable from the adapter to the projector. Make sure both connections are secure to avoid signal loss. Turn on the projector before starting the Chromebook for a smooth link.
Configuring The Display
Open your Chromebook’s settings and go to the “Displays” section. Detect the projector if it doesn’t appear automatically. Choose between “Mirror” to show the same screen or “Extend” to use the projector as a second display. Adjust resolution if the image looks blurry or stretched.
Connecting Wirelessly
Connecting wirelessly to a projector with a Chromebook is simple. Ensure both devices are on the same Wi-Fi network. Access the display settings on your Chromebook, select the projector, and enjoy seamless sharing.
Connecting wirelessly to a projector with your Chromebook is convenient. It allows for a more flexible setup without the hassle of cables. This method is ideal for classrooms, meetings, or any place where mobility is key. Wireless connections also help in maintaining a neat workspace. Before diving into specific methods, ensure your Chromebook and projector are compatible with wireless features.
Using Chromecast With Chromebook
Chromecast is a popular choice for streaming content wirelessly. It’s easy to use and compatible with most Chromebooks. Start by plugging the Chromecast into the projector’s HDMI port. Ensure both devices are on the same Wi-Fi network. Open the Chrome browser on your Chromebook. Click on the three-dot menu in the top-right corner. Select “Cast” from the dropdown menu. Choose your Chromecast device from the list. Your screen should now display on the projector.
Setting Up Miracast Or Other Wireless Methods
Miracast offers another way to connect wirelessly. First, confirm your projector supports Miracast. On your Chromebook, go to settings. Find the “Display” section. Look for wireless display options. Select Miracast or another available method. Follow on-screen instructions to connect. This method might require additional software, so check compatibility first.
Troubleshooting Wireless Connections
Wireless connections can sometimes have issues. If your Chromebook isn’t connecting, check Wi-Fi settings. Both devices must share the same network. Restart the Chromebook and projector. Update your Chromebook’s software. Sometimes outdated software causes problems. Check for interference from other devices. Move the projector closer to the Wi-Fi router if needed. Resetting your Chromecast or Miracast settings can also help.
Optimizing Display Settings
Optimizing display settings ensures your Chromebook and projector work well together. Proper settings make your presentation clear and professional. Adjusting resolution, choosing the right screen mode, and setting audio output are key steps.
Adjusting Resolution
Set the resolution to match the projector’s capabilities. Too high resolution can cause blurry images. Too low resolution may make content look pixelated. Open your Chromebook’s display settings to select the best resolution.
- Click the clock area and select “Settings.”
- Go to “Device” then “Displays.”
- Choose the resolution that fits the projector.
Try different resolutions until the image looks clear and sharp.
Extending Vs Mirroring Screens
Decide how you want to show your screen. Mirroring shows the same content on both screens. Extending creates a bigger workspace by using both screens separately. Mirroring is good for presentations. Extending helps when using notes or multiple apps.
- Open “Displays” in settings.
- Select “Mirror built-in display” to duplicate.
- Uncheck it to extend the screen.
Choose the option that fits your presentation style and needs.
Audio Output Settings
Sound may not play through the projector by default. Check audio settings to direct sound properly. Your Chromebook can send audio through its speakers, headphones, or the projector.
- Click the clock area and open “Settings.”
- Select “Audio” or “Sound.”
- Choose the output device, such as the projector.
Test audio after connecting to avoid silent presentations.
Troubleshooting Common Issues
Troubleshooting common issues can save time and prevent frustration. Connecting a Chromebook to a projector usually works smoothly. Still, some problems may occur. Knowing how to fix these quickly helps keep your presentation on track.
No Signal On Projector
This problem often happens due to connection errors. Check the cable is firmly plugged into both devices. Try a different HDMI or VGA cable if available. Confirm the projector input source matches the Chromebook’s output port. Restart both the Chromebook and projector to reset connections. Make sure the Chromebook is not in sleep mode or screen locked.
Display Not Mirroring Correctly
Incorrect display settings cause this issue. Open Chromebook display settings and select “Mirror” to show the same screen. Adjust the resolution to match the projector’s native resolution. Use the “Extend” option to use the projector as a second screen instead. Check the display arrangement and drag windows if needed. Restart the Chromebook if changes do not apply.
Audio Problems
Audio may not play through the projector’s speakers. Check the Chromebook’s sound output settings and select the projector as the audio device. Increase the volume on both the Chromebook and projector. Test with headphones to confirm Chromebook sound works. Use external speakers if the projector’s audio is weak or unavailable.
Tips For Smooth Presentations
Presenting with a Chromebook and projector can be simple and effective. Small steps help avoid common issues during your presentation. Clear visuals and smooth transitions keep your audience focused. Follow these tips to ensure everything runs without a hitch.
Preparing Your Chromebook
Close unnecessary tabs and apps to improve Chromebook speed. Update your Chromebook’s software for better compatibility. Connect any needed adapters or cables before you start. Organize your presentation files in an easy-to-find folder. Adjust your display settings for the best projector output.
Testing Connections Beforehand
Connect your Chromebook to the projector well before your presentation. Check the video and audio output to confirm they work. Test different cables or adapters to find the most reliable one. Use the Chromebook’s display settings to select the correct screen mode. Verify the projector’s input source matches your Chromebook connection.
Managing Power And Battery Life
Plug your Chromebook into power to avoid battery drain. Close background programs to save battery during the presentation. Keep a charger and spare adapter handy as a backup. Dim the screen brightness if the room lighting allows. Save your work frequently to prevent data loss.
Credit: www.tiktok.com
Frequently Asked Questions
How Do I Connect A Chromebook To A Projector?
Use an HDMI or VGA adapter to connect your Chromebook to the projector. Then, select the correct input source on the projector. Finally, press the “Ctrl” and “F4” keys to mirror or extend your display.
Can I Connect A Chromebook To A Projector Wirelessly?
Yes, you can connect wirelessly using Chromecast. Plug Chromecast into the projector, then cast your Chromebook screen via the Chrome browser’s cast option. Ensure both devices are on the same Wi-Fi network for a smooth connection.
Why Won’t My Chromebook Display On The Projector?
Check the cable connection, input source, and adapter compatibility. Make sure your Chromebook screen is set to mirror or extend mode using “Ctrl + F4. ” Restart both devices if needed to resolve any temporary glitches.
What Adapters Do I Need For Chromebook Projector Connection?
Most Chromebooks require a USB-C to HDMI or USB-C to VGA adapter. Choose the adapter based on your projector’s input ports. Using the correct adapter ensures a stable and high-quality connection without display issues.
Conclusion
Connecting a Chromebook to a projector is simple and quick. Use the right cable or wireless method for your setup. Check your Chromebook’s settings to ensure the display shows correctly. Adjust sound if needed for a better experience. Testing before your presentation saves time and stress.
With these steps, sharing your screen becomes easy and smooth. Now, you are ready to present confidently and clearly.