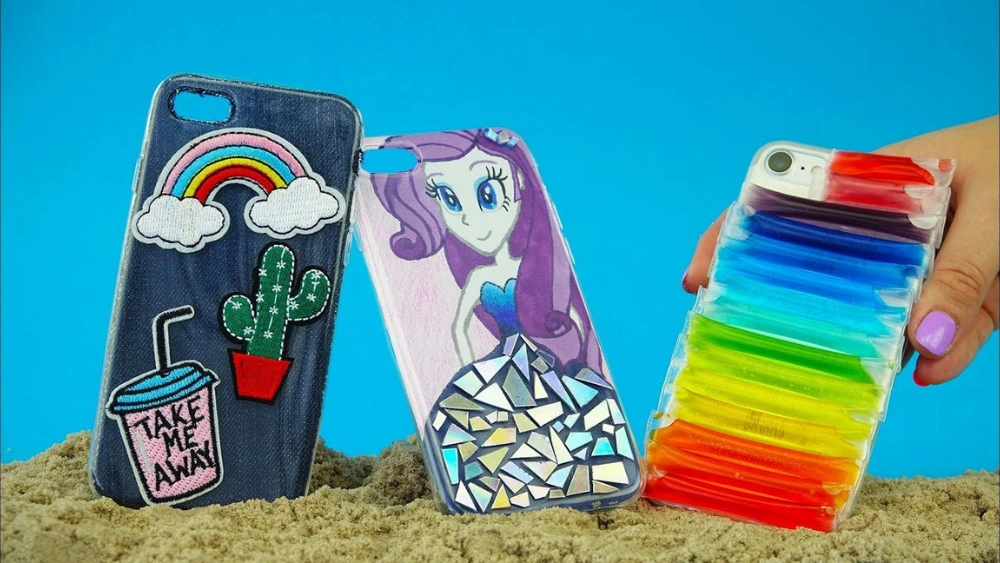
Are you tired of boring, store-bought phone cases that don’t show your style? Imagine having a unique case that reflects who you are, made by your own hands.
Creating your own phone case is easier than you think, and it gives you a chance to stand out from the crowd. You’ll discover simple, step-by-step ways to design a case that’s truly yours. Ready to turn your phone into a personal statement?
Keep reading, and let’s get started!
Credit: www.lemon8-app.com
Choosing The Right Phone Case
Choosing the right phone case is more than just picking a pretty design. It’s about matching your lifestyle, protecting your device, and expressing yourself. Before you start making your own phone case, you need to understand what options fit best for your needs.
Types Of Phone Cases
There are several types of phone cases, each serving different purposes. Slim cases add minimal bulk and keep your phone sleek, but they offer limited protection. Rugged cases provide heavy-duty protection, perfect if you’re prone to dropping your phone or work in a rough environment.
Wallet cases combine style and function by adding card slots, which is handy for carrying essentials without a bulky wallet. Clear cases let your phone’s original design shine through while still offering some defense.
Materials To Consider
The material you pick affects durability, feel, and protection level. Silicone cases are flexible and shock-absorbent, making them great for everyday drops. Hard plastic cases look polished but can crack under stress.
Leather offers a premium look and ages well but may not protect as much against impacts. TPU (thermoplastic polyurethane) cases strike a balance, offering flexibility and durability. Think about how you use your phone daily—do you often drop it, or is it mostly safe in your hand?
Sizing And Compatibility
Your phone case must fit your device perfectly to work properly. Even a slight misfit can block buttons, ports, or the camera lens. Check your phone model carefully and look for case dimensions that match it exactly.
Consider additional features like screen protectors or wireless charging compatibility. Will your case support these without removing it? Making your own case means you can customize these details, so don’t overlook sizing and functional compatibility.
Gathering Your Supplies
Gathering your supplies is the first step in making your own phone case. Having the right materials helps the process go smoothly. It also ensures your case looks good and lasts long. Focus on tools, decorative materials, and protective finishes. This will cover all you need for a custom phone case.
Basic Tools Needed
- Clear or plain phone case as a base
- Scissors or craft knife for cutting
- Ruler for measuring dimensions accurately
- Pencil or marker for marking designs
- Glue suitable for plastic or silicone
- Tweezers for placing small decorations
- Cutting mat or safe surface to work on
Decorative Materials
- Stickers or decals for easy customization
- Paints like acrylic or fabric paint for colors
- Glitter or rhinestones for sparkle effects
- Washi tape or decorative tape for patterns
- Small charms or beads for 3D decoration
- Photos or printed images for personal touch
- Markers or pens for drawing details
Protective Finishes
- Clear sealant spray to protect paint and decorations
- Mod Podge or similar glue to coat the surface
- Epoxy resin for a hard, glossy finish
- Matte finish spray for a smooth, non-shiny look
- UV protectant spray to prevent fading
Design Ideas For Custom Cases
Designing your own phone case lets you showcase your personality and creativity in a way store-bought cases can’t match. It’s not just about protection—it’s about making your phone an extension of your style. How you choose to decorate your case can turn a simple accessory into a statement piece.
Using Paint And Markers
Paint and markers give you full control over your phone case’s look. Acrylic paint works well on most plastic cases and dries quickly, letting you layer colors for bold or subtle effects.
Try using fine-tip permanent markers for detailed patterns or doodles. You can create geometric designs, abstract art, or even your favorite quotes in neat handwriting.
Have you ever thought about mixing different colors to create a gradient or ombre effect? It’s easier than you might expect and adds a professional touch without needing special skills.
Incorporating Photos And Prints
Adding photos or printed images can make your phone case deeply personal. Print your favorite picture on glossy photo paper, then use clear adhesive or decoupage glue to attach it smoothly.
Consider using patterned scrapbook paper or fabric prints for a unique background. Layer them with transparent glue to protect the design and keep it durable.
What memories or themes do you want to carry everywhere you go? Capturing those on your case keeps them close and sparks conversations wherever you use your phone.
Adding Textures And Embellishments
Textures bring your phone case to life beyond flat designs. Small gems, beads, or fabric patches add a tactile dimension that’s fun to touch and visually interesting.
Try gluing on tiny studs or sequins in a pattern for a subtle sparkle. If you prefer something softer, attach a piece of felt or leather for a cozy feel.
How can you balance practicality with decoration? Choose embellishments that won’t easily catch on pockets or scratch surfaces, so your case stays beautiful and functional.
Credit: www.tiktok.com
Step-by-step Diy Process
Creating your own phone case is simple and fun. This step-by-step DIY process guides you through making a unique case. Each stage prepares the case for a lasting and beautiful design.
Preparing The Case Surface
Start with a plain phone case. Clean it using rubbing alcohol to remove dirt and oils. Let it dry completely. Sand the surface lightly with fine-grit sandpaper. This helps the design stick better. Wipe away dust with a soft cloth.
Applying Your Design
Choose your design type: paint, stickers, or printed images. For painting, use acrylic paint and small brushes. Apply thin, even layers for smooth coverage. Let each layer dry before adding another.
If using stickers or printed images, arrange them on the case first. Use clear glue or decoupage medium to fix them in place. Press firmly to remove air bubbles and wrinkles.
Sealing And Drying
Protect your design with a clear sealant. Use spray or brush-on varnish suitable for plastic. Apply thin coats evenly. Allow each coat to dry fully before the next. This prevents smudging and adds shine.
Let the case dry for 24 hours in a dust-free area. This ensures the design is fully set and durable. Your custom phone case is now ready to use.
Tips For Durable And Long-lasting Cases
Choosing strong materials like silicone or TPU helps create a tough phone case. Sealing edges well prevents dust and water damage. Adding a soft inner layer protects your phone from scratches and drops.
Creating your own phone case can be a fun and rewarding project, but ensuring that it stands the test of time requires thoughtful planning and execution. Whether you’re crafting a personalized design or experimenting with materials, understanding how to make your phone case durable is key. Here are some practical tips to help you achieve a long-lasting, resilient phone case.
Choosing The Right Sealant
Selecting the appropriate sealant can make or break the longevity of your phone case. Consider using a clear, waterproof sealant that dries quickly and is compatible with the materials you’ve chosen. Brands like Mod Podge or Krylon offer versatile options that can work with plastic, leather, or fabric. A sealant can protect your design from daily wear and tear, ensuring that colors stay vibrant and the surface remains smooth. Test a small area first to make sure the sealant doesn’t alter the appearance of your design.
Maintenance And Care
Regular maintenance will keep your phone case looking fresh and functional. Make it a habit to clean the case weekly with a gentle cleanser. Avoid harsh chemicals that might damage the surface or your artwork. If your case is made of fabric, consider treating it with a fabric protector spray. This will help repel stains and keep it looking new. How often do you check for small cracks or signs of wear? Catching these early can prevent bigger issues down the road.
Avoiding Common Mistakes
Some pitfalls can undermine your efforts in creating a durable phone case. One common mistake is overloading the case with embellishments. While they can add flair, too many can make the case heavy and prone to damage. Another mistake is neglecting the edges. These are the most vulnerable parts of your phone case, so reinforce them with extra sealant or padding. Make sure the case fits snugly around your phone. A loose fit can lead to scratches and reduce the protective qualities of the case. Have you ever thought about how the materials might react in different climates? Consider how humidity or extreme temperatures might affect your chosen materials. Opt for components that can withstand your local environment for best results.
Creative Variations To Try
Making your own phone case opens many creative paths. Simple designs are fun, but adding unique touches makes your case stand out. Trying different techniques lets you explore textures, colors, and styles. These creative ideas help you design a case that fits your personality and needs.
Using Resin And Inlays
Resin creates a smooth, glossy finish that protects your design. You can pour clear or tinted resin over your phone case base. Embed small items inside like dried flowers, glitter, or tiny charms. This method seals the items inside, making your case look like a work of art.
- Mix resin carefully following instructions for safety.
- Place inlays flat for a smooth surface.
- Use silicone molds for easy shaping.
3d Embellishments
Adding 3D decorations gives your case a unique feel. Use beads, rhinestones, or small plastic shapes. Glue them firmly onto the case surface. These elements add texture and can create patterns or images. Choose lightweight materials to keep your case easy to handle.
- Arrange embellishments before gluing to plan your design.
- Use strong adhesive made for plastic.
- Allow enough drying time to secure pieces well.
Mixing Materials
Combining different materials creates interesting contrasts. Try mixing fabric, leather, or paper with plastic or silicone cases. Attach pieces with glue or double-sided tape. Experiment with colors and patterns for a custom look. This technique also adds grip and comfort to your case.
- Cut materials to fit your case size.
- Seal edges to avoid peeling.
- Layer materials for a 3D effect.
Credit: www.tiktok.com
Frequently Asked Questions
How Do I Start Making My Own Phone Case?
Begin by selecting a durable base material like silicone or plastic. Next, choose your design method—painting, decoupage, or 3D printing. Gather necessary tools and customize your case with personal touches. This ensures a unique and protective phone case tailored to your style.
What Materials Are Best For Diy Phone Cases?
Silicone, TPU, and hard plastic are top choices for DIY cases. They offer durability, flexibility, and protection. Additionally, fabric and resin can be used for decorative purposes. Choose materials based on your design skills and desired phone protection level.
Can I Personalize My Phone Case Easily At Home?
Yes, personalizing at home is simple using paints, stickers, or decals. You can also use photo transfers or resin art for unique effects. Homemade personalization allows creativity and makes your phone case one-of-a-kind without professional tools.
How Long Does It Take To Make A Custom Phone Case?
Making a custom phone case typically takes 30 minutes to a few hours. Time depends on complexity, materials, and drying or curing times. Simple designs are quicker, while resin or 3D printing may require longer periods.
Conclusion
Creating your own phone case lets you show your style and protect your phone. It is fun and easy to do at home. You can choose colors, designs, and materials you like. This way, your phone case will be truly unique.
Enjoy the process and be creative. Making your own case saves money and helps the environment too. Try it today and see how simple it can be!