Have you ever wondered how to check resistance with a multimeter but felt unsure where to start? You’re not alone.
Knowing how to measure resistance accurately can save you time and money, whether you’re fixing a gadget or working on an electronics project. This simple skill puts you in control, helping you spot problems before they become headaches. Keep reading, and you’ll learn step-by-step how to use your multimeter to check resistance like a pro—even if you’ve never tried it before.
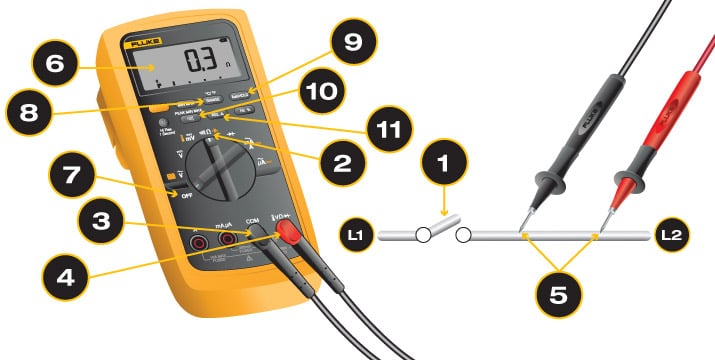
Credit: www.fluke.com
Choosing The Right Multimeter
Choosing the right multimeter is the first step to accurately measuring resistance and ensuring your projects run smoothly. Not all multimeters are built the same, and picking one that fits your needs can save you time and frustration. Let’s break down the key differences and must-have features that will help you make a smart choice.
Digital Vs Analog Multimeters
Digital multimeters (DMMs) show readings on an easy-to-read screen, making them more popular for resistance testing. They provide precise numbers quickly, which reduces the chance of misreading values.
Analog multimeters use a needle and dial, which some people prefer for watching changes in resistance in real time. However, they require a bit more skill to interpret and can be less accurate for small resistance values.
If you’re just starting out or want straightforward results, a digital multimeter is usually the better pick. Have you ever struggled to read a tiny needle on a dial? Digital displays eliminate that hassle.
Essential Features For Resistance Testing
When buying a multimeter for resistance, check if it has these features:
- Auto-ranging:This feature automatically selects the right resistance range, saving you from manual guesswork.
- Continuity testing:A beep or indicator that confirms if a circuit is complete, making troubleshooting faster.
- Low resistance measurement:Ability to measure very low resistance values accurately, which is crucial for many electronic components.
- Clear display:A bright, easy-to-read screen helps avoid mistakes, especially in low-light environments.
Think about the projects you’ll use your multimeter for. Do you need features that support testing sensitive electronics or just basic household repairs? Choosing the right tool for your specific needs will improve your confidence and efficiency.
Preparing Your Multimeter
Preparing your multimeter properly is key to getting an accurate resistance reading. The multimeter must be set to the correct mode and range before testing. This ensures the device measures resistance precisely and avoids any damage to the tool or the component.
Understanding how to set the resistance mode and select the right range makes the process smooth. Let’s break down these essential steps.
Setting The Resistance Mode
Turn the multimeter dial to the resistance setting. This mode is usually marked with the omega symbol (Ω), which stands for ohms, the unit of resistance.
Some multimeters combine modes, so make sure you pick the one specifically for resistance. This prepares the meter to measure how much current is blocked by the component.
Selecting The Correct Range
Many multimeters have manual and auto-ranging options. Manual range lets you choose the expected resistance level. Auto-ranging finds it automatically.
Choosing the right range avoids errors. For example, if you expect low resistance, pick a low range. For unknown values, start high and work down.
This step helps prevent the meter from displaying overload or inaccurate readings.
Safety Tips Before Testing
Before you start checking resistance with your multimeter, prioritizing safety is crucial. Testing electrical components without proper precautions can lead to inaccurate readings or even harm. Taking a moment to prepare properly will protect both you and your equipment.
Power Off The Circuit
Always ensure the circuit you’re measuring is completely powered off. Leaving the power on can damage your multimeter or cause electric shock. Unplug devices or switch off the main power source before connecting your probes.
Double-checking with a non-contact voltage tester can give you extra confidence that the circuit is de-energized. Have you ever rushed this step and faced unexpected sparks or blown fuses? It’s a small pause that prevents big problems.
Avoiding Common Hazards
Keep your work area clean and dry to avoid accidental slips or short circuits. Don’t touch metal parts of the probes during testing—it’s tempting, but that contact can cause shocks or false readings.
Use insulated gloves if you’re working with unknown or high-voltage circuits. Also, inspect your multimeter leads for any cracks or wear before use. Damaged cables can expose you to live wires without warning.
Would you rather take a few extra seconds to prepare or deal with a painful shock later? Your safety depends on the small habits you build before every measurement.
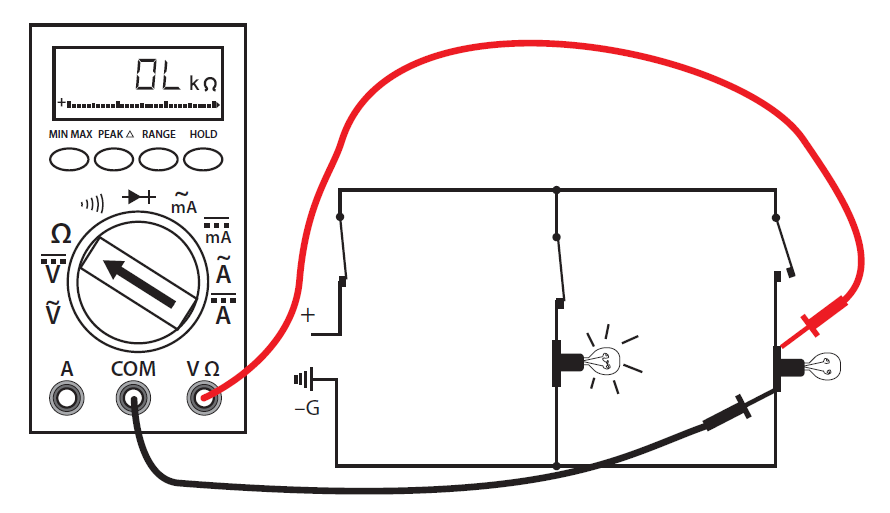
Credit: ecampusontario.pressbooks.pub
Measuring Resistance Step-by-step
Measuring resistance with a multimeter is simple and quick. Follow clear steps to get accurate readings. Each stage is important for correct results. This guide breaks down the process into easy parts.
Connecting The Probes
Start by turning off power to the circuit. Set the multimeter to the resistance mode, often marked as Ω. Plug the black probe into the common (COM) port. Insert the red probe into the port labeled with the omega symbol (Ω).
Touch the probe tips together first to check the meter. The display should show zero or close to it. Now, place the probes across the component or section you want to test. Ensure good contact for a steady reading.
Reading The Display
Look at the multimeter screen carefully. The number shown is the resistance value in ohms (Ω). Some meters use kilo-ohms (kΩ) or mega-ohms (MΩ) for large values. Note the unit to understand the reading correctly.
If the display shows “OL” or “1,” it means the resistance is too high or the circuit is open. Check the connection or component again. Adjust the range on your multimeter if needed for better accuracy.
Interpreting Results
Compare the reading with the component’s expected resistance. A close match means the part works well. A much higher or lower value suggests damage or a fault.
Low resistance usually means good conductivity. High resistance can signal a break or corrosion. Use this info to decide on repairs or replacements.
Troubleshooting Common Issues
Checking resistance with a multimeter can be straightforward, but sometimes things don’t go as planned. When your readings seem off, or the multimeter display goes haywire, it can be frustrating. Understanding how to troubleshoot these common issues can save you time and help you get accurate readings. Let’s dive into some frequent problems you might encounter and how to address them.
Inconsistent Readings
Have you ever experienced fluctuating resistance readings? This is often due to loose connections or dirty probes. Ensure your test leads are securely connected to the multimeter and the component you’re testing. Clean the probes with a bit of alcohol to remove any debris or oxidation. A stable connection can make all the difference.
Another culprit might be the range setting on your multimeter. Double-check that you’ve selected the correct range for the resistance you expect to measure. If in doubt, start with the highest range and work your way down.
Are you testing in a humid environment? Moisture can affect readings. Consider moving to a drier location or using a fan to reduce humidity around your workspace. You might be surprised at how environmental factors can skew your results.
Multimeter Display Errors
Sometimes, the multimeter itself can present display errors. A blank screen or jumbled numbers can signal a low battery. Replacing the battery can often resolve these issues. Keep spare batteries handy; they can be a lifesaver.
If the display is still acting up, try resetting the multimeter. Remove the battery, wait for a minute, and reinsert it. This simple reset can clear minor glitches. Always ensure your multimeter is calibrated regularly to avoid these problems.
Have you checked the condition of the display? Dust or smudges on the screen can obscure readings. A quick wipe with a microfiber cloth can restore clarity. If the display remains faulty, it might be time for a professional check-up or considering an upgrade.
What do you do when troubleshooting doesn’t solve the problem? Share your tips and tricks in the comments below. Your insights could help someone else facing the same issues.

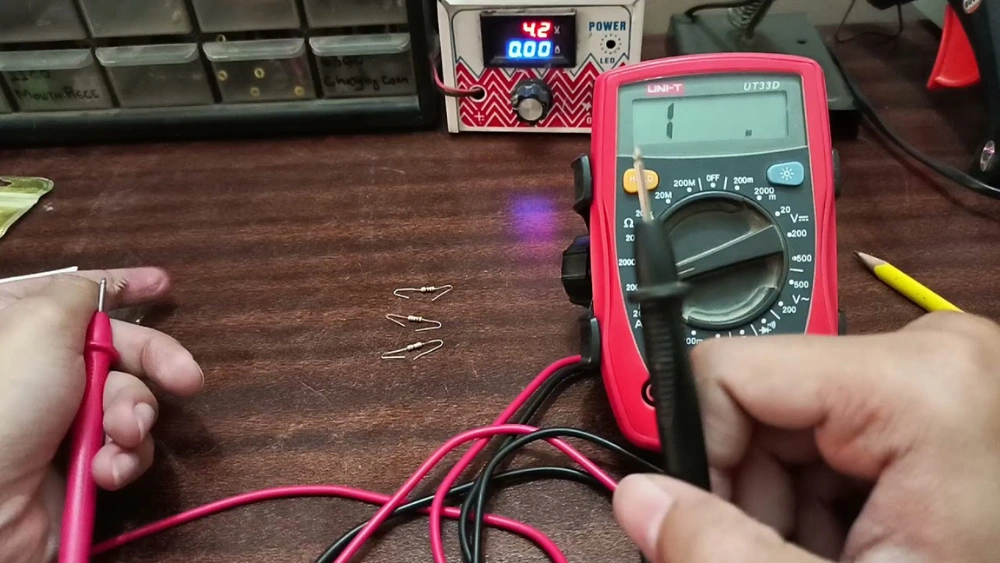
Credit: www.youtube.com
Maintaining Your Multimeter
Maintaining your multimeter ensures accurate readings and extends its lifespan. Proper care prevents damage and keeps the device reliable. Simple habits can protect your tool and improve your work quality.
Proper Storage
Store your multimeter in a dry, cool place away from direct sunlight. Avoid places with high humidity or extreme temperatures. Use a protective case to prevent dust and physical damage. Keep the test leads coiled neatly to avoid wire breakage. Remove batteries if you do not plan to use it for a long time. This prevents battery leakage and corrosion inside the device.
Regular Calibration
Calibration keeps your multimeter’s measurements accurate. Check calibration every six months or after heavy use. Use a known reference standard or send it to a professional service. Calibration detects errors caused by age or rough handling. Keep a record of calibration dates and results for future reference. Accurate calibration saves time and avoids wrong readings.
Frequently Asked Questions
How Do I Set A Multimeter To Measure Resistance?
To measure resistance, turn the multimeter dial to the Ω symbol. This setting enables the meter to read resistance values accurately.
Can I Check Resistance Without Removing The Component?
It’s best to remove the component to avoid false readings. Testing in-circuit can show incorrect resistance due to parallel paths.
What Units Does A Multimeter Show For Resistance?
Resistance is displayed in ohms (Ω). Higher resistance values may be shown in kilo-ohms (kΩ) or mega-ohms (MΩ).
How Do I Test If A Resistor Is Faulty?
Measure resistance across the resistor terminals. Compare the reading to the resistor’s rated value to check for faults.
Conclusion
Checking resistance with a multimeter is simple and useful. Just set the meter, connect the probes, and read the value. This skill helps find problems in wires and devices fast. Practice a few times to feel confident and avoid mistakes.
Remember to always handle the multimeter carefully for safe use. Now, you can measure resistance easily and fix many electrical issues yourself. Keep your tools ready and try these steps whenever needed.