Are you wondering if your grounding mat is working properly? Testing it with a multimeter is easier than you might think.
Knowing how to check your grounding mat ensures you stay safe and get the full benefits it offers. In this guide, you’ll learn simple, step-by-step instructions to test your grounding mat quickly and accurately. Keep reading to find out how to protect yourself and make sure your mat is doing its job right.
Tools Needed
To accurately test a grounding mat with a multimeter, having the right tools is crucial. Without proper equipment, your readings could be misleading or incomplete. Let’s look at what you need to get reliable results and why each tool matters.
Choosing The Right Multimeter
Not all multimeters are built equally for grounding mat testing. You want one that can measure resistance in the low ohm range because grounding mats typically have very low resistance values.
A digital multimeter with an auto-ranging feature makes it easier to get precise readings without switching settings manually. Look for a model with a resolution of at least 0.1 ohms to catch subtle differences.
Have you ever tried using a multimeter that only measures voltage for resistance tests? It’s frustrating and inaccurate, which is why selecting the right tool upfront saves time and effort.
Additional Equipment
Besides the multimeter, you’ll need some extra gear to ensure your test is thorough and safe. A pair of insulated test leads is essential—they help maintain safety and accuracy when connecting to the grounding mat.
- Alligator clips:These allow you to clip the leads securely to the mat without holding them, reducing the chance of movement that can skew readings.
- Grounding rod or reference ground:Sometimes, you’ll need a known good ground reference to compare against your mat’s resistance.
- Protective gloves:While testing is low risk, it’s better to be safe, especially if your grounding mat is connected to live systems.
Can you think of a moment when a simple accessory like an alligator clip made your work smoother? Small tools often have a big impact on accuracy and ease.

Credit: www.facebook.com
Preparing The Grounding Mat
Preparing the grounding mat is an essential step before testing it with a multimeter. A clean and properly set up mat ensures accurate results. Taking time to prepare the mat helps avoid errors and misreadings during the test.
Cleaning The Mat Surface
Start by wiping the mat surface with a dry cloth. Remove any dust, dirt, or debris that may affect the test. Use a mild cleaner if the mat has stains or sticky spots. Avoid harsh chemicals that can damage the mat’s material.
Ensure the mat is completely dry before proceeding. Moisture can cause false readings or short circuits in the test.
Ensuring Proper Setup
Place the mat on a flat, non-metallic surface to avoid interference. Check that the grounding wire is firmly attached to the mat’s connector. Confirm the wire is intact without breaks or damage.
Connect the grounding wire to a known earth ground point. This setup allows the multimeter to measure resistance accurately. Double-check all connections before starting the test.
Setting Up The Multimeter
Setting up your multimeter correctly is essential before testing your grounding mat. It ensures accurate readings and protects both you and your device. Skipping this step can lead to confusion or faulty results, so take a moment to prepare your multimeter properly.
Selecting The Correct Mode
Start by turning on your multimeter and selecting the right mode. For grounding mat tests, you typically need the resistance or continuity mode. Look for the symbol that resembles an ohm (Ω) or a sound wave for continuity.
Some multimeters have auto-ranging features, but if yours doesn’t, manually choose a range that can measure low resistance values, usually under 1 kilo-ohm. Picking the correct mode helps you get precise measurements and avoid damaging your multimeter.
Calibrating The Device
Calibration ensures your multimeter gives accurate readings. To calibrate, touch the two test leads together and check the display. It should read zero or close to zero ohms.
If the reading isn’t zero, adjust the calibration dial or knob until it does. This simple step can save you from misinterpreting your grounding mat’s condition. Have you ever assumed a device was faulty, only to find out it wasn’t calibrated? Avoid that frustration by taking this quick action.
Credit: www.tiktok.com
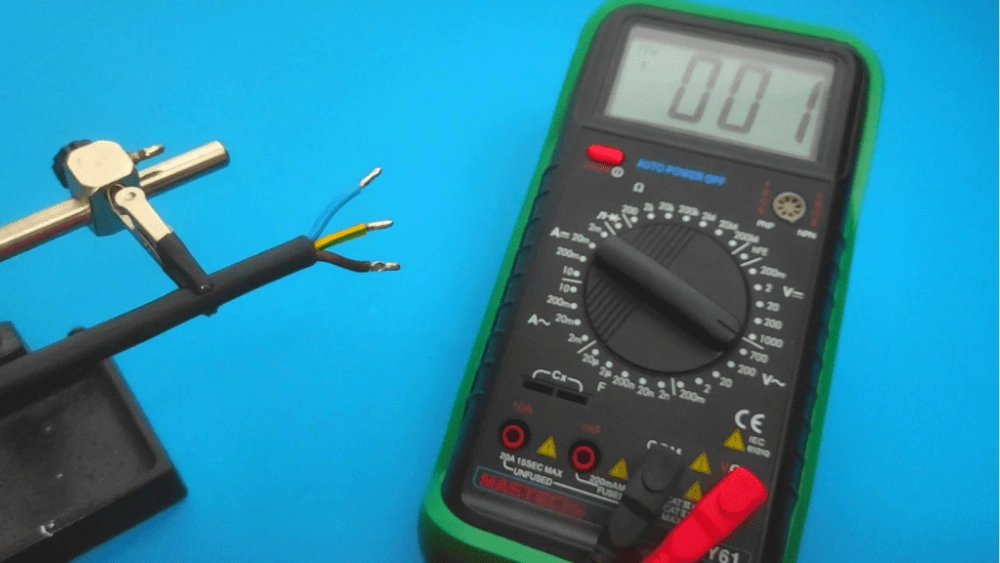
Measuring Resistance
Measuring resistance is a crucial step to ensure your grounding mat functions correctly. It helps verify that the mat effectively conducts electricity to the ground, offering proper protection. If resistance is too high, the mat won’t perform as intended, so accurate measurement is essential.
Connecting The Probes
Start by turning your multimeter to the resistance or ohms (Ω) setting. Connect the black probe to the COM port and the red probe to the VΩmA port on the multimeter. Place the probes on the grounding mat’s connectors or the conductive surface points.
Make sure the probes have a steady contact without slipping. If your grounding mat has a plug, touch the probes to the metal parts inside the plug for the best reading. Holding the probes firmly ensures the reading is stable and reliable.
Interpreting Resistance Values
Look at the reading on your multimeter screen. A good grounding mat usually shows a resistance value under 100 ohms. If the reading is higher, it could mean poor conductivity or damage to the mat.
Keep in mind that environmental factors like humidity and temperature can slightly affect resistance. If you see an unusually high value, test multiple points and compare readings. This helps pinpoint if the problem is with a specific area or the entire mat.
Have you ever thought about how small changes in resistance impact your grounding experience? Testing regularly can save you from unnoticed issues and keep your setup safe and effective.
Checking Continuity
Checking continuity is a crucial step when testing your grounding mat with a multimeter. This process helps ensure that your grounding mat is effectively connected, allowing the flow of electrons between the mat and the earth. By verifying continuity, you can confirm that your grounding mat is functioning properly, providing the grounding benefits you seek.
Testing For Circuit Completeness
To begin testing for circuit completeness, set your multimeter to the continuity mode. This mode typically has a symbol resembling a sound wave or a diode. Ensure the multimeter’s probes are securely connected—red to the ‘VΩ’ port and black to the ‘COM’ port.
Place one probe on the mat’s surface and the other on the grounding cord. If your multimeter emits a beep or shows a reading near zero, your circuit is complete. This confirms that the mat is properly grounded and ready for use.
Troubleshooting Common Issues
What if there’s no beep or the reading isn’t close to zero? Common issues could include a faulty grounding cord or poor connection between the mat and the cord. Check the cord for any visible damage or wear.
If the cord appears intact, try reconnecting it to ensure a secure fit. Sometimes, simply adjusting the connection can resolve continuity issues. If problems persist, consider replacing the cord or consulting a professional for further evaluation.

Credit: www.facebook.com
Verifying Ground Connection
Verifying the ground connection is a crucial step when testing your grounding mat with a multimeter. Without a proper ground, your mat cannot protect you from electrical hazards or provide the intended benefits. This section guides you through ensuring your ground wire and earth connection are solid and reliable.
Testing Ground Wire
First, set your multimeter to the continuity or resistance mode. Touch one probe to the grounding mat’s wire and the other to the exposed copper or grounding rod end. A low resistance reading, typically below 1 ohm, indicates a good connection. If you get no continuity or a high resistance, your ground wire might be damaged or disconnected.
Think about the last time you assumed wiring was fine without checking—did it lead to unexpected issues? Testing the wire yourself saves you time and frustration later.
Confirming Proper Earth Ground
Next, ensure the ground wire is properly connected to an earth ground. Use your multimeter set to AC voltage mode and place one probe on the grounding rod or earth connection point. Place the other probe on a known neutral or ground point inside your home’s electrical panel.
You should see a very low voltage difference, ideally close to 0 volts. If the reading is higher, it might mean a poor earth ground or interference. This simple check confirms your grounding mat is truly connected to the earth, which is essential for its function.
Safety Tips
Testing a grounding mat with a multimeter involves working close to electrical components, so prioritizing safety is essential. Ignoring safety precautions can lead to serious injuries or equipment damage. Here are key safety tips to keep you secure while performing your tests.
Avoiding Electrical Hazards
Always make sure your multimeter is set to the correct measurement mode before connecting it to the grounding mat. Testing on the wrong setting can cause electric shock or damage the meter.
Check that the grounding mat and surrounding area are dry. Moisture increases the risk of electrical shock and can give false readings.
Before testing, unplug any devices connected to the mat. This prevents unexpected current flow that could harm you or affect the accuracy of your test.
Proper Handling Of Equipment
Inspect your multimeter and leads for cracks or exposed wires. Damaged equipment can malfunction and pose an electric shock risk.
Hold the multimeter probes by their insulated handles only. Touching the metal tips during testing can expose you to live currents.
Keep your workspace organized to avoid accidental contact with electrical parts. Clutter can cause you to trip or inadvertently touch something hazardous.
Maintaining Your Grounding Mat
Testing a grounding mat with a multimeter ensures it works correctly. Measure resistance between the mat and ground; low resistance means good connection. Regular checks keep your grounding mat safe and effective.
Maintaining your grounding mat is crucial for its effectiveness. Regular care ensures its longevity and functionality. By following a few simple guidelines, you can keep your mat in top condition. Testing your grounding mat with a multimeter is one way to maintain it. Knowing how to do this will help you ensure that your mat is working properly.
Regular Testing Schedule
Testing the grounding mat regularly is essential. Set a monthly schedule for testing. Use a multimeter to check the electrical resistance. This confirms the mat is properly grounded. Regular checks prevent potential issues. Testing ensures the mat’s effectiveness. Keep a log of test results. This helps track changes over time.
Storage Recommendations
Proper storage extends the life of your grounding mat. Always store it in a cool, dry place. Avoid direct sunlight and moisture. Roll it up gently to prevent creases. Use a protective cover when not in use. This keeps dust and dirt away. Clean the mat before storing. This prevents buildup of unwanted particles.
Frequently Asked Questions
How Do I Test A Grounding Mat With A Multimeter?
Set your multimeter to the resistance mode (ohms). Place one probe on the grounding mat and the other on a known ground point. A low resistance reading (close to zero) indicates proper grounding of the mat.
What Multimeter Setting Is Best For Grounding Mat Testing?
Use the resistance (ohms) setting on your multimeter. This helps measure the electrical continuity between the mat and ground. Low resistance means good grounding, while high resistance suggests poor or no grounding.
Why Is Grounding Mat Resistance Important To Check?
Grounding mat resistance ensures electrical safety and effective discharge of static electricity. High resistance can cause shocks or equipment damage. Regular testing guarantees the mat works correctly and protects users and devices.
Can A Faulty Grounding Mat Affect Electronic Devices?
Yes, a faulty grounding mat can cause static buildup. This static can damage sensitive electronics and cause malfunctions. Testing the mat with a multimeter helps prevent these issues by ensuring proper grounding.
Conclusion
Testing a grounding mat with a multimeter helps ensure safety. It checks if the mat is properly grounded and working well. Follow the steps carefully to get accurate results. Using a multimeter is simple and quick. Regular testing can prevent electrical problems and protect your devices.
Keep your grounding mat in good condition for best performance. Stay safe by checking your grounding mat often. This small task makes a big difference in electrical safety.