
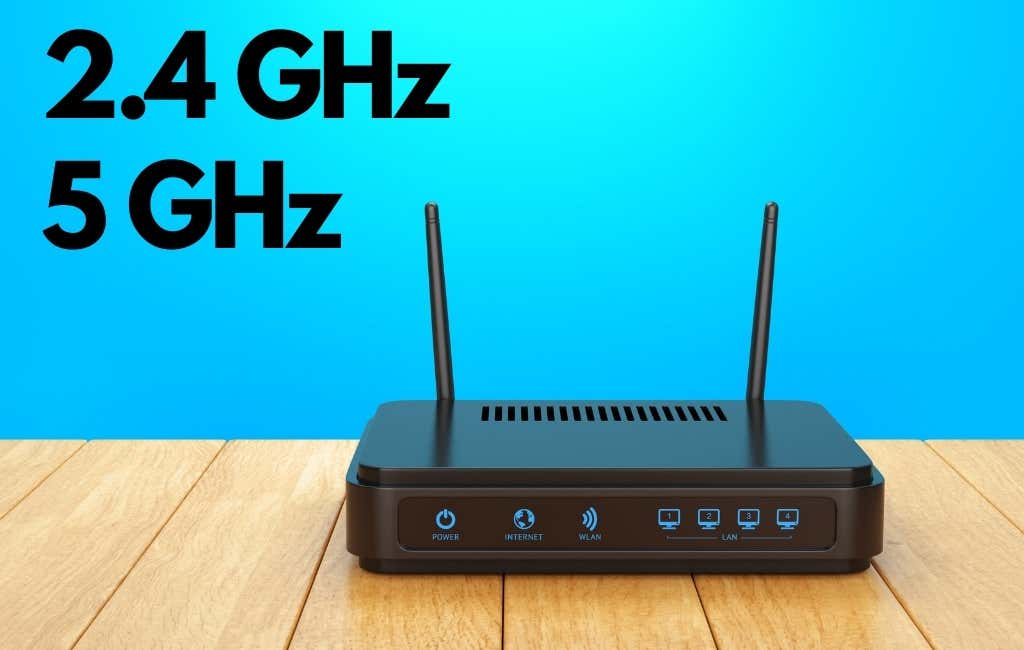
Are you struggling to connect your devices to the 2.4 GHz Wi-Fi on your router? You’re not alone.
Many people find it confusing to switch between 5 GHz and 2. 4 GHz bands, but getting your router to use the 2. 4 GHz band can improve your Wi-Fi range and compatibility. In this guide, you’ll learn simple, step-by-step methods to make your router broadcast on 2.
4 GHz. By the end, you’ll have a stronger, more reliable Wi-Fi connection that works perfectly for all your devices. Keep reading to unlock the full potential of your home network!
Check Router Compatibility
Before you adjust your router to operate on the 2.4 GHz Wi-Fi band, it’s crucial to confirm that your device supports this frequency. Not every router can broadcast on both 2.4 GHz and 5 GHz bands, so checking compatibility saves you time and frustration.
Understanding your router’s capabilities helps you make informed decisions about settings and potential upgrades. Have you ever tried changing settings only to realize your router doesn’t support them? Avoid that by verifying compatibility first.
Identify Dual-band Support
Look at your router’s model number and check the manufacturer’s website or the manual to see if it supports dual-band operation. Dual-band routers can broadcast both 2.4 GHz and 5 GHz signals, giving you more flexibility.
If your router only supports one band, it’s likely 2.4 GHz because this frequency has been around longer. However, if your device is dual-band, you’ll want to confirm it can switch between bands or run them simultaneously.
- Check the router label or box for terms like “Dual-Band” or “2.4 GHz / 5 GHz.”
- Search online using the exact model number followed by “specifications.”
- Review the user manual for frequency details.
Locate 2.4 Ghz Settings
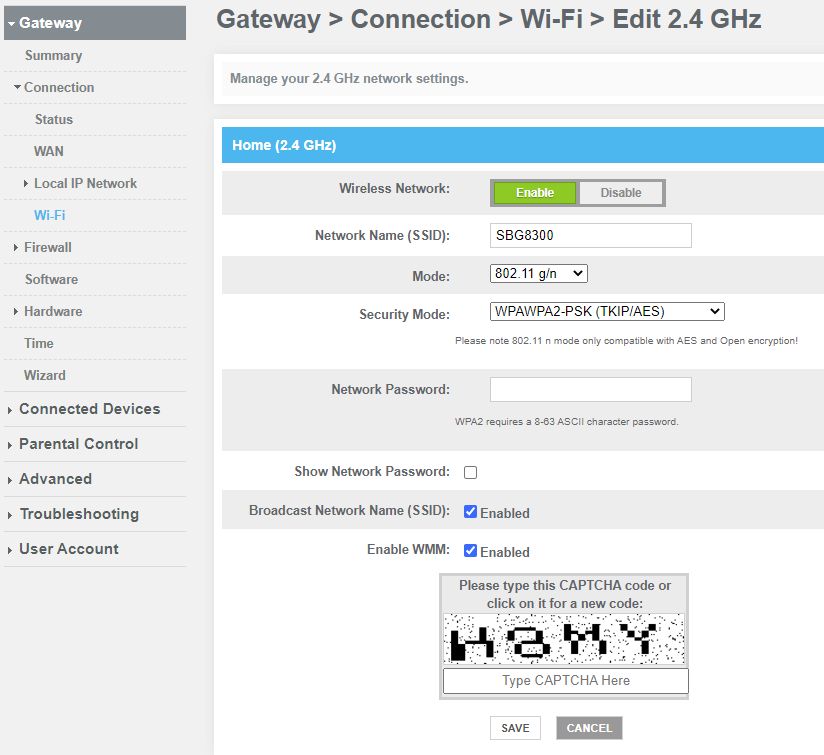
Once you know your router supports 2.4 GHz, log into the router’s admin panel. This is usually done by typing the router’s IP address into a web browser, commonly 192.168.1.1 or 192.168.0.1.
Inside the admin panel, navigate to the wireless settings section. Look specifically for options labeled “Wireless Network,” “Wi-Fi Settings,” or “Frequency Band.”
- Find a setting that lets you enable or disable the 2.4 GHz band.
- Check if you can rename the 2.4 GHz network to distinguish it from 5 GHz.
- Adjust the channel if interference is an issue in your area.
Have you found the 2.4 GHz section in your router’s settings before? If not, this is your chance to explore and take control of your Wi-Fi experience.
Credit: helpdeskgeek.com
Access Router Settings
Accessing your router settings is the key to switching your Wi-Fi frequency to 2.4 GHz. This process lets you control your network’s behavior and improve device compatibility. If you’ve ever struggled with spotty connections or devices that won’t connect, tweaking these settings can often fix the problem.
Connect To Router Interface
To start, you need to connect to your router’s interface. This is usually done through a web browser on a device connected to your network.
- Open any browser like Chrome, Firefox, or Safari.
- Type your router’s IP address into the address bar. Common ones are 192.168.0.1or 192.168.1.1.
- Press Enter, and you should see the router’s login page.
If the IP address doesn’t work, check the label on your router or look it up in your device’s network settings. This step is crucial because without access, you can’t change the frequency settings.
Login Credentials Needed
Once on the login page, you’ll need your username and password. These credentials protect your network settings from unauthorized changes.
Default login info is often found on a sticker on your router or in the manual. Common defaults are adminfor both username and password. However, if you or your ISP changed them, use the updated credentials.
Can’t remember your login details? Resetting the router to factory settings will restore defaults, but it also wipes all custom settings. Before you reset, try checking saved passwords in your browser or contacting your ISP for help.
Enable 2.4 Ghz Band
Enabling the 2.4 GHz band on your router helps connect devices that use this frequency. This band offers better range and works well through walls. It is ideal for older devices and simple internet tasks.
Accessing the right settings is essential. Each router’s menu may look different, but the process is similar. Follow the steps below to turn on the 2.4 GHz frequency.
Navigate To Wireless Settings
Open your web browser and enter your router’s IP address. Common addresses are 192.168.0.1 or 192.168.1.1. Log in with your username and password. These details are usually on the router label or manual.
Once logged in, find the “Wireless” or “Wi-Fi” section. This area controls your network bands and channels. Look for a tab or menu named “Wireless Settings” or “Advanced Wireless.”
Turn On 2.4 Ghz Frequency
Inside Wireless Settings, locate the 2.4 GHz band option. It may be listed alongside the 5 GHz band. Check the box or toggle switch to enable the 2.4 GHz band.
Set the network name (SSID) and password for the 2.4 GHz band. Save your changes. Your router will now broadcast on the 2.4 GHz frequency.
Set Network Name And Password
Setting a clear network name and a strong password is key for your 2.4 GHz Wi-Fi. These two elements help you find your network easily and keep it safe from unwanted access. Choosing the right name and password ensures your connection is secure and easy to identify among many networks.
Choose Ssid For 2.4 Ghz
SSID stands for Service Set Identifier. It is your Wi-Fi network’s name. Pick a simple name that tells you which network is which. Avoid using personal information like your full name or address. Use letters and numbers to make it unique. For example, “HomeWiFi_24G” is clear and shows the band type.
Create Strong Password
A strong password protects your Wi-Fi from hackers. Use a mix of letters, numbers, and symbols. Make it at least 8 characters long. Avoid common words like “password” or “12345678.” Change your password regularly to keep your network safe. Write it down somewhere safe to avoid forgetting it.
Adjust Channel And Bandwidth
Adjusting your router’s channel and bandwidth helps improve 2. 4 GHz Wi-Fi performance. Choose a less crowded channel and set bandwidth to 20 MHz for better connection stability. This reduces interference and boosts signal strength in busy areas.
Adjusting the channel and bandwidth settings on your router can enhance your 2.4 GHz Wi-Fi performance. These settings influence signal quality and network speed. With the right adjustments, you can reduce interference and improve connectivity. Understanding these elements ensures your Wi-Fi runs smoothly and efficiently.Select Best Channel
Finding the best channel is crucial for reducing interference. Routers often default to auto-select channels. This might not be optimal. Many devices and networks can crowd certain channels. Use a Wi-Fi analyzer tool to check nearby networks. Identify which channels are less congested. Once identified, set your router to a less crowded channel. This choice can lead to better performance.Optimize Bandwidth Settings
Adjusting bandwidth settings affects your Wi-Fi speed. You can choose between 20 MHz and 40 MHz bandwidths. 20 MHz is ideal for congested areas. It minimizes interference but offers slower speeds. 40 MHz can provide faster speeds. It might face more interference, though. Depending on your needs, select the appropriate bandwidth setting. This ensures optimal balance between speed and reliability.
Credit: www.youtube.com
Save And Restart Router
After adjusting your router settings to switch to the 2.4 GHz Wi-Fi band, saving those changes is crucial. If you skip this step, your efforts won’t take effect, and your router will continue operating on the previous configuration. Saving ensures the router records your new preferences, while restarting makes sure these settings become active.
Apply Changes
Look for a “Save” or “Apply” button on your router’s settings page. This button confirms the adjustments you just made.
Clicking it might take a few seconds, so be patient. Some routers show a confirmation message once the settings are saved.
Failing to apply changes means the router won’t switch to 2.4 GHz, and you’ll keep facing the same connection issues.
Reboot For Effect
After saving, a reboot is often necessary. Restarting your router refreshes its system and fully activates the new Wi-Fi band setting.
You can do this by clicking a “Restart” button in the admin panel or simply unplugging the router, waiting 10 seconds, and plugging it back in.
Ever noticed how your Wi-Fi speeds improve after a restart? That’s because the router clears temporary glitches and reloads your saved settings.
Test 2.4 Ghz Connection
Testing your 2.4 GHz Wi-Fi connection ensures your devices use the correct frequency. This step verifies the signal quality and confirms proper router settings. It helps spot issues that affect speed and coverage.
Connect Devices
Start by connecting your phone or laptop to the 2.4 GHz network. The network name may include “2.4G” or “2.4GHz” in the SSID. If unsure, check your router’s Wi-Fi list for available networks. Connect only to the 2.4 GHz band, not the 5 GHz one.
Try using different devices to confirm the 2.4 GHz connection works well. This ensures compatibility across gadgets. Watch for any connection drops or slow speeds during use.
Check Signal Strength
After connecting, check the Wi-Fi signal strength. Strong signals mean better performance and fewer drops. Move your device around the room to test coverage in different areas.
Use built-in tools on your device or free apps to measure signal quality. Look for a signal level above -70 dBm for stable connections. Weak signals may need router repositioning or removing obstacles.
Troubleshoot Common Issues
Facing issues with your router’s 2.4 GHz Wi-Fi can be frustrating, especially when it disrupts your daily routine. Whether it’s a sluggish connection or a device that refuses to connect, there’s often a simple fix hiding in plain sight. Let’s explore some common troubleshooting steps to help you get back online smoothly.
Reset Router
A quick reset can often resolve connectivity issues and restore your network to its optimal state. Start by unplugging your router from the power source. Wait for about 30 seconds—this gives it a chance to clear its cache.
Plug it back in and allow a few moments for it to reboot. You might be surprised at how many times a simple reset fixes mysterious problems. If you’re still facing issues, consider performing a factory reset, which will revert all settings to their defaults.
Update Firmware
Routers, like any tech device, need regular updates to function correctly. Outdated firmware can lead to connectivity issues and security vulnerabilities. Check your router’s admin settings for available updates.
Most manufacturers provide clear instructions on their websites for downloading and installing the latest firmware. Have you updated recently? It’s worth double-checking. An update might just be the missing piece in your connectivity puzzle.
Reduce Interference
Your 2.4 GHz Wi-Fi signal might be competing with other devices for bandwidth. Microwaves, cordless phones, and even Bluetooth devices can disrupt your network. Consider relocating your router to minimize interference.
Placing it in an open area, away from walls and other electronics, can significantly improve signal strength. You might also adjust the channel settings in your router’s admin panel to find a less congested frequency.
Have you ever tried these solutions before? It’s amazing how small tweaks can lead to big improvements in connectivity. Dive into these methods and watch your Wi-Fi transform from frustrating to fantastic!
Credit: community.surfboard.com
Frequently Asked Questions
How Do I Switch My Router To 2.4 Ghz Wi-fi?
Access your router’s settings via its IP address in a browser. Find the wireless settings section. Select the 2. 4 GHz band and save changes. Restart your router if needed for the settings to apply.
Why Choose 2.4 Ghz Over 5 Ghz Wi-fi?
2. 4 GHz offers better range and wall penetration. It works well in larger spaces or through obstacles. It supports older devices that don’t use 5 GHz. However, it can be slower and more prone to interference.
Can I Use Both 2.4 Ghz And 5 Ghz Simultaneously?
Yes, many modern routers support dual-band operation. You can enable both bands at once for different devices. This improves network flexibility and reduces congestion. Just configure each band separately in your router’s settings.
How To Find My Router’s 2.4 Ghz Wi-fi Network Name?
Check your router’s wireless settings page via its IP address. The 2. 4 GHz network usually has “2. 4G” or similar in its SSID. You can rename it for easy identification. Ensure it’s enabled and broadcasting.
Conclusion
Getting your router to use 2. 4 GHz Wi-Fi is simple and useful. This frequency helps reach devices farther from the router. It also works well with many older gadgets. Just follow the steps to change settings in your router’s menu.
Check your device’s connection after switching bands. A strong 2. 4 GHz signal can improve your internet experience. Keep your router updated for the best results. Now, enjoy better Wi-Fi coverage in your home or office.