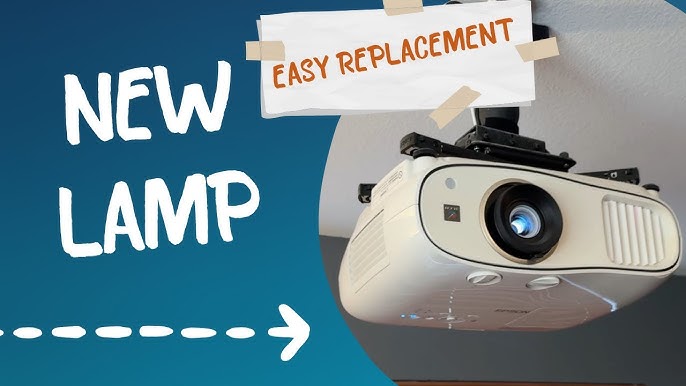
Is your projector’s image looking dim or flickering? That’s a clear sign your projector lamp needs changing.
But don’t worry—replacing the lamp yourself is easier than you think. In this guide, you’ll learn simple, step-by-step instructions to swap out your projector lamp safely and quickly. By the end, you’ll have your projector shining bright again, ready for your next movie night or important presentation.
Keep reading, and you’ll master this essential skill in no time!

Credit: www.amazon.com
Signs Lamp Needs Replacement
Knowing when to replace your projector lamp can save you from unexpected disruptions during important presentations or movie nights. Lamps don’t just fail suddenly; they often give subtle hints that their time is running out. Paying attention to these signs can help you plan a timely replacement and keep your projector working smoothly.
Dimming Light Output
Have you noticed your projector’s image getting dimmer even after adjusting the settings? A lamp’s brightness naturally fades over time, causing the picture to lose its sharpness and vibrancy.
This dimming effect can make it hard to see details, especially in well-lit rooms. If you find yourself constantly increasing the brightness or moving closer to the screen, it’s a clear signal the lamp is weakening.
Warning Messages
Your projector might display warning messages before the lamp completely fails. These alerts can appear on-screen or through indicator lights on the device.
Common warnings include “Lamp Replacement Needed” or blinking lights in specific colors. Don’t ignore these notifications—they’re designed to help you avoid sudden blackouts.
Flickering Or Color Issues
Does your projected image flicker or show unusual colors? Flickering light or strange color shifts often point to a lamp nearing the end of its life.
These issues can distract you and reduce viewing quality. If adjusting the projector’s settings doesn’t fix the problem, it’s time to consider a new lamp.
Tools And Materials Required
Changing a projector lamp needs the right tools and materials. Having these ready makes the process smooth and safe. This section covers what you need before starting.
Replacement Lamp Selection
Choosing the correct lamp is key. Use the projector’s model number to find the right lamp. Check the lamp’s wattage and type to match the original. Buy from a trusted seller to avoid low-quality parts. Genuine lamps last longer and work better.
Screwdrivers And Cleaning Supplies
A small Phillips or flat-head screwdriver fits most projector screws. Keep a clean cloth or microfiber towel for wiping dust. Use canned air or a soft brush to clean inside the projector gently. Avoid touching the new lamp with bare hands. Gloves or a cloth help keep oils off the lamp surface.
Preparing The Projector
Preparing your projector before changing the lamp is crucial for safety and to ensure the replacement goes smoothly. Skipping these steps can cause damage to the device or even harm you. Taking a few moments to get your projector ready will make the process faster and safer.
Power Off And Unplug
Start by turning off your projector using the remote or power button. Don’t just switch it off; make sure the power indicator lights go out completely. Then, unplug the power cord from the wall socket to eliminate any risk of electric shock.
I once tried changing a lamp without unplugging the device, and it gave me a minor shock. That experience taught me never to skip this simple but important safety step.
Allow Cooling Time
Projector lamps get extremely hot during use. You need to wait at least 30 minutes for the lamp to cool down before touching it. Handling a hot lamp can cause burns or even damage the lamp housing.
Use this waiting time to gather your tools and read the manual. Have you ever rushed and tried swapping the lamp immediately? Waiting can save you from costly mistakes and injuries.
Removing The Old Lamp
Removing the old lamp is the first essential task when changing a projector lamp. It requires care and attention to avoid damage. The process starts by finding the lamp cover. Then, the lamp module is unscrewed and carefully taken out. Follow these steps to remove the old lamp safely and prepare for the new one.
Locate Lamp Cover
Turn off the projector and unplug it from power. Let it cool down for at least 30 minutes. The lamp cover is usually on the side or bottom of the projector. Look for a panel with screws or clips holding it in place. Check the user manual if unsure where the lamp cover is located.
Unscrew And Extract Lamp Module
Use a screwdriver to remove all screws securing the lamp cover. Keep the screws safe for later use. Gently lift off the cover to expose the lamp module. Unscrew the screws holding the lamp module firmly. Hold the lamp module by the handle or edges. Pull it out slowly and carefully to avoid breaking the lamp.
Installing The New Lamp
Installing a new projector lamp can seem daunting, but with the right approach, it becomes a simple and rewarding task. A successful installation not only ensures that your projector shines brightly but also prolongs its life. The key is to handle each step with care and precision. Let’s delve into the process, starting with the careful handling of the new lamp.
Handle Lamp With Care
Projector lamps are fragile, so it’s crucial to handle them with care. Always hold the lamp by its housing and avoid touching the glass bulb with your fingers. Oils from your skin can cause damage when the lamp heats up. Imagine dropping a delicate glass piece; the same caution applies here.
Use a soft cloth or gloves to further protect the lamp during handling. Is your workspace safe and clutter-free? Ensuring this can prevent accidental drops or knocks.
Secure Lamp In Place
Once you’re ready to install the lamp, gently slide it into the projector’s lamp compartment. You’ll often hear a reassuring click when it’s properly seated. If it seems loose, double-check the alignment and connections.
Consider the importance of stability. A securely placed lamp not only functions better but also prevents potential damage to the projector. How confident are you in the placement? Make sure it’s firmly in place.
Replace Lamp Cover
With the lamp securely in place, it’s time to replace the lamp cover. The cover protects the lamp and helps manage airflow within the projector. Make sure it’s fastened tightly, as a loose cover can cause overheating.
Have you ever misplaced a cover or left it ajar? Doing so can lead to operational issues. Double-check the fit to ensure your projector runs smoothly. Your attention to detail here makes all the difference!
Credit: www.tiktok.com
Resetting The Lamp Timer
Resetting the lamp timer is a crucial step after you replace your projector’s lamp. It ensures your projector accurately tracks the new lamp’s usage, preventing premature warnings or shutdowns. Without resetting, your device might think the old lamp is still in use, leading to confusion and potential performance issues.
Accessing Reset Menu
To reset the lamp timer, you first need to access your projector’s reset menu. This option is usually found in the projector’s main menu under “Settings” or “Maintenance.”
Use your remote or the buttons on the projector to navigate. Look for a submenu labeled “Lamp,” “Lamp Settings,” or “Lamp Timer.”
If you can’t find it, check your projector’s manual or search online using your model number. Some projectors require you to press and hold specific buttons during startup to enter a hidden reset menu.
Follow Reset Procedure
Once you’re in the lamp timer menu, select the option to reset or clear the lamp hours. The projector might ask you to confirm this choice—make sure you select “Yes” or “OK.”
After resetting, the lamp timer should display zero hours or indicate that the lamp is new. This step helps your projector provide accurate warnings and optimizes lamp performance.
Have you noticed your projector still giving lamp warnings after replacement? A quick timer reset often solves this issue and saves you from unnecessary troubleshooting.
Testing The New Lamp
Testing the new projector lamp is essential to confirm it works correctly. This step helps avoid problems during presentations or movie nights. Proper testing ensures the lamp performs well and lasts long. Follow these simple checks after installing the new lamp.
Power On Projector
Plug in the projector and switch it on. Listen for unusual sounds or flickering lights. The lamp should light up smoothly without delays. Watch the startup screen to ensure it appears clearly. If the projector does not power on, recheck the lamp installation.
Check Brightness And Color
Look at the image on the screen carefully. The brightness should be strong and even across the display. Colors must appear natural, not washed out or too dark. Adjust the projector settings if needed to improve color balance. A good lamp will provide a sharp and vibrant picture.
Tips For Lamp Longevity
Changing a projector lamp carefully helps it last longer. Always let the lamp cool before handling it. Use gentle movements to avoid damage during replacement.
Changing a projector lamp might seem straightforward, but extending its life requires careful attention. Proper maintenance can save money and prevent frequent replacements. Follow these tips to ensure your projector lamp lasts longer and performs efficiently.
Proper Usage Habits
Develop habits that protect your lamp. Always allow the projector to cool down before turning it off. Sudden shutdowns can damage the bulb. Avoid switching the projector on and off frequently. This stresses the lamp and shortens its lifespan. Use eco-mode settings if available. They reduce brightness but increase lamp longevity. Ensure proper ventilation around the projector. Overheating can degrade the lamp’s quality quickly.
Regular Cleaning
Dust and dirt can harm your projector lamp. Clean the projector regularly to prevent buildup. Use a soft cloth to wipe surfaces gently. Avoid harsh chemicals that might damage components. Check air filters often. Replace or clean them to ensure proper airflow. Blocked filters lead to overheating and shorten lamp life. Inspect the lamp for signs of dust accumulation. A clean lamp performs better and lasts longer. Regular cleaning keeps your projector in top condition. It ensures a longer lifespan for your lamp.

Credit: www.youtube.com
Frequently Asked Questions
How Do I Know When To Change My Projector Lamp?
You should replace the lamp when the image dims or flickers. Most projectors display a lamp timer warning. Check the lamp life in the user manual for specific hours recommended.
What Tools Are Needed To Change A Projector Lamp?
Usually, only a screwdriver is needed to open the lamp cover. Some models may require additional tools. Always unplug the projector before starting the replacement.
How To Safely Handle A New Projector Lamp?
Handle the lamp by its housing, avoiding touching the bulb glass. Oils from your skin can damage the lamp and reduce its lifespan. Use gloves if possible.
Can I Use Any Replacement Lamp For My Projector?
No, use only lamps compatible with your projector model. Using incorrect lamps may cause damage or poor performance. Check the manufacturer’s specifications before purchase.
Conclusion
Changing a projector lamp is simple with the right steps. Start by turning off the projector and unplugging it. Let the lamp cool before removing it. Carefully take out the old lamp and put in the new one. Make sure it fits well and secure it properly.
Turn on the projector and check if the lamp works. Regular lamp changes keep your projector bright and clear. Following these tips helps you save time and avoid mistakes. Enjoy your clear and bright projector images again!