Have you ever faced a faulty wire and wondered how to quickly find the problem? Knowing how to test wires with a multimeter can save you time, money, and frustration.
Whether you’re fixing something at home or working on a project, this simple skill puts the power in your hands. You’ll learn easy, step-by-step methods to check your wires safely and accurately. Keep reading, and you’ll be confident to tackle wiring issues like a pro.
Tools Needed
Testing wires with a multimeter requires more than just the device itself. Having the right tools at hand makes the process smoother and more accurate. Before you start, make sure you have everything you need to avoid interruptions and mistakes.
Choosing The Right Multimeter
Not all multimeters are created equal. You want one that fits your specific needs, whether you’re testing simple household wiring or more complex automotive circuits.
- Digital Multimeter (DMM):Offers clear readings and is easy to use, especially for beginners.
- Analog Multimeter:Provides a visual gauge, which some professionals prefer for detecting fluctuations.
- Auto-Ranging Feature:Saves you from manually setting the range, making testing faster and less prone to error.
- Durability and Safety Ratings:Look for multimeters with proper insulation and safety certifications to protect yourself during testing.
Think about the types of wires and circuits you’ll be working on. Would a basic model suffice, or do you need advanced features like temperature measurement or Bluetooth connectivity?
Additional Accessories
Besides the multimeter, certain accessories can improve your testing experience.
- Test Leads:High-quality, flexible leads with sharp probes help you reach tight spots and ensure good contact.
- Alligator Clips:Useful if you need hands-free testing or are measuring continuously over time.
- Wire Strippers and Cutters:Essential for preparing wires, especially if you need to test internal connections.
- Insulating Tape:Keep this handy to safely cover exposed wires after testing.
Have you ever struggled to hold test probes steady while measuring? Accessories like alligator clips can prevent that frustration and make your work safer.

Credit: www.youtube.com
Preparing The Multimeter
Preparing the multimeter correctly is essential for accurate wire testing. This process ensures the device gives reliable readings and protects you from electrical hazards. Proper preparation helps avoid mistakes that could damage the multimeter or the circuit.
Setting The Correct Mode
Turn on the multimeter and choose the right mode for your test. For wire testing, use the continuity mode or resistance (ohms) mode. Continuity mode checks if the wire is complete and unbroken. Resistance mode measures how much the wire resists electrical flow.
Look for symbols like a sound wave or a diode on the dial. These represent continuity and resistance tests. If the multimeter has an auto mode, it might select the correct setting automatically. Double-check to avoid wrong readings.
Calibrating The Device
Calibrate the multimeter before testing to ensure accuracy. Some models need manual calibration, while others adjust automatically. To calibrate manually, touch the two test probes together. The display should show zero or a very low number.
If the reading is off, adjust the calibration knob or settings. Calibration removes small errors caused by the probes or device. Always calibrate in the same environment where you will test the wires, as temperature can affect readings.
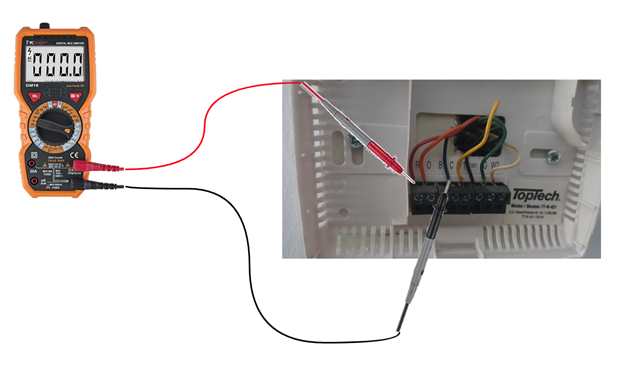
Testing Wire Continuity
Testing wire continuity is a fundamental skill that helps you identify whether a wire is capable of conducting electricity without breaks. This test is crucial for troubleshooting electrical circuits and ensuring your wiring is safe and functional. By checking continuity, you can quickly spot damaged or disconnected wires before they cause bigger problems.
Connecting The Probes
Start by setting your multimeter to the continuity mode, usually marked with a sound wave symbol or diode icon. Touch the multimeter probes together first to hear a beep, confirming the device is ready. Then, place one probe on each end of the wire you want to test.
Make sure you have a solid connection with the wire’s metal parts. If the wire has insulation, you might need to strip a small section to access the conductor. Hold the probes steadily to avoid false readings caused by poor contact.
Interpreting Continuity Results
If the wire is continuous, your multimeter will beep or show a low resistance value close to zero. This means electricity can flow freely through the wire. No beep or a very high resistance reading indicates a break or fault in the wire.
Sometimes, you might see a fluctuating reading or no beep even if the wire looks fine. This could mean internal damage or corrosion that isn’t visible. Have you ever trusted a wire only to find out it was faulty? Continuity testing helps you avoid those frustrating surprises.
Measuring Wire Resistance
Measuring wire resistance helps check wire quality and continuity. It shows if the wire is damaged or has poor connections. A multimeter measures resistance in ohms (Ω). Low resistance means good conductivity. High resistance may signal a problem. Proper use ensures accurate readings and safe testing.
Proper Probe Placement
Place the multimeter probes firmly on the wire ends. Clean the wire surface for better contact. Avoid touching the metal probes with your fingers. Hold the probes steadily to avoid fluctuating readings. Use the correct multimeter setting for resistance measurement (Ω).
Test the wire by touching one probe to each end. Keep the wire isolated from other circuits. This prevents false readings. Ensure the wire is not connected to power while testing.
Understanding Resistance Values
Resistance shows how much the wire opposes electric flow. Copper wires usually have very low resistance. Long or thin wires have higher resistance than short or thick ones.
| Resistance Range (Ω) | Meaning |
|---|---|
| 0 – 1 | Wire is good and conducting well |
| 1 – 10 | Possible slight damage or thin wire |
| Above 10 | Wire may be broken or damaged |
Infinite or very high resistance means the wire is open or broken. Always compare readings with known good wires. This helps judge if your wire is in good condition.
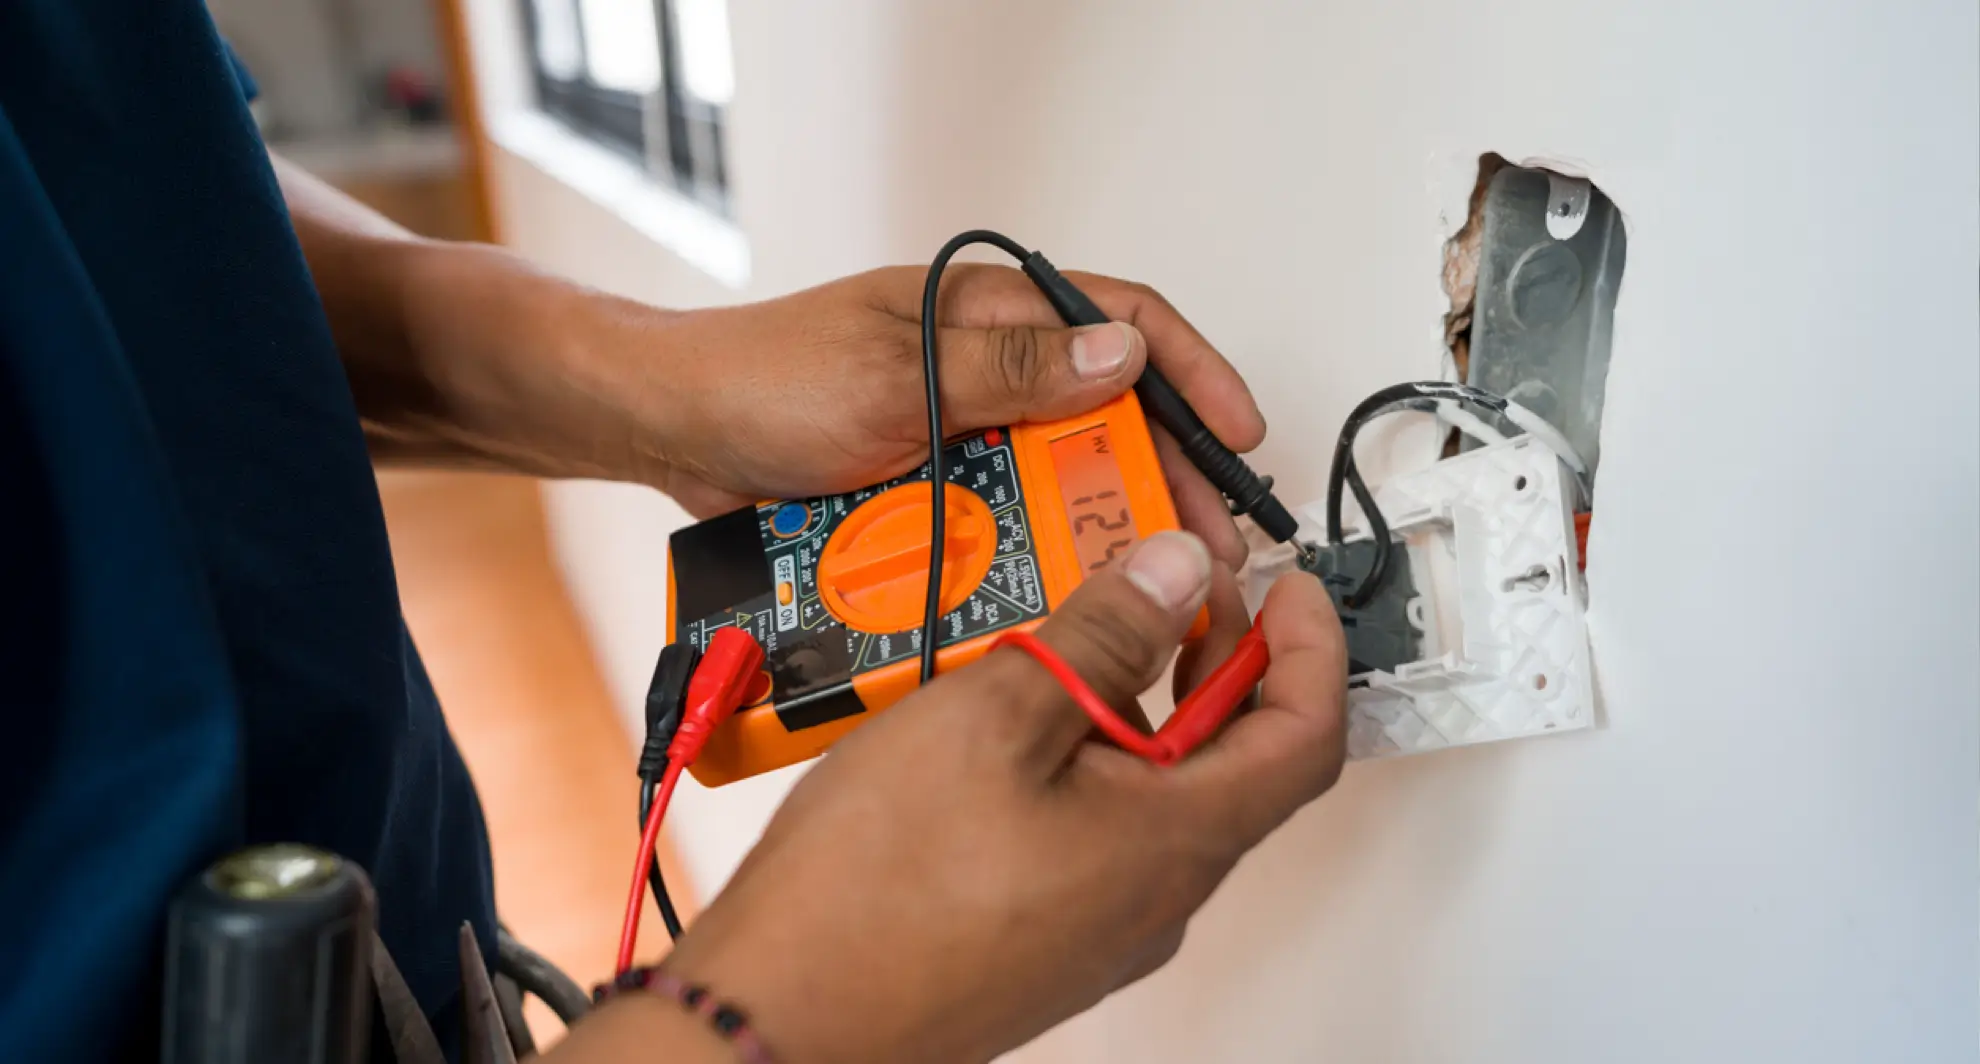
Checking For Voltage
Testing wires for voltage is crucial for safety and accuracy. A multimeter can help you measure voltage and ensure electrical components function correctly. Before starting, ensure your multimeter is set to the correct voltage range. Proper techniques are essential to avoid damage and get accurate readings.
Safe Voltage Testing Techniques
Ensure the multimeter is in voltage mode. Check it is set to either AC or DC, depending on your circuit. Use insulated probes to avoid electric shock. Always test in a dry environment to prevent accidents. Stand on a rubber mat if possible. This minimizes the risk of electric shock.
Place one probe on the wire’s exposed metal. Then, touch the other probe to the ground or another wire. Confirm the connection is secure. A loose connection can result in incorrect readings. Double-check the multimeter settings before proceeding.
Reading Voltage Measurements
Observe the multimeter’s display for the voltage reading. A stable reading indicates a consistent voltage. Fluctuating readings may suggest a faulty wire or connection. Compare the reading to expected values. This ensures the wire is functioning properly.
If the voltage is too high or low, investigate further. This can prevent potential damage to your equipment. Note the reading for future reference. This helps track changes over time.
Credit: mrelectric.com
Common Issues And Fixes
Testing wires with a multimeter often reveals common problems. Knowing these issues helps fix wiring quickly and safely. Some problems come from the wires themselves, while others arise from the multimeter or testing method.
Identifying Faulty Wires
Faulty wires can cause devices to stop working or create safety risks. Look for these signs:
- Visible cuts or breaks in the wire insulation
- Burn marks or melted sections on the wire
- Loose or corroded wire connections
- Unusual resistance readings on the multimeter
- No continuity when testing the wire
Use the multimeter’s continuity function to check if current flows through the wire. A beep sound means the wire is good. No beep suggests a break or fault inside the wire. Measure resistance to find high resistance spots indicating damage or corrosion.
Troubleshooting Multimeter Errors
Multimeter errors can lead to wrong readings. Check these common causes:
- Dead or weak batteries inside the multimeter
- Incorrect multimeter settings for the test
- Loose or damaged multimeter probes
- Dirty or oxidized probe tips
- Improper connection to the wire
Replace batteries regularly to ensure accurate tests. Set the multimeter to the right mode, such as voltage, resistance, or continuity. Firmly press probes against the wire. Clean probe tips with a fine abrasive if readings seem off. Double-check connections before testing again.
Safety Tips
Safety should always be your top priority when testing wires with a multimeter. Electrical components can be unpredictable, and even small mistakes might lead to shocks or equipment damage. Understanding how to handle these components properly and using the right protective gear makes your work safer and more efficient.
Handling Electrical Components
Always ensure the power is turned off before touching any wires or circuits. This simple step prevents accidental shocks and keeps you safe. If you must test live circuits, double-check your multimeter settings and probe placement to avoid short circuits or sparks.
Keep your hands dry and avoid working in damp environments. Moisture increases the risk of electrical shock, so find a dry, well-lit workspace. Also, never touch the metal parts of the probes directly while testing; hold them by their insulated handles.
Protective Gear Recommendations
Wearing the right protective gear protects you from unexpected hazards. Use insulated gloves designed for electrical work to reduce the risk of shocks. Safety glasses are equally important to protect your eyes from sparks or debris.
Consider wearing non-conductive shoes and standing on an insulated mat, especially if you are working in an area with a concrete or metal floor. These precautions create a barrier between you and the ground, minimizing shock risks.
Have you ever tested a wire without gloves and felt a small shock? That moment highlights why protective gear isn’t just recommended; it’s necessary. Your safety gear isn’t just about comfort—it’s about making sure you finish the job without injury.

Credit: www.youtube.com
Frequently Asked Questions
How Do I Test Wire Continuity With A Multimeter?
Set the multimeter to continuity mode. Touch probes to each wire end. A beep or low resistance shows continuity.
Can A Multimeter Detect Wire Shorts Easily?
Yes, set the multimeter to resistance mode. Low or zero resistance indicates a short circuit in the wire.
What Multimeter Setting Is Best For Wire Testing?
Use the continuity or resistance setting. Continuity mode quickly checks if wires are connected without breaks.
How To Test If A Wire Is Live With Multimeter?
Set multimeter to AC or DC voltage. Place probes on wire ends; voltage reading means the wire is live.
Conclusion
Testing wires with a multimeter is simple and helpful. You can check if wires are good or broken fast. Just follow the steps carefully and stay safe. Using a multimeter saves time and avoids mistakes in wiring. Keep practicing to feel more confident each time.
This skill helps in fixing many electrical problems at home. Remember, a working wire means your devices work well too. Try testing wires today and see the difference it makes.